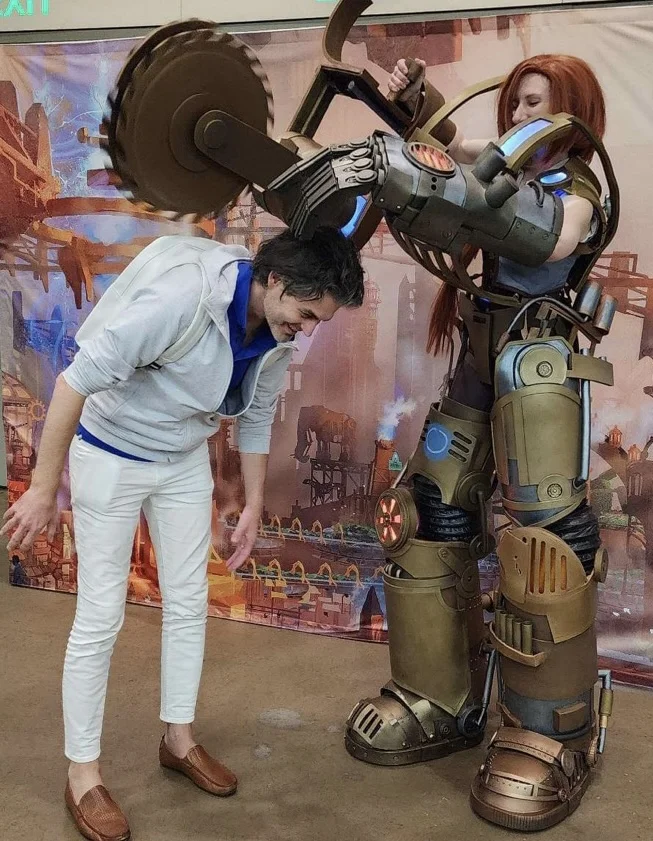
Rachel Stoddard (aka Max Ferocity) is a legendary cosplayer, known for winning the coveted Taylor promo three times for her cosplay as Dash, Inventor Extraordinaire, Nitro Mechanoid, and Data Doll MKII. Renowned for her ability to take things to the next level and achieving the impossible, Rachel is a true Mechanologist with a burning passion to bring the world of Metrix to life.
What is a Mechanologist without her favorite toys? In Dynasty the Flesh and Blood community was treated to a new feat of engineering courtesy of our favorite redheaded Inventor Extraordinaire. The Nitro Mechanoid burst onto the scene, stoking the imagination with larger-than-life stature. The first time I saw this card there was no doubt in my mind that I would find a way to bring this creation to life. Constructing these mechanized costumes is no easy task, but it's truly the special effects that make them leap off the card. Today I'll be taking you into the workshop to explore how these electronic components - batteries, wires, bulbs and more - all fit together.
Enter the Workshop
As you tackle your next (or first) cosplay I encourage you to think of the extra details that might take your creation from ordinary to extraordinary. Like any good Mechanologist don't be afraid to experiment, research, and tinker! I assure you, I don't have any professional background in engineering or technology, just a passion for 'doing the impossible'. If I can create these effects so, can you. It just takes a little blessing of ingenuity to get started!
Start by assessing your build and your goals. What additional effects might be appropriate for the theme? Costume inspiration does not have to come from Metrix to incorporate fun technology. Perhaps you wish to bless your herald with an ethereal glow? Maybe bring the twinkling of fireflies to an earthen deity? Or even stoke the fires of Volcor! With imagination (and a few LEDs) all of these possibilities are in your reach. Lay out a project plan and note down your inspirations. Don't limit yourself, you might not have the perfect solution in mind initially but if you research and experiment as you go, I guarantee you'll be amazed at how the ideas flow throughout your project.
The first step to learning any new skill is research and practice. Two excellent resources that I've found helpful in my journey to picking up more advanced lighting and electrical components in my cosplay have been YouTube and adafruit.com. When I decided to create the Nitro Mechanoid, one of the first effects that I committed to was animated lighting effects. My previous costume had used static lighting effects, mainly from off the shelf sources (i.e. fairy lights, string lights, and puck lights). Although I had started my journey in wiring small individual LEDs and simple steam generators in my Dash costume, I had not crossed the threshold into utilizing programmable lighting, motors, or remote-controlled generators. I didn't let my lack of knowledge stop me. I started by searching for similar costumes and effects.
I found excellent videos from seasoned cosplayers on YouTube to be exceedingly helpful in breaking down the basics of these effects. In addition, a friend directed me to check out adafruit.com. While this is a site that sells materials for creating your own tech, they also have fantastic free tutorials on how to get started with programming your own wearables, which translates very well to costuming. Once you've gained a familiarity with the basic concepts of what you're trying to accomplish, begin drafting a supply list and pulling together your very own Mechanologist workshop.
Load Your Arsenal
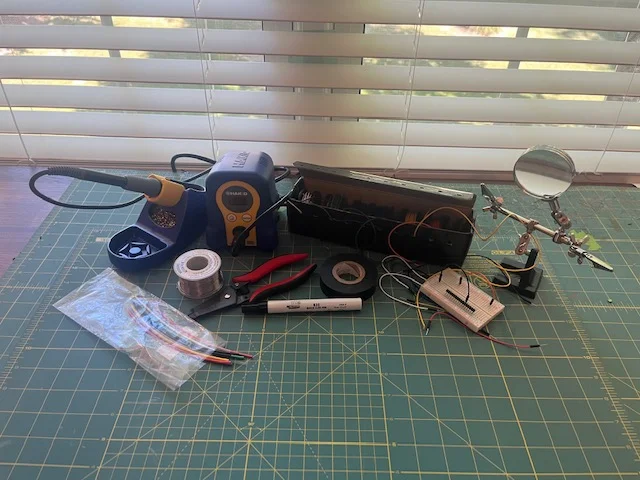
Before getting started with electrical components in your cosplay there are some basic supplies you'll want to have on hand and become familiar with. At a minimum, I recommend purchasing a basic soldering iron and stand, wire strippers, soldering wire, flux, shrink tubing of various sizes, electrical tape, stranded wire in at least 3 colors (I like 22-24 gauge), and 'helping hands'.
I don't recommend spending a lot of money on high-end versions of these items initially. I started with a very basic $25 soldering iron. While I've since upgraded to a full soldering station given how much I love tinkering with electrical components, I still find myself pulling out my old iron for quick jobs. A breadboard and jumper wires can also come in handy for testing out your build before committing it to a permanent solder. Trust me, you don't want to figure out you've assembled something wrong after you've put away your soldering iron!
Safety First
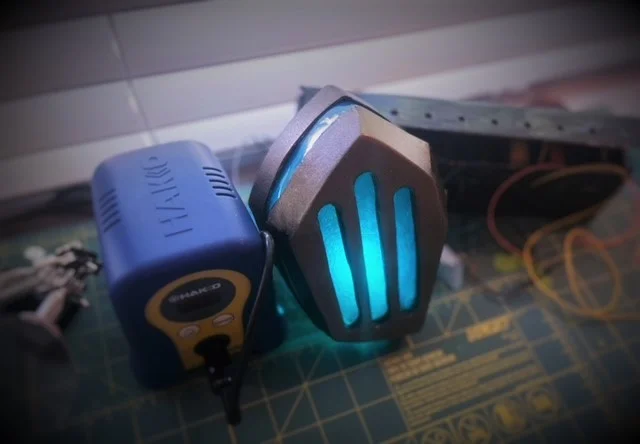
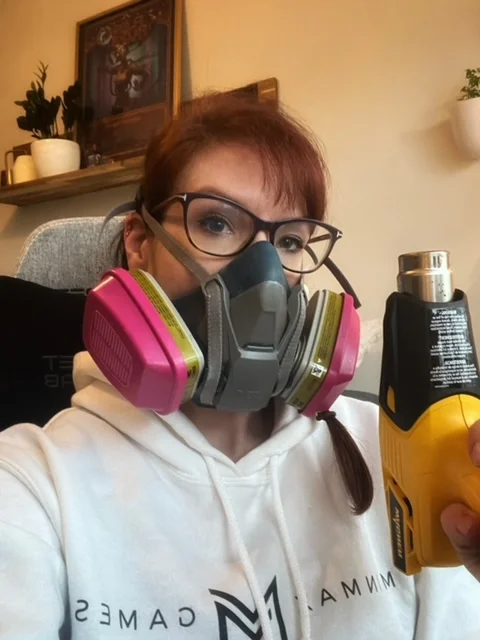
Before we get started with our examples, I want to impart upon you the importance of keeping an organized and safe workspace. While we are dealing with low voltage, there are still several risks in working with electricity in cosplay. Firstly, I recommend good ventilation and/or a respirator when soldering, especially if you are working with leaded soldering wire and flux.
Secondly, be cautious of hair, loose clothing, and bare skin. You will be working with an extremely hot iron and it will likely be very close to your fingers and body. Trust me, the only souvenirs you want of your cosplay are pictures, not scars. If you are using a standalone iron, make sure you have a stand to rest it between steps (and a sponge to clean the tip) so that you don't stoke the flames in your own home.
Finally, as you are wiring your various 'rigs', ensure that you are aware of the polarity of your wires. Do NOT cross your wires. Positive to positive and negative to negative. Anything else and you're going to have a bad time. I recommend committing to the same color of wire for each throughout your build to avoid any mix-ups as well as sealing any connections with shrink tubing or electrical tape to ensure no inadvertent connections are made. There are many simple instructional videos on YouTube to familiarize yourself with basic soldering and power concepts if you aren't already comfortable with the process.
Turning on the Lights
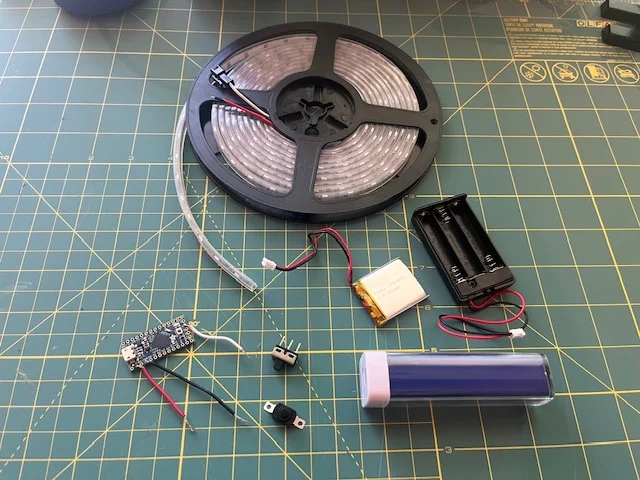
Unlike static LED lighting, animated LEDs, often found in strip form, require a data connection and basic programming to function. While a basic LED circuit might include two wires connected to a small battery, an animated light strip will typically have three. That is because the additional wire is transmitting data between the microcontroller and the lighting strip which instructs the LEDs on the function to be performed. The microcontroller is a small chip which can be loaded with programming instructions to communicate to the LED strip. The microcontroller must also be powered, in this instance by small rechargeable lithium batteries.
When selecting supplies for your lighting project you'll have to pick up a few items to get started. You'll need a lighting source (this might be a strip lighting, a ring, or a small panel of pixels), a microcontroller (the itty bitty 'computer' that will speak to your lights), and a power source. In the following examples I will be using NeoPixel RGB light strips (Also known as a WS2812 type strip), an Adafruit Arduino based microcontroller, and a 5V power source to match the electrical draw of my strip and microcontroller.
I personally favor rechargeable Lithium-Ion batteries, whether that be a micro battery with a JST connector or a 5V power bank with a USB micro connector. It's much more convenient and environmentally friendly to have a few of these along for the ride on your trip than disposable alkaline batteries where feasible. Just make sure the type of battery you select matches the voltage requirements of your lighting and the plug corresponds to the one on your microcontroller! Most controllers come with a micro-usb plug out and will require additional work to add a JST connector.
Effects Extraordinaire
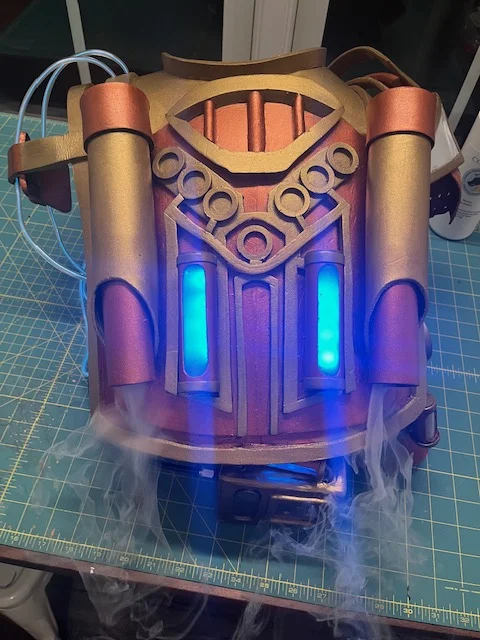
For the lighting on Nitro Mechanoid I wanted to have two main visual effects, a cool toned lighting 'plasma flow' in the cage and saw, and a flickering 'flame boiler' effect within the hand and legs to recreate the original dynamic art. I also wanted my legs and arm to have corresponding steam emanating from the pipes on the body and for the saw to spin accordingly. To accomplish this, I used 2 primary codes for my lighting with slight variations between each piece across 5 independent microcontrollers and batteries. I kept my steam generators on a separate setup so that I could install a remote control in the puppeteered hand to activate them. My saw is controlled by a simple momentary switch and does not utilize a microcontroller. Let's start by taking a look at the lighting setup using the boiler pattern as an example.
Within the legs and hand, I used a fairly simple circuit, connecting a few parallel strips to each microcontroller, sharing a single data pin per setup. The 'pin' is the data output for the strip. The positive and negative leads are connected to the 5V output and ground pins respectively. For the right leg I made the strips align in a circular pattern to create the illusion of a fan and cooling system (note the design of the knee mimicking a butterfly style vent). In the left leg I arranged the strips parallel to each other with varying heights to allow the 'flame' pattern to climb and emulate a roaring steam engine. In the hand I used a NeoPixel ring to create a more pronounced fan pattern behind the vent slats. All of these chips and lighting setups run on the same basic code with minor alterations made for speed and direction of the animations to correspond to the physical setup.
Cracking the Code
I mentioned before that I don't have a background in engineering or technology, so how do I code my animations? When you select a microcontroller, I highly recommend going with one that works with the Arduino IDE. This is an intuitive software development environment that helps you develop and upload your code. In addition, because of its popularity there are many example codes available across multiple sources. Of course, there are other options such as Circuit Python based code; however, Arduino code was used in the Nitro Mechanoid and we will focus on it here.
Because I don't have a background in coding, I began my journey by selecting pre-made code from adafruit.com as well as other codebases such as GitHub that were similar to my vision. By connecting with cosplay communities and message boards I was able to find code that others had developed and shared to get me started and from there I was able to reverse engineer my understanding of it and alter the portions needed to achieve the effects I desired. Don't be afraid to leverage the shared work of others in the community. As I've said before, we stand on the shoulders of giants and nobody truly succeeds alone. Over time you will, as I have, begin to develop your own understanding and venture out in experimenting with your setups and coding.
Another aspect to consider in your lighting is diffusion and presentation. There's nothing stopping you from displaying the bare lights along the costume but in most instances, you will likely wish to diffuse your lighting source to achieve a specific effect. In the case of my 'boiler' effect I used multiple methods to spread the light and enhance the flickering effect. One option is to create an indirect light source by turning the lights away from the viewing angle. While this will reduce brightness to an extent it also creates a more diffuse look to the scene and creates interesting shadows.
If you want to amplify your lighting you can use something as simple as tinfoil around your lighting channel to bounce your light. Just be cautious if using any metal to ensure that it does not touch your lighting or wiring contacts as it is a conductor! Another option is to use 'LED Foam' or Plastazote 45 which is a loose cell white foam that allows a significant amount of soft light to pass through. Finally, you can use other transparent or semi-transparent barriers such as plastic. For this costume I designed and 3D printed several transparent orange 'lenses' which I combined with the previously mentioned methods to achieve a more realistic flame effect.
Full Steam Ahead!
For the power sources I primarily used 5V power banks, essentially the same device you might use to charge your phone on the go. I selected these as my power source due to their high capacity. Most power banks have a capacity of 5,000 mAh to 10,000 mAh which can easily run my lighting rigs for an entire day without breaking a sweat. In fact, I used my lights the entire last night of Pro Tour: Baltimore to illuminate my room when the hotel's power went out. Talk about a spark of genius! If you wish to use a smaller battery you will want to look for those that come with a JST connector. If you are using these you will need to add a corresponding connection to your microcontroller by either adding a 'LiPo backpack' on top of the chip or soldering a JST connector to the reverse side power pads.
While I've covered steam generators in my previous Cosplay Corner (see Inventing the Extraordinary), I decided to bump up the challenge with future costumes by disconnecting my steam machines from their typical manual switch operation to a remote sensor. This enabled me to have generators in the legs and arms all controlled by the push of a button on my glove without worrying about tangled or pulled wires. I accomplished this by adding a remote microcontroller to the power lead of the machines. These can be found in tandem with remote controls that are very similar to those you might use for your car. Because I bought my supplies from the same source, I am able to have all of them on the same frequency. Cosplayer Frankly Built has a fantastic YouTube video on how to add remote controls to steam machines that I used to learn the basics.
Finally, one of my favorite effects on the Nitro Mechanoid was also one of its simplest from a technology perspective. The moving saw is actually a fairly easy circuit to assemble. I used a 'TT Motor' which is a DC motor often found in small toy cars. Although it isn't very powerful it has enough torque to move the 18 inch saw 'blades' I crafted from EVA foam and cardboard. This motor spins at a top end of approximately 200 RPMs which can either be controlled via a microcontroller or by application of voltage. I elected not to incorporate a microcontroller this time as I wanted a consistent on demand spin. I connected the motor power leads directly to a small battery pack that delivered 4.5V from three AA batteries. The leads were 'interrupted' by a momentary switch which would close the circuit whenever I pressed and held the button on the saw handle and spin for as long as I held it down. This generated an impressive spin on the saw while also giving me full control over the amount of power I was drawing and retaining the aspect of safety to be able to quickly release the button and stop the spin where needed.
The Future is Bright
In closing, you will never know what you are truly capable of until you try something new. Don't be afraid to channel our friend Dash and embrace your adventurous spirit. Your experience and age do not matter when it comes to testing your limits. I would have never thought when I started my cosplay journey a year ago that I would be standing where I am and I am grateful for every second of that journey and every mistake (aka learning opportunity) along the way. I'll leave you with a small teaser below from one of my upcoming cosplays. Whatever you are passionate about, do it with maximum ferocity!