Rachel Stoddard recently competed in the cosplay contest at the World Championship in San Jose, taking home a prize for her Dash, Inventor Extraordinaire cosplay. As we look to a brand new year of games, events, and cosplay, she joins us as a guest writer to discuss how she approached creating Dash, and how you can invent the extraordinary with your next project!
The first time I saw her was on a booster pack on our kitchen table. My husband had brought home a new game; what else was new? But; for the first time, that image drew me in. Who was this wild, adventurous heroine? That was my introduction to Dash and the world of Rathe. Besides quickly taking to her playstyle at our weekly armories, I devoured the lore and admired her outgoing nature, creativity, and optimism.
I have long loved Halloween, conventions, renaissance fairs, and really any opportunity to dress up. When the first cosplay contests were announced I knew I wanted to take the opportunity to bring Dash to life. Although I had previously thrown together some budget closet costumes using thrifted clothing, I knew attempting an outfit like Dash’s would require a whole new level of effort and skill. To say I was intimidated would be an understatement. How could I create an entire set of armor, weaponry, and effects? Where would I even start? What would an Inventor Extraordinaire do?
Research and Laying Out a Blueprint
Before I even bought my first supplies, I took the time to gather and study as many reference pictures as I could find of Dash and her Teklo Plasma Pistol. I used these resources along with the Procreate program to begin laying out sketches of her suit and gadgets. By working in layers, I was able to give myself a piece-by-piece vision of what I needed to accomplish on this journey and how it should fit together to enable me to still comfortably play throughout the day for the costume’s first outing at US Nationals in Charlotte. Once I had a vision of how the parts needed to interact and connect to enable realistic and comfortable movement, I needed to decide on whether I would be incorporating lighting to determine type, wiring, and battery location. I initially decided to start small, by lighting the back of her jetpack, the core on her chest, and the pauldron on her shoulder (but I didn’t stop there!).
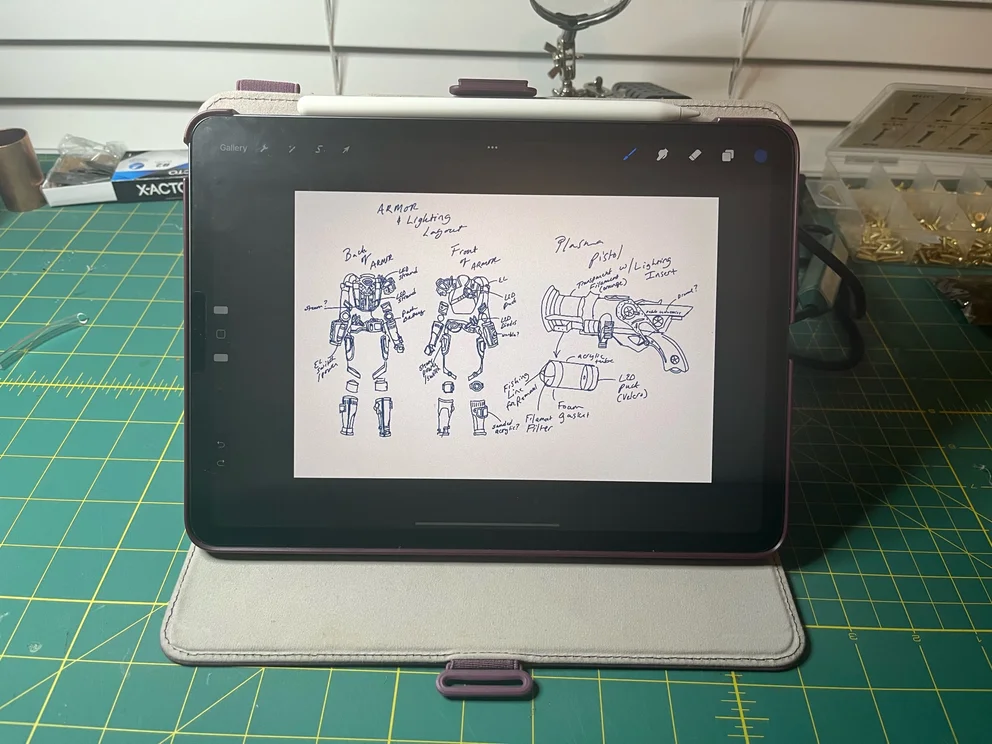
I found it handy to download and layer reference photos of the costume in Procreate, which enabled me to sketch and trace the costume to create layers detailing what I needed for each piece and keep notes along the way
Assess Your Skills and Hit the Books
Going into this project I knew how to sew and sketch, but that was really the extent of my costuming skillset. I dove headfirst into researching various methods for armor and prop-making. I found YouTube videos from various cosplayers to be a fantastic resource for learning about EVA foam armor, painting, lighting, and ‘special effects’. If I found myself stuck on how to execute a particular element of the build, I would try to relate the shape or style of that piece to something familiar, such as another character or costuming style that is similar to find guidance that could translate to what I was trying to create. Don’t be ashamed to leverage tutorials or alter patterns available on the internet to start your build. We stand on the shoulders of giants and using the learnings of those that came before does not invalidate your efforts or accomplishments!
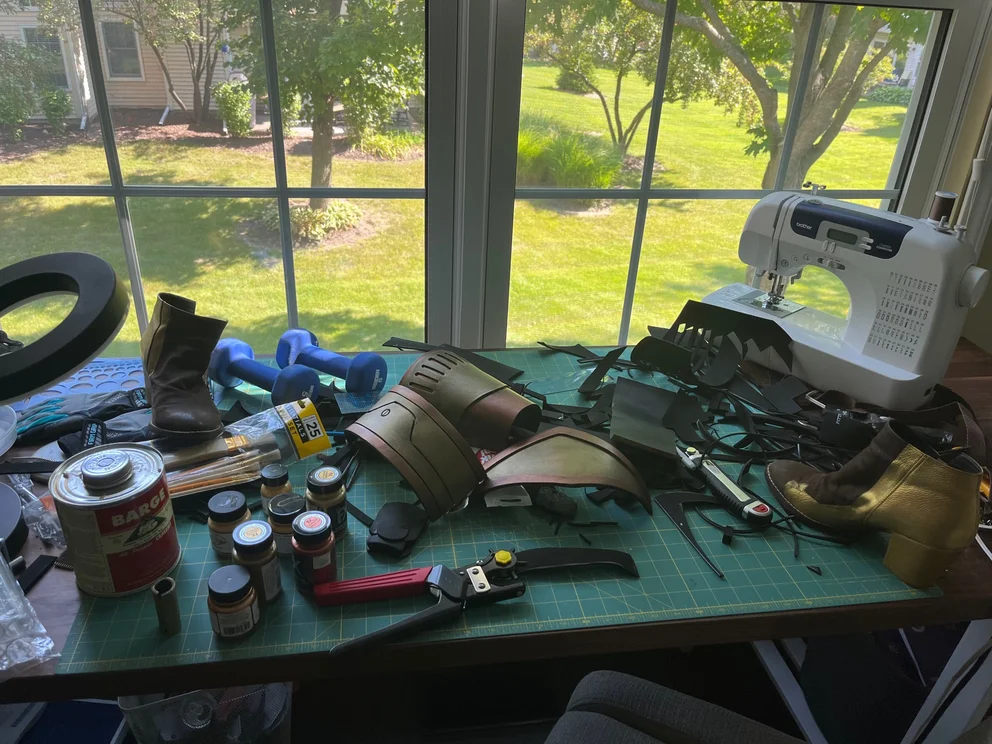
Sometimes your first steps (and workbench) look like this. We've all been there, keep pushing through and don't be afraid to 'fail'. I have a lot of scraps from my 'failures' on this costume just waiting for their next use!
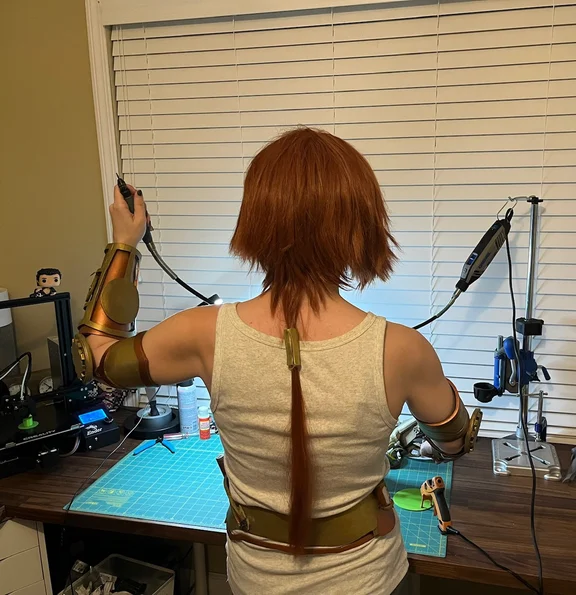
Hard at work making tweaks to the pistol on Halloween, only days before leaving for San Jose. Plan ahead so that unlike me you aren't having to attain maximum velocity to finish in time!
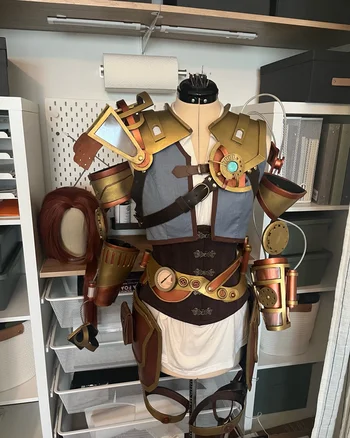
I was lucky to have a sewing form available in my size that helped to size and fit all of the pieces prior the finishing touches. If you don't have a sewing dummy no worries! You can find many videos on making 'duct tape dummies' to help you fit your armor.
Experiment, Reinvent, and Find Your Spark of Genius
“Illuminating the Situation”
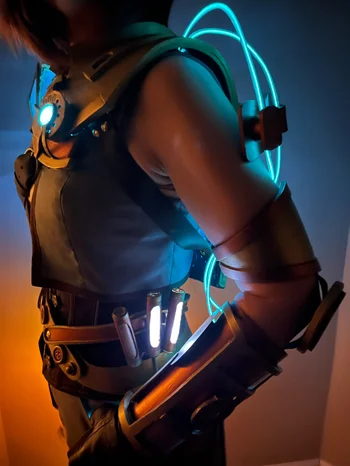
After a fast-paced month of creating the clothing and my first attempt at armor for Dash I was ready to debut the costume in Charlotte. While I was incredibly proud of the complete costume, by far, the attention and comments I initially received at US Nationals centered heavily around the lighting. I’ll never forget the looks the first time I flipped the switches. It was the armor equivalent of ‘thanks, it has pockets!’. For my first attempt at lighting on the vest jetpack prop I used a few ‘out of the box’ solutions that were readily available to someone without soldering or wiring experience, such as micro-LED light strands (i.e., ‘fairy lights’) and submersible LED light pucks. While these were an easier starting point than soldering custom lighting, they required alterations to the prop to ensure that the light could be sufficiently diffused to provide an allover glow as opposed to ‘pinpoints’.
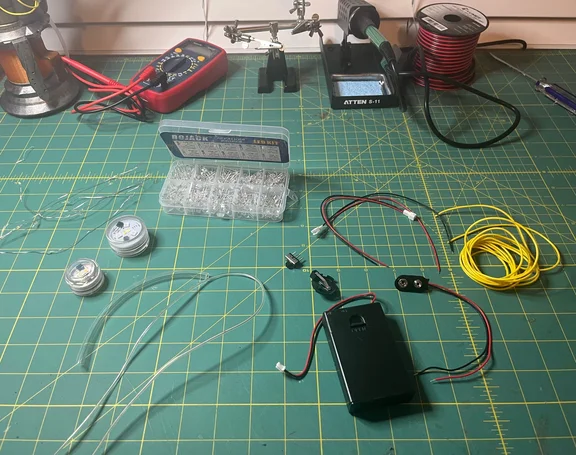
The lighting used in this build is very basic and consisted led wire ('fairy lights), EL wire, individual LED diodes, and submersible LED pucks. Several types of battery holders and switches were used as I experimented with the different methods; I liked best.
There are a couple of ways to go about enhancing and diffusing LEDs, but the three I used primarily were sanding clear acrylic surfaces to provide a ‘frosted’ effect, using vellum (parchment paper is a good substitute) as a filter, and for the strongest diffusion, thin white EVA foam over the light source. The tubes containing the lighting throughout the suit were created using old storage tubes for beads. I realized the similarity of shape and sizing as I was cleaning out my craft supplies in preparation for the build; recycling to the rescue! I covered the tubes in foam with a cutout for the lighting and cut an insert of vellum to fit before running the wiring through the tubes. To enhance the brightness of the LEDs and further bounce the light, I added a piece of tinfoil inside the back of each tube prior to sealing.
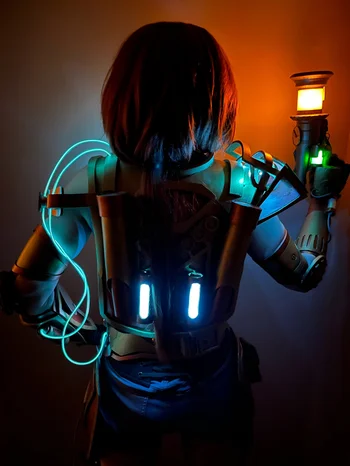
Although this lighting looks 'high tech' it's made from attainable components available to most online or in your local craft store. It doesn't take a lot of know how to find the look you want if you're willing to experiment.
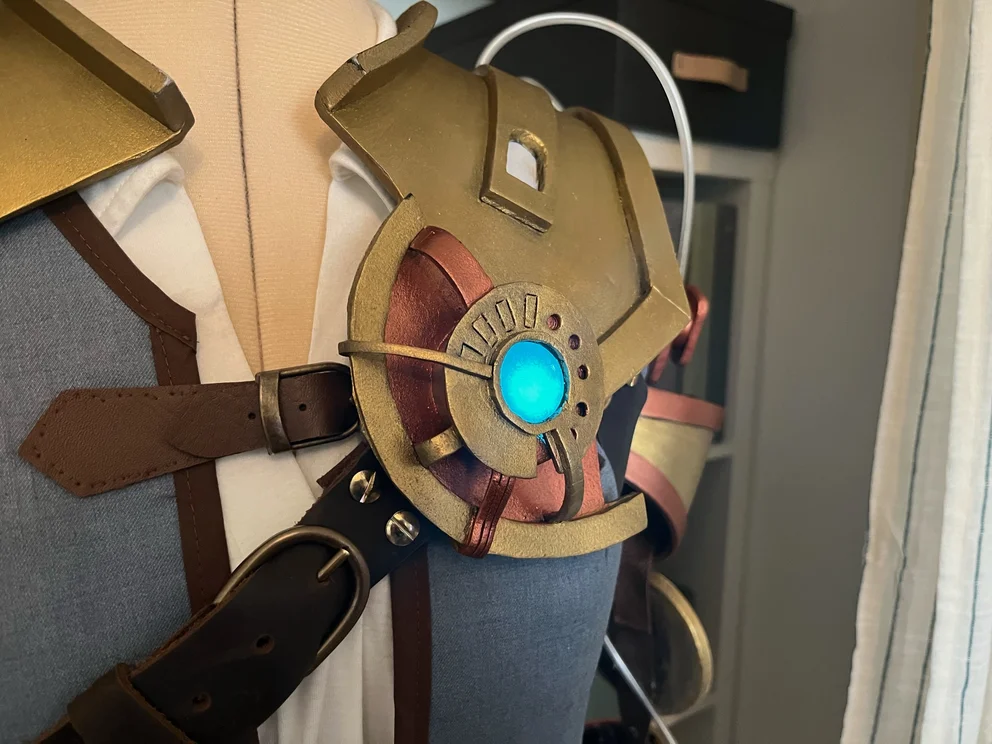
I also ran wiring to the shoulder pauldron, using a combined effect of mounting the lighting under the shoulder ‘cage’ detail and sanding flexible acrylic with a fine grit sandpaper for the ‘glass’ panels to create a frosted light effect for the shoulder.
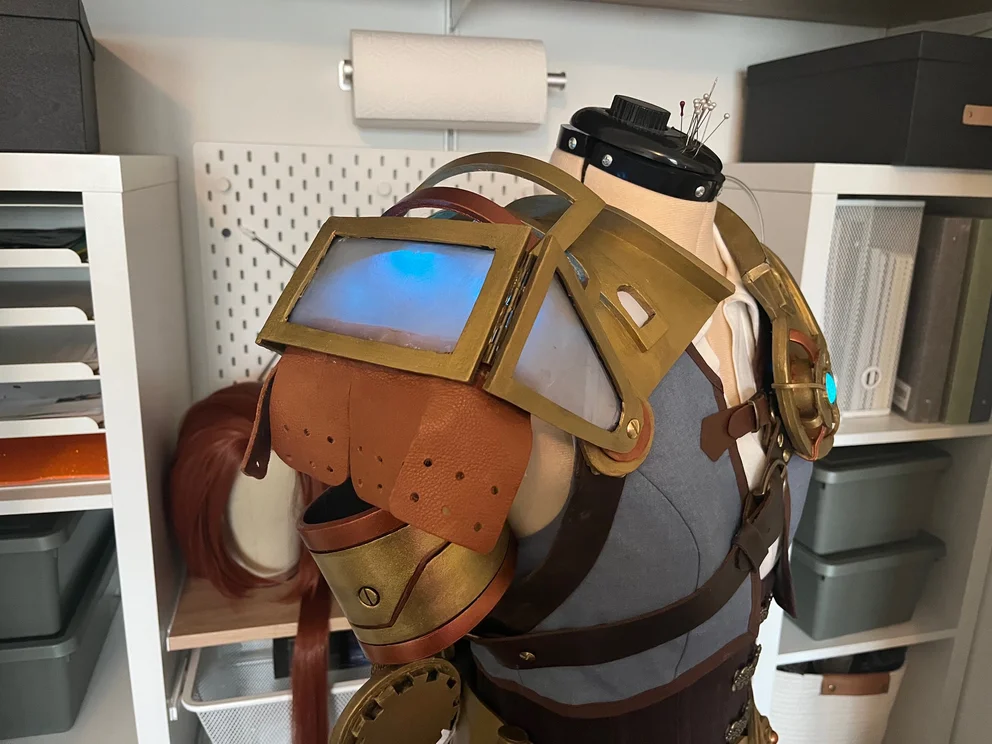
One of the easiest ways to diffuse clear panels (also known as acrylic sheets or plexiglass) is to take a fine grit (400-800) sandpaper and sand one side of the panel in multiple directions. You can additionally 'tint' the panel by using diluted acrylic paint to wash the sanded side in a color of your choice.
The Teklo Core glow effect on the front of the vest was achieved by attaching thin white EVA foam to the back of a decorative acrylic gem to create a filter for the harsh LED diode. I sanded the back of the gem to remove the metallic coating and diffuse the light further. The lighting used for this prop is a round submersible LED puck which can easily be popped out for battery replacement and has the added bonus of being remote controlled.
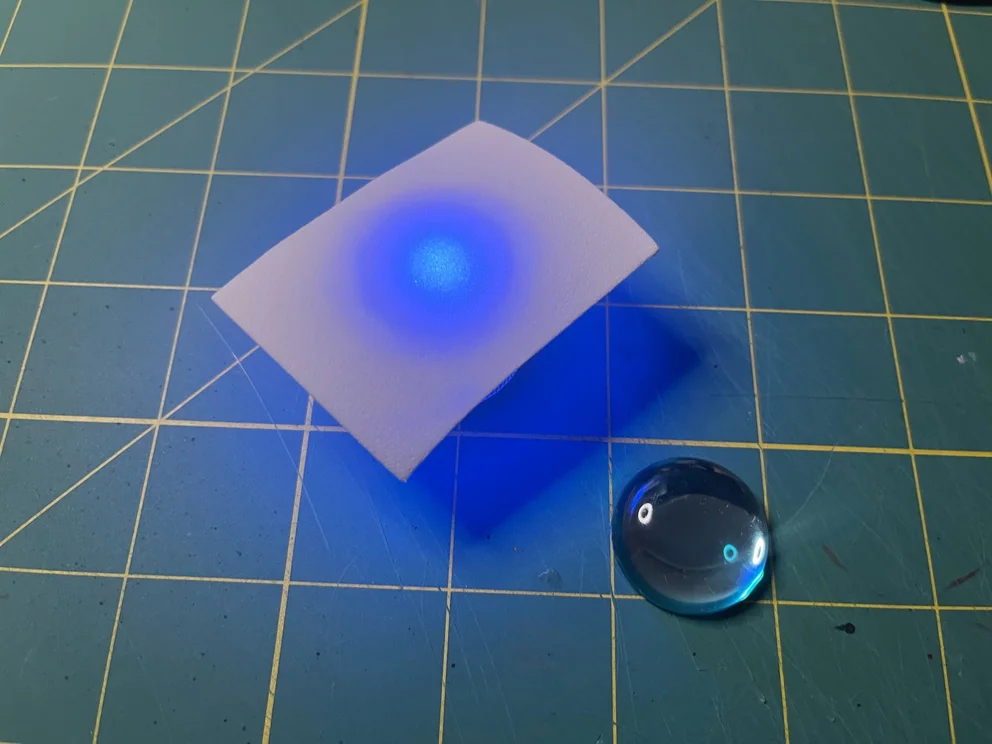
Here is an example of 2mm white EVA foam serving to diffuse the puck light used for the 'core'. Next to it is an acrylic gem that was sanded to remove the opaque metallic backing before being placed on top of the foam.
Although multiple types of lighting could be used for the core, I found that submersible LEDs, often used in centerpieces for parties, make a great solution for props that need a very bright light and have enough room for the projection of the housing.
Upon returning from Charlotte, I decided that I wanted to finish what I had started in lighting my gear before the World Championship. I was also more confident and ready to tackle soldering my own LEDs as well as finding better solutions for battery storage. I began by rewiring the lighting strands on the back of jetpack to a smaller battery case which enabled me to move the power source and switch to my belt. I was able to hide the ‘guts’ by creating a cover resembling the pack on the back of Dash’s belt in the art for ‘Spark of Genius’.
The battery cover for the back of the 'jetpack' is loosely modeled on the back of Dash's belt in the 'Spark of Genius' art and has a small opening on the side to activate the lighting switch. It clips on the belt and can be easily lifted to replace the batteries.
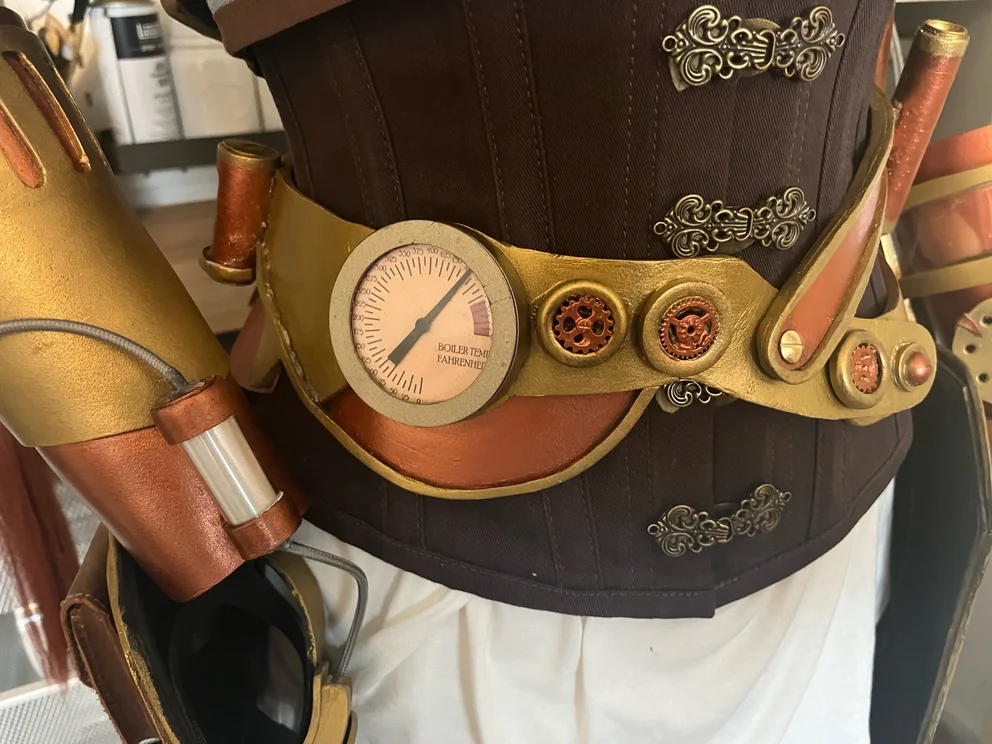
I also needed to completely rebuild the belt which suffered from several unfortunate accidents on its first outing. I took this opportunity not only to make the belt from a sturdier foam but also enhance several pieces of the prop for a more realistic look. On the front of the belt, I used old buttons and small plastic gears for a 3d effect. In addition, I replaced the original flat foam ‘steam gauge’ on her hip to an enhanced version, using an old makeup compact and some creativity.
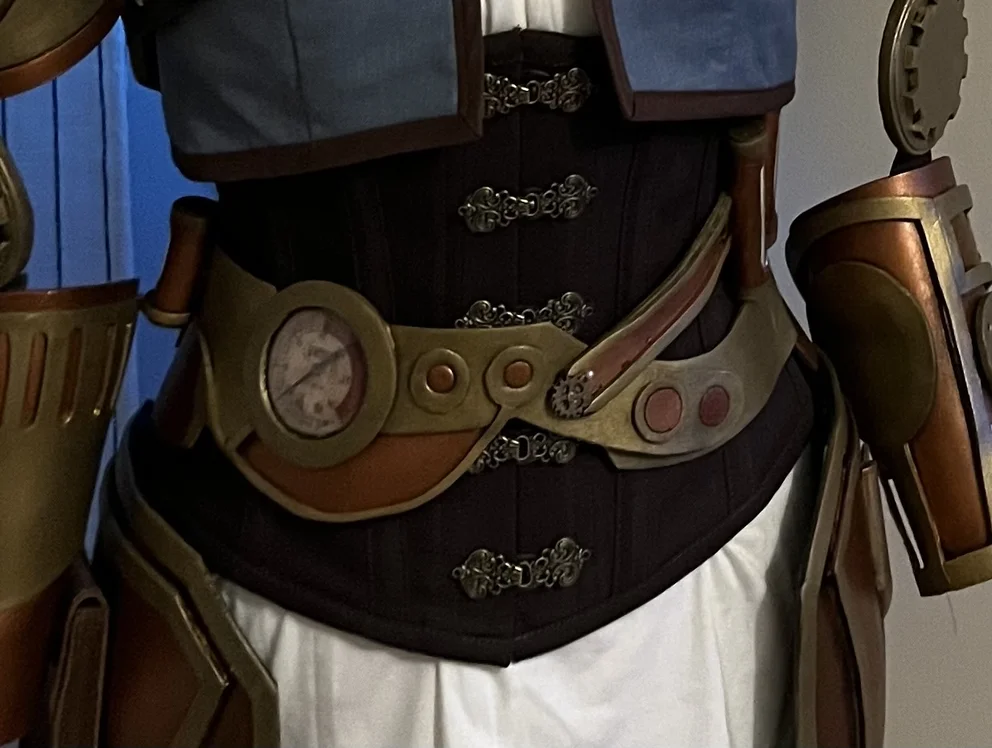
While there was nothing 'wrong' with the older belt, I had learned a lot from my first attempt that I wanted to put to the test.
The second version made in a thicker 5mm foam was not only better looking but strong enough to attach support for various wiring on the costume.
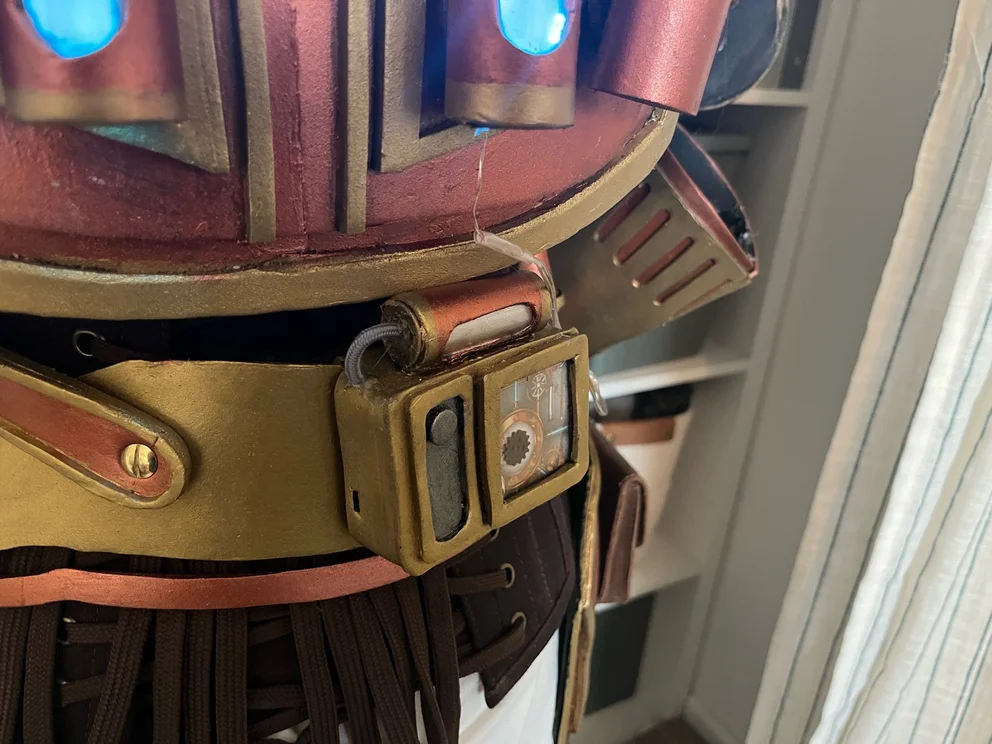
Another custom lighting effect I added were the tubes on the hip. Since these were so small, I used individual LED diodes in each tube which I wired to a small coin style battery pack that could be easily hidden behind the belt.
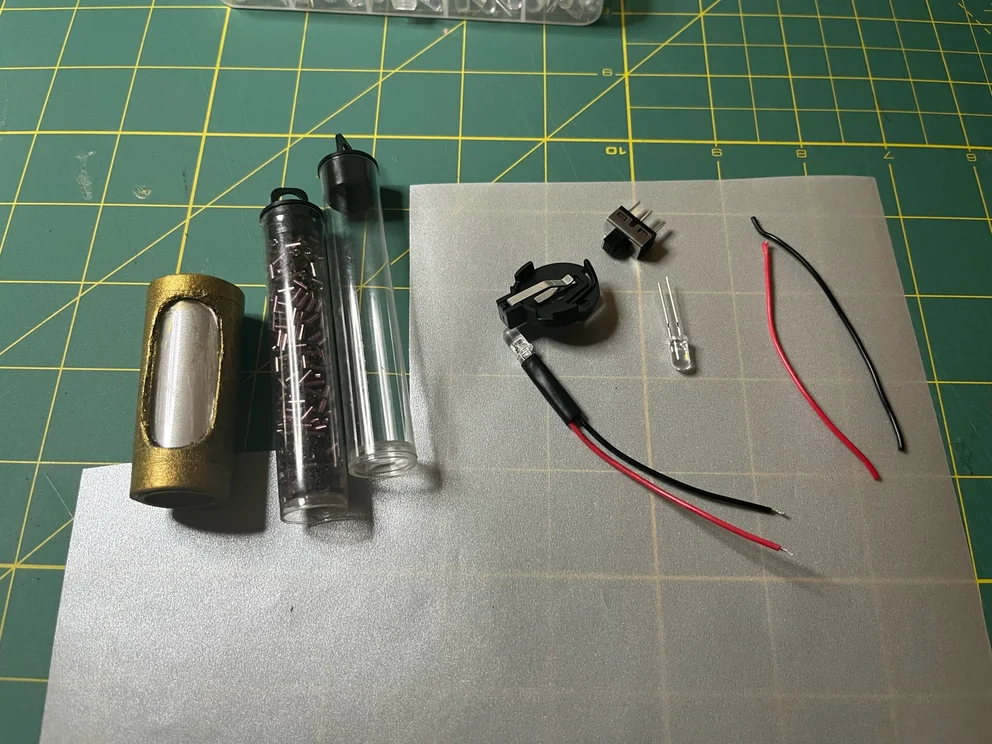
Old bead storage tubes were used to create those seen all over the armor. Here is an example of the original tubes next to one in progress, along with the lighting, battery holder, switch, and vellum paper that was used for the belt.
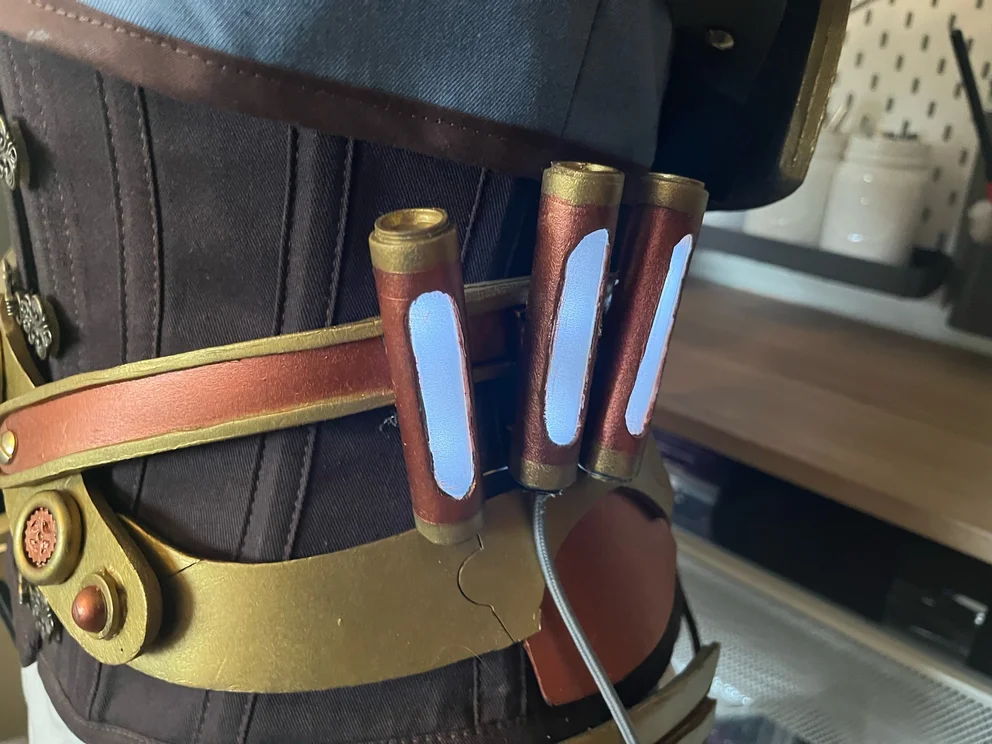
Since these tubes are small, I wasn't able to effectively use the sanding diffusion method. I turned to vellum paper found in the scrapbooking section of my craft store to insert in front of the lights and disguise the 'mechanicals' of the pieces. A faux wire borrowed from a broken phone charger gives a little more character to the design.
Finally, my last addition to the lighting on the jetpack was glowing wiring running from the shoulder down through my gauntlet. I used EL wire for this purpose; however, it is thin and flimsy. To give the wire more structure and depth I ran it through a length of clear vinyl tubing and created a wiring guide from EVA foam to keep it in place and out of the way, with the end terminating in a small ‘tank’ I created on the gauntlet.
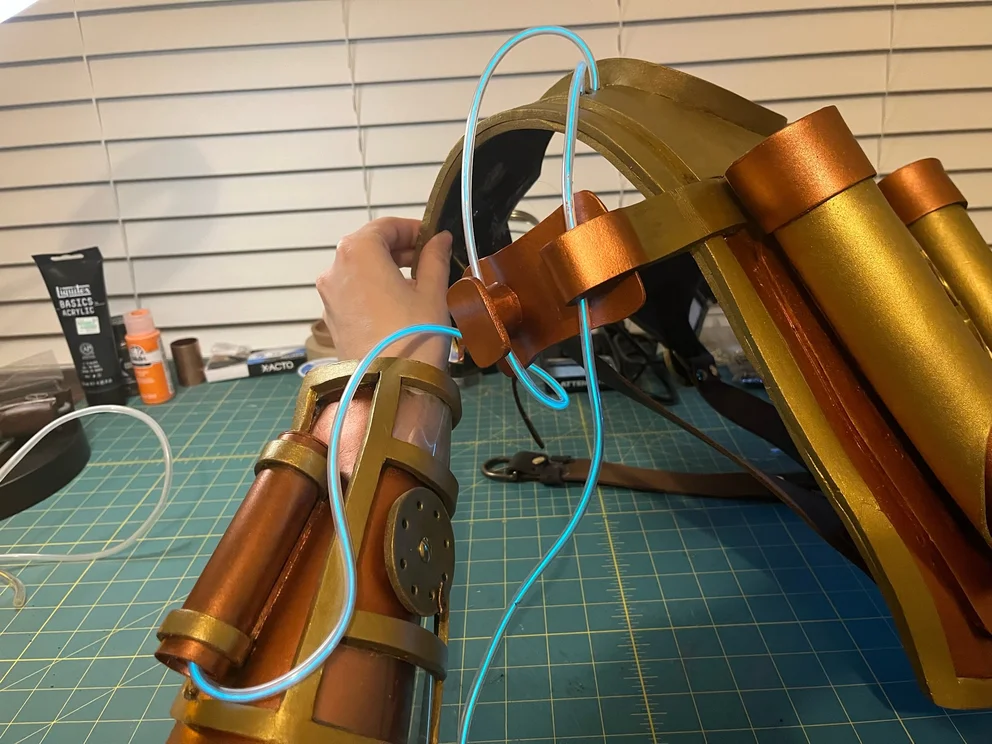
The wiring guide on the side of the pack is both practical in keeping the wires from tangling as I moved around and also a nod to Sam Yang's original (stunning) concept art for Dash which I referenced throughout the build.
The final effect was enhanced by the aquarium tubing as it reflected the wire within and made the overall lighting appear more substantial.
Hit Me With Your Best Shot
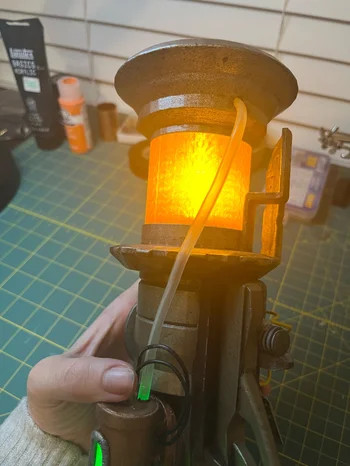
While I was happy with the overall result of these effects given my initial starting point, it was not my complete vision. I still didn’t have a pistol. As luck would have it, the Flesh and Blood community provided the inspiration that I needed to return to the drawing board. One of the most impactful interactions I had in Charlotte was to meet an incredible cosplayer, Matthew Ayers (@covensnow, seriously, check him out!), who generously offered me a 3D file he had designed for the Teklo Plasma Pistol after I told him I was working on a foam version. He encouraged me to get into the hobby of 3D printing and provided guidance and encouragement as I tackled this endeavor. Over the course of several weeks, I researched and altered the original design to incorporate a ‘glowing plasma’ effect. I accomplished this by replacing the center portion of the barrel with transparent orange filament, using a gyroid infill pattern to achieve a more ‘fluid’ look. For lighting I wanted the solution to be wireless and compact, so I turned to the same submersible LEDs that I used for the Teklo Core. I created a removable rig from an acrylic tube and the same orange filament printed to create a flat ‘screen’ so that the barrel would glow not only from the side but the front as well.

I didn't just want the barrel to glow from the side so I crafted a solution using the same filament to create a 'screen' to filter the light from the end of the barrel too.
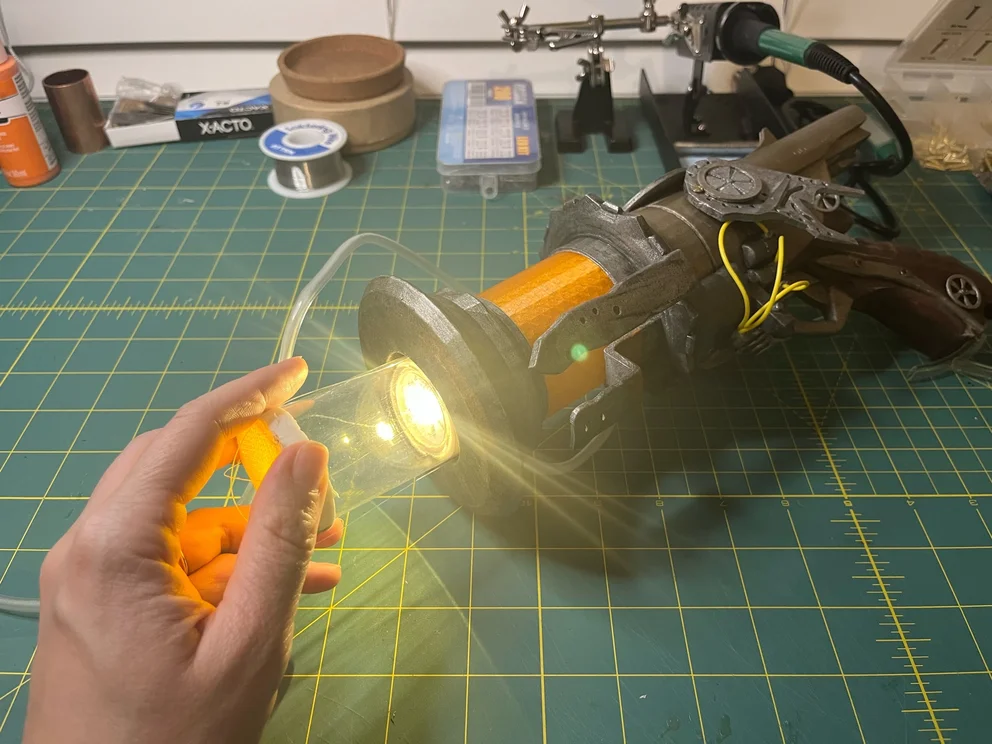
The lighting rig is a primitive but effective solution that combines an LED puck, a repurposed storage tube, the filament screen and is held in place by Velcro and a foam 'gasket'. Clear fishing line allows me to pull the insert when the batteries require replacement.
After creating the glowing effect, a friend jokingly challenged me to make the pistol ‘smoke’. I initially blew the idea off as impossible, but my curiosity got the better of me and after some research and trial and error I was able to incorporate a mini ‘fog machine’ in the design. The machine is made using a vape cartridge, a small air pump, and a battery source and runs on a glycerin base, similar to the fog juice used in larger counterparts. There are multiple ways to construct these machines and I recommend checking out videos online for more detailed instructions if you are comfortable with basic soldering and wiring concepts.
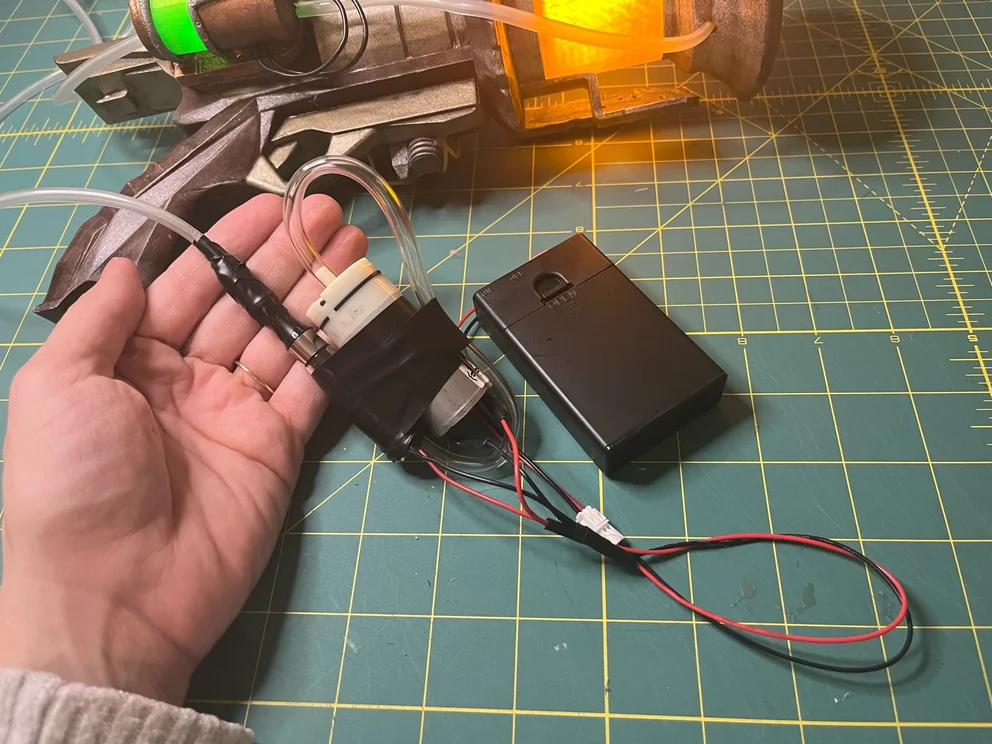
The 'smoke' machine is based on a simple design which incorporates a basic fog generator (the vape core), an aquarium pump, and a switched AA battery pack which is hidden behind the hip armor. There are many variations on this design and I'm experimenting currently with one that can be remote controlled.
Since the addition of this effect came after the construction of the pistol, I needed to drill a hole in the barrel to run the tubing which meant I needed a way to integrate it in the design. In response to this I 3D printed a tube from green transparent filament and used spare wire and worbla to create an ‘induction chamber’ for the tubing to run through. Unsatisfied with just a plain prop I also added LED diodes using the same method I used for the belt tubes.
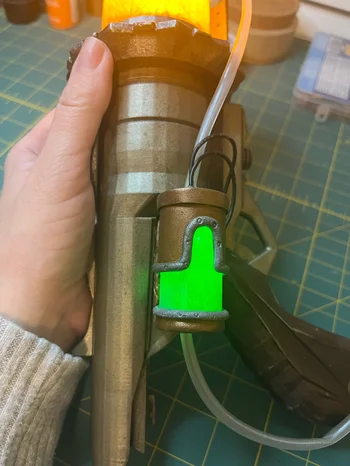
The tubing for the steam effect runs through the 'Induction Chamber' and is removable for display purposes when I'm not wearing the costume. I made impressions in the heated worbla detail using a small seed bead to look like tiny rivets and added mini-LEDs attached to a small coin battery on the back to make the addition pop.
The tubing runs to a small hole in the barrel just past the lighting. I'm making a new version of the pistol so that I can retire this version, which will have the tube incorporated from the start and fully contained within the pistol body itself.

The pistol smoke effect in action. Steam counters not required!
Once all of the effects were in place, I was able to finish the painstaking task of filling, sanding (oh so much sanding), and priming the pistol to eliminate any layer lines. As a finishing touch I used my Dremel rotary tool to engrave ‘Teklo Industries’ on the side before painting and sealing the prop. Brand name weapon, no knockoffs here!
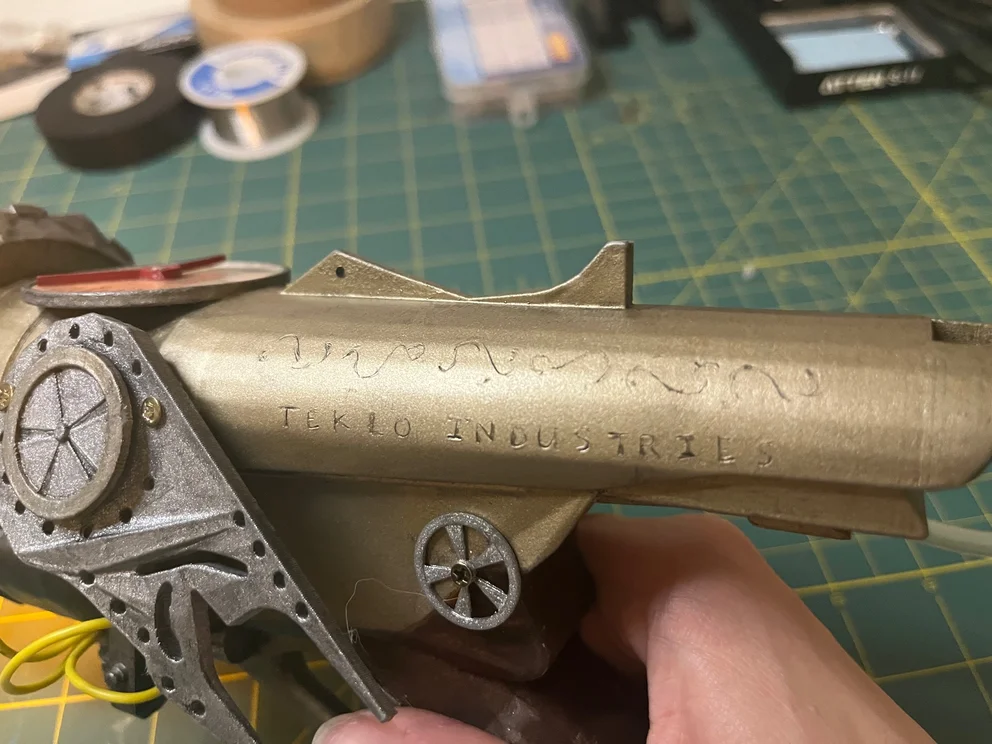
Since PLA filament is difficult to engrave without melting, I layered extra body filler (also known as 'Bondo') on the side to give a softer canvas for carving.
Final Thoughts
This build is one of the most exciting projects I’ve ever embarked on and much to my husband’s chagrin has only made me more excited for the next big cosplay project to take over our home. By far, the best part of ‘being Dash’ at both US Nationals and Worlds was the opportunity to meet and interact with so many wonderful members of the Flesh and Blood community and share the love of my favorite hero. I look forward to the next time ‘Dash’ can make an appearance!
Special thanks to my LGS MinMax Games and my friend Sam for assisting my disorganized self throughout the day and keeping me caffeinated when I needed it most, my husband for having the patience to deal with foam scraps still being found around the house, and to Matt for entertaining my 3D printing questions with the utmost patience and kindness.
Rachel Stoddard is a Flesh and Blood player, cosplayer, and an author of content relating to cosplay. The opinions expressed in the above article are her own and do not necessarily reflect the views of Legend Story Studios.