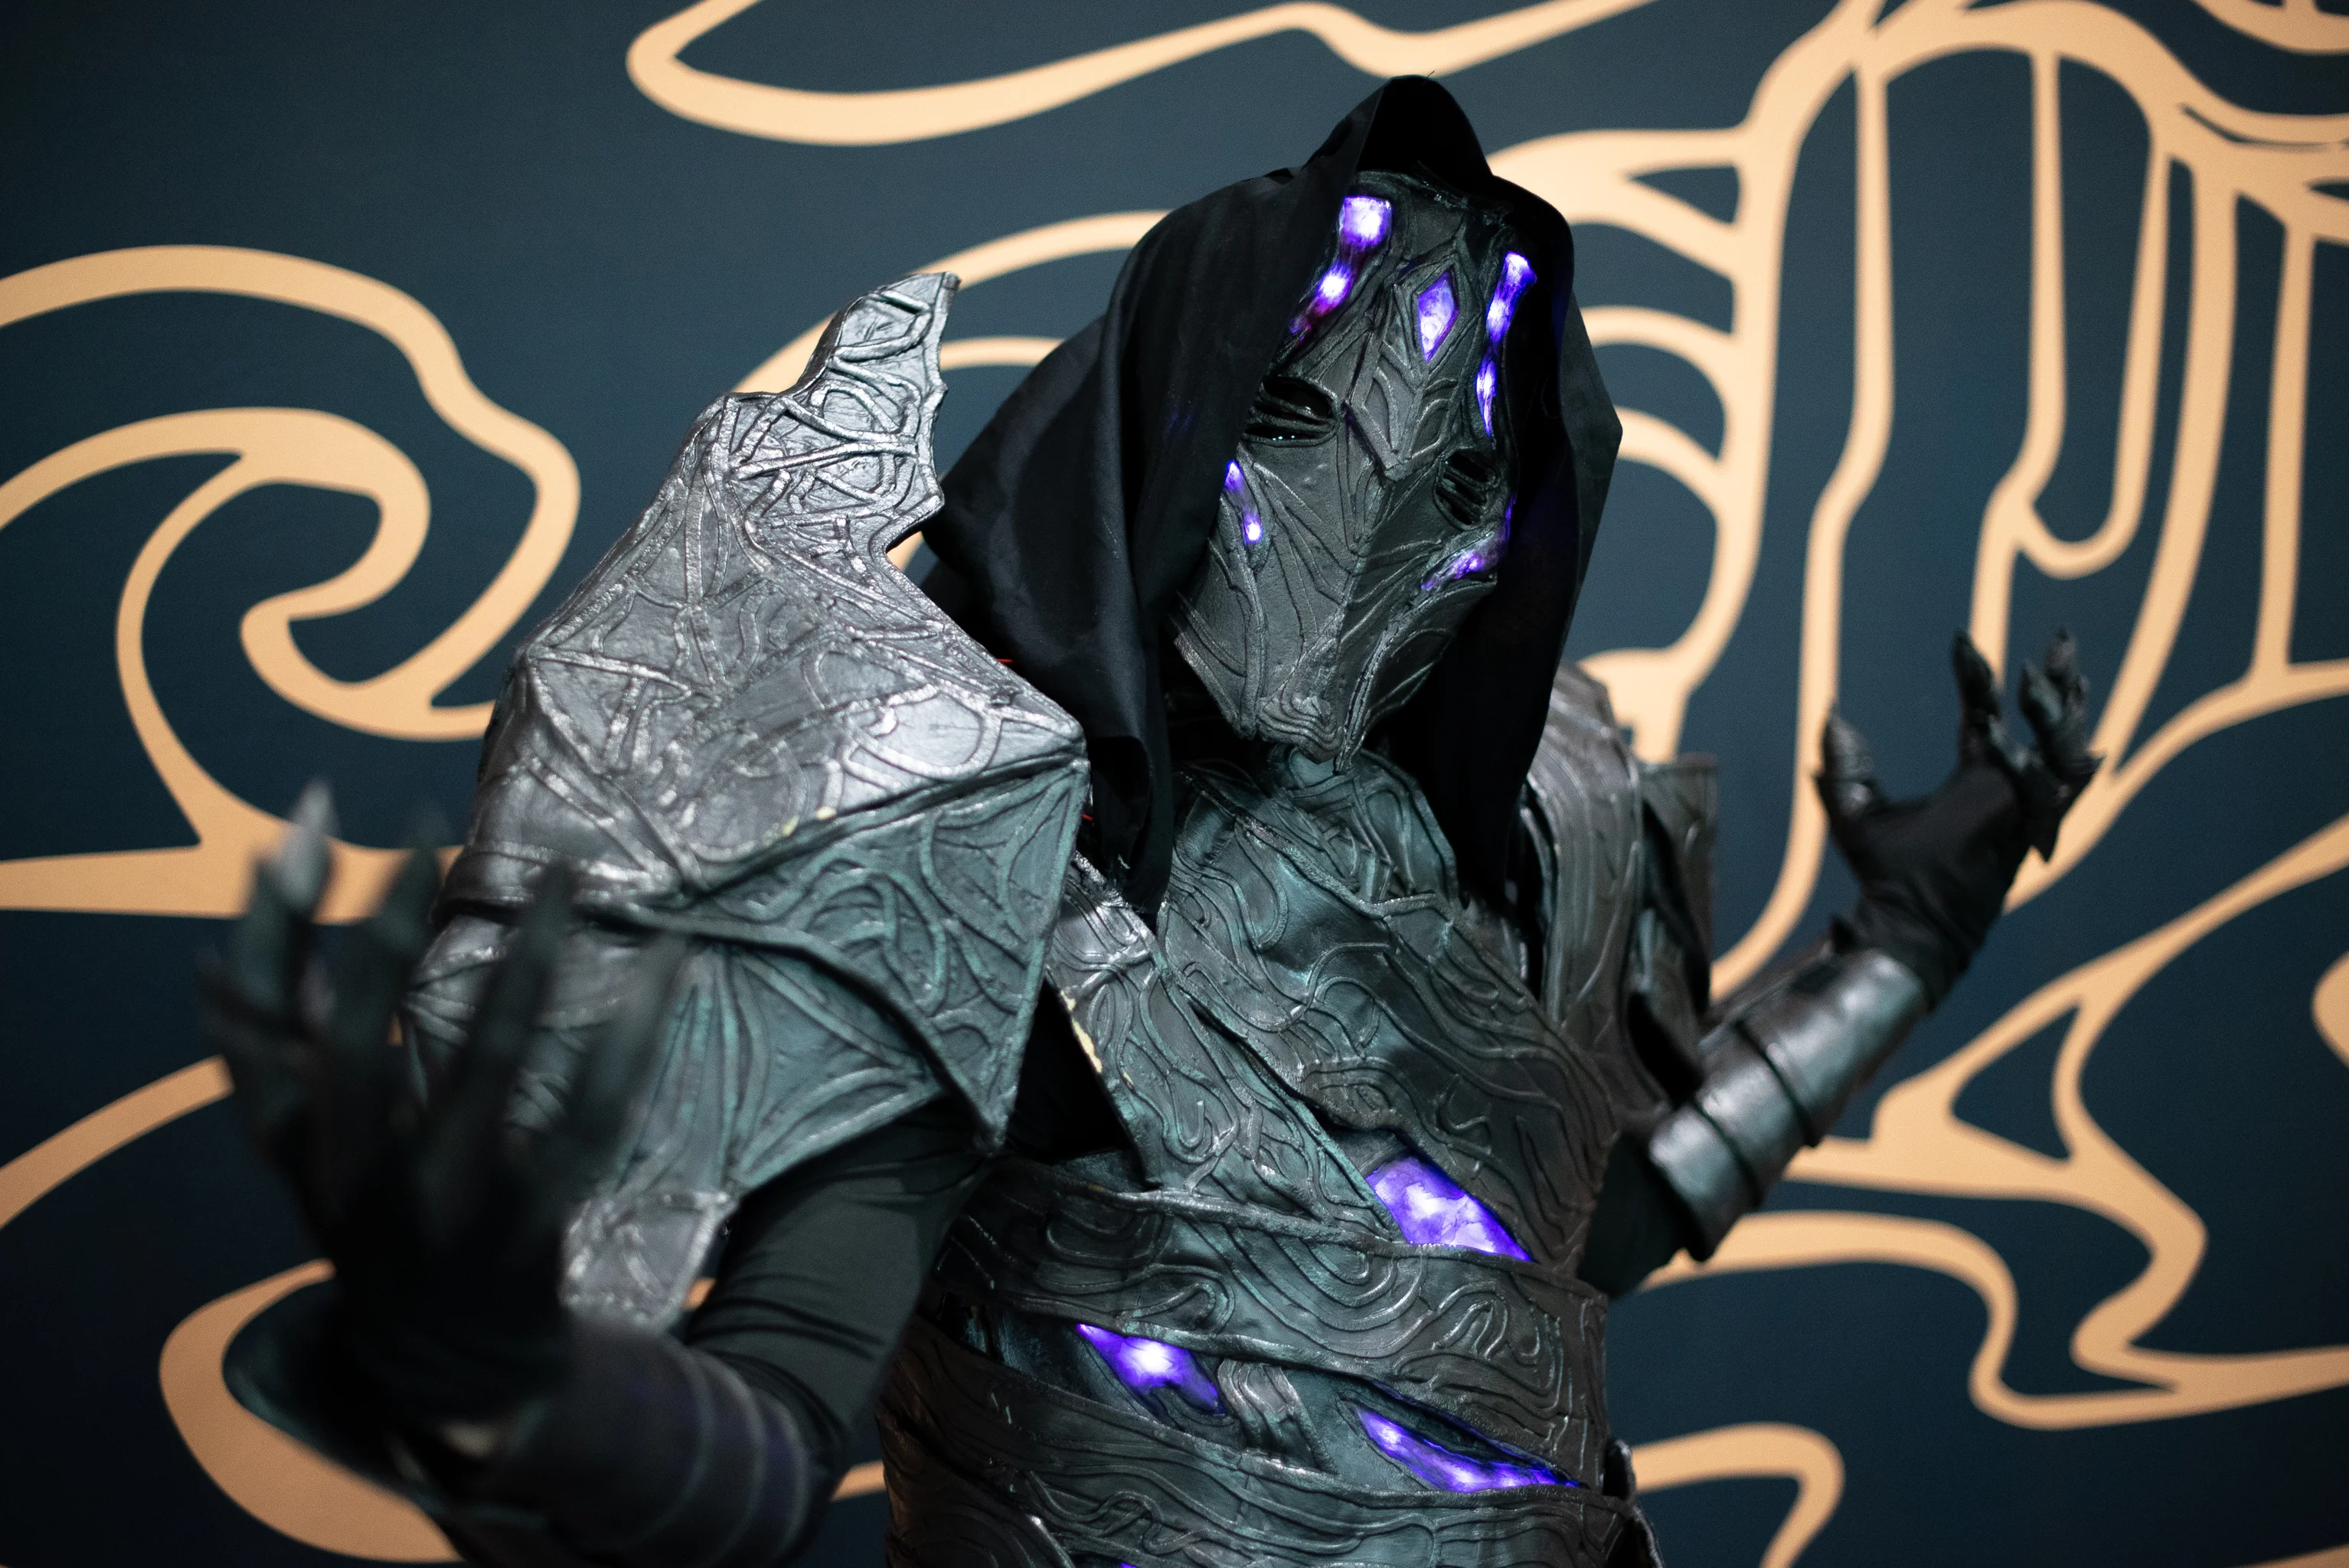
Anthony Harden is an esteemed cosplayer, known for bringing to life Kavdaen, Trader of Skins, Fai, Rising Rebellion, and Viserai, Rune Blood. Ahead of World Championship: Barcelona, Anthony is here to share a masterclass on some of the most difficult aspects of cosplay - painting, dyeing, and weathering.
World Championship: Barcelona is fast approaching and time is running out to finish your award-winning cosplay. I’m excited to be back for another Cosplay Corner and to share the secrets of how I paint my pieces. With the recent release of Bright Lights and Round the Table, I’ll be mainly focusing on the color schemes we see in these sets.
While I will be showcasing my particular painting style it is by no means the only way to paint your own cosplay. Through practice and experimentation, you will develop your own style and flair that will impress the judges. For me, I paint my cosplays similar to how I paint wargaming miniatures, and try to transfer the techniques I’ve learned while painting miniatures from the micro to macro scale. When painting miniatures you want the tiniest of details to be visible from afar and the same can be said when on stage at a cosplay contest. When I first started cosplaying I was often told my details didn’t pop and couldn’t be seen while on stage. Over the years I’ve culminated advice given to me by professional cosplayers and will be imparting this wisdom onto you.
Let’s start with a few supplies every cosplayer needs...
Supplies
When starting to paint your cosplay whether you’re using EVA Foam or Worbla it’s important to use a sealant to protect, smooth, and most importantly create a surface your paint will adhere to. Below are two sealants I’ve used before and their pros and cons.
FlexBond
Pros:
- Non-toxic and can be used in small spaces. Gloves recommended
- Easy to use, brush it on and allow 45-60 minutes to dry before adding another coat or starting to paint
- Little to no sanding is required
- Can be used as a top coat for a semi-gloss finish
- A little goes a long way
Cons:
- Brushing FlexBond onto large projects can be tedious
- Easy to apply too heavy of a layer
- Expensive ($31 for 16oz, $84 for 128oz)
PlastiDip
Pros:
- Quick to apply. Spraying your cosplay can take as little as a few seconds to a minute
- Cheap ($9 for 11oz spray can)
- A rubberized surface that protects your cosplay against scratches and Banksy attacks
Cons:
- Can melt styrofoam
- Toxic and requires Personal Protective Equipment (Gloves, Respirator Mask, Safety Goggles, Well Ventilated Area)
- Non-sandable
Once we have our sealant in hand the next choice we need to make is whether we’re going to use acrylic paint or spray paint. While both are best if used together to keep costs low you might pick one type of paint over the other. Personally, if I can I will use spray paint as a base coat and use acrylic paint for the details.
Acrylic Paint
Pros:
- Available in various colors and is easy to mix to get the perfect color.
- Control over the application of the paint
- Usable indoors no PPE required
- Less mess than spray paint
- Semi-flexible
Cons:
- It is time-consuming due to hand painting the entire piece
- Multiple coats of paint are required due to not being fully opaque
Spray Paint
Pros:
- Quick to apply. Spraying your cosplay can take as little as a few seconds to a minute
- Great for base coats and painting single-colored cosplays
- Metallic colors require little to no work to look realistic
Cons:
- Sprays in a wide area, hard to spray smaller details without masking and prep work
- Toxic and requires Personal Protective Equipment (Gloves, Respirator Mask, Safety Goggles, Well Ventilated Area)
- Not very flexible
While we can paint perfectly fine cosplay pieces with just acrylic or spray paint we want to bring our cosplay to the next level. To achieve this we will be using a mix of effect washes to deepen shadows so finer details are more pronounced, as well as a metallic wax finish (Rub ‘n Buff or Art Alchemy) to make sure our metallic finish looks more realistic and shines brightly.
Effect Wash
Pros:
- Deepen shadows to ensure details pop
- Many colors are widely available
- Easy to make a home using acrylic paint and water
- Used to color-correct cosplay pieces
Cons:
- Liquid consistency can be tough to control
- Dries lighter than it appears
Metallic Wax Finish
Pros:
- Makes metallic paints shine brightly
- A little goes a long way
- Doesn’t need to be sealed
- Easy to use
Cons:
- Limited color range (while somewhat transparent the color of Rub n’ Buff used will influence the final color of the cosplay)
- Toxic and requires PPE (Gloves and Mask if the area is not well-ventilated)
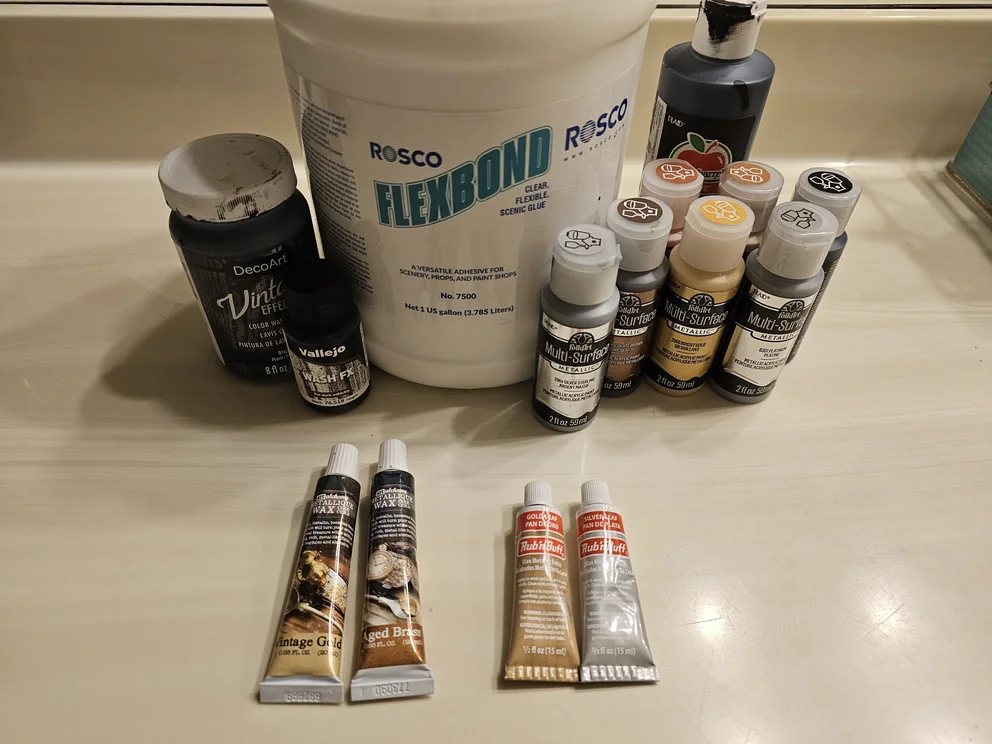
Today we’ll be using FlexBond as our sealant of choice, Apple Barrel and FolkArt Multi-Surface Acrylic paints from both the Metallic and Satin collections, Vallejo Dark Vehicle Wash and DecoArt Vintage Effect Wash for our wash effects, and to finish it off we’ll be using Rub ‘n Buff to make our pieces shine.
Getting Started
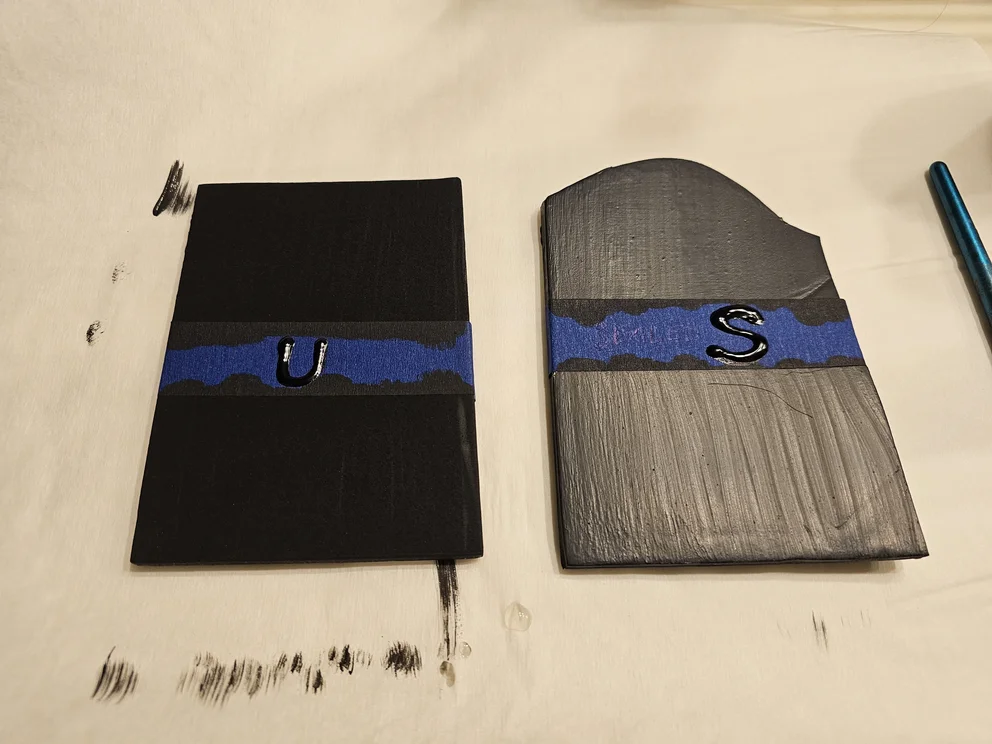
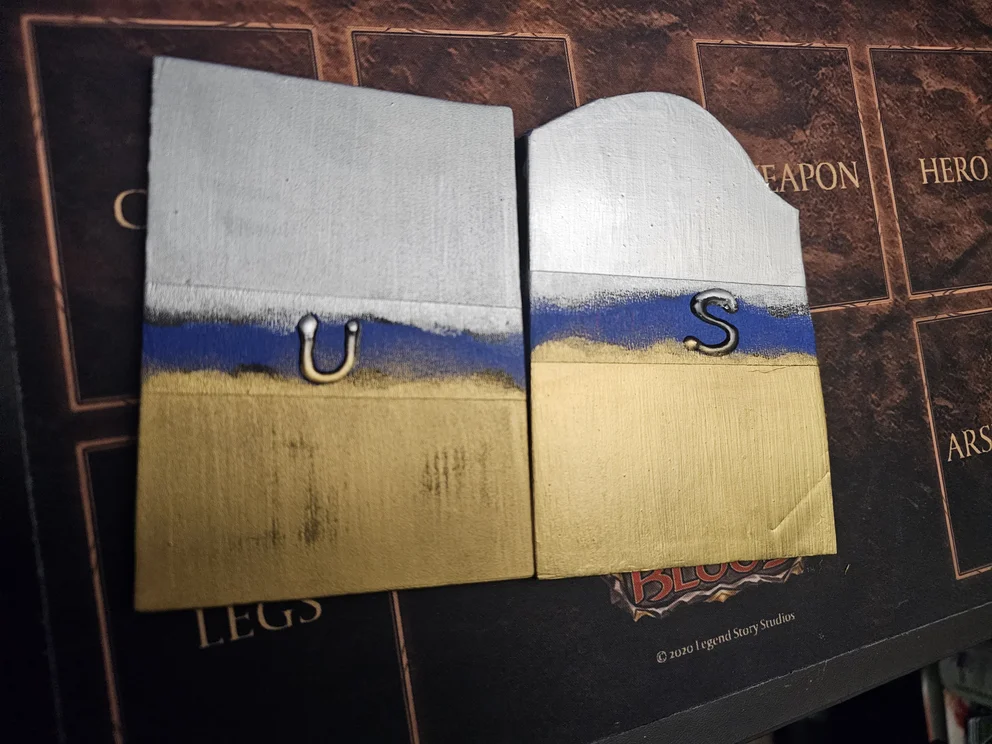
With our supplies out of the way, I want to start off by showcasing how much of a difference sealing your EVA Foam makes when painting for cosplay. The EVA Foam on the left with the, “U” will be unsealed while the EVA Foam on the right with the, “S” will be sealed using FlexBond. The sealed foam was done using one coat of unsanded FlexBond to show just how much of a difference FlexBond or Plasti Dip will make to your project. We followed this up with one base coat of black acrylic paint. I base coat all my projects in black as this ensures the acrylic paints I use aren’t influenced by any colors that might affect the end product.
A mistake I made when I first started cosplaying was trying to paint silver across two surfaces, one being red and the other black, only to find out that the silver had a red tint when in bright light due to the slight transparency. Now every project I work on is base coated in black to avoid this, black showcases colors the best out of any other base color I’ve experimented with. White is another alternative used when painting cosplay if the entire cosplay is going to be light colors.
Our next step is to apply our metallic color of choice onto our base coat. For this example, I’m using FolkArt Sterling Silver for the top half of our EVA Foam and FolkArt Bright Gold for the bottom half. This picture starts to showcase just how porous EVA Foam is and how it’ll dilute our colors. Both pieces had two coats of their respective paint applied to them with around an hour of drying time in between.
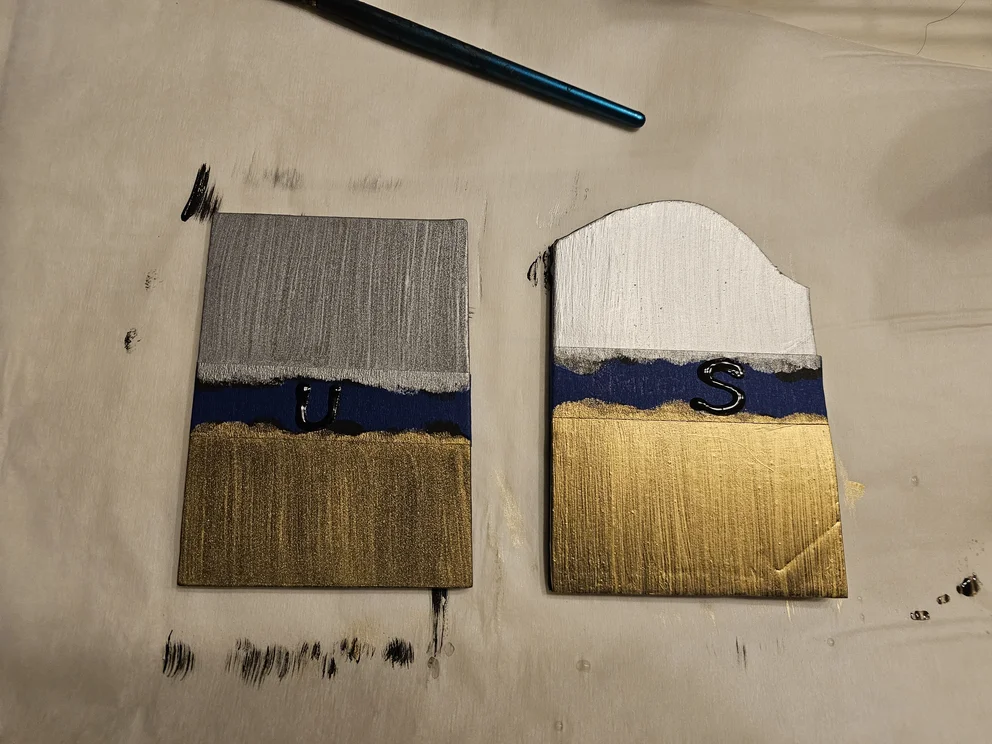
For this test piece I finished both with Rub ‘n Buff using Silver Leaf on the top and Gold Leaf on the bottom. While the difference wasn’t too noticeable on camera, the Rub ‘n Buff made both pieces shinier and created a more realistic metal effect in person. Another benefit to sealing the EVA Foam was during the application of Rub ‘n Buff, while lightly buffing the unsealed gold portion, part of the paint was stripped off. Acrylic paints adhere well to FlexBond making them more resilient to light damage that might occur while in costume or creating it.
With the Rub ‘n Buff added our test project is complete. Rub ‘n Buff is a topcoat finish so we don’t need to add an additional topcoat to the project, any additional layers we add would cause the Rub ‘n Buff to become dull. A common mistake when using Rub ‘n Buff is applying too much, a pea-sized amount can cover an entire helmet or vambrace. Now let's apply this technique to a piece of armor.
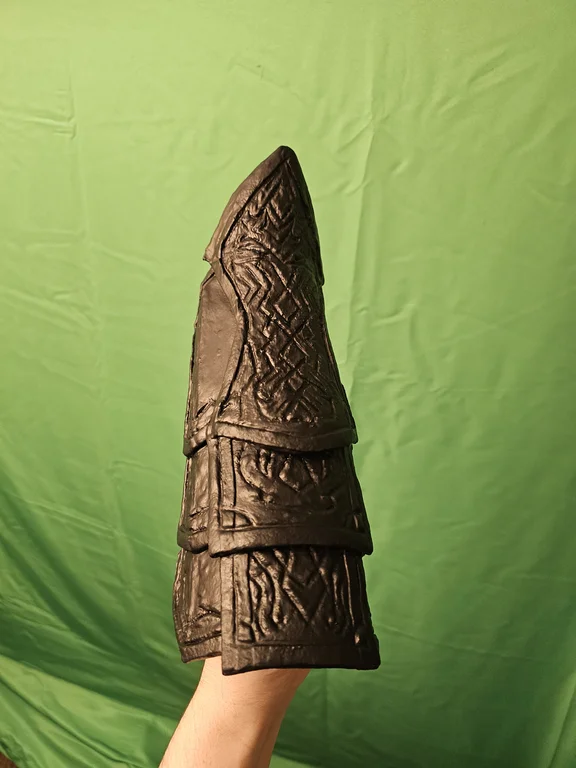
Painting Metallic Armor
Almost all pieces of cosplay armor I paint use the technique shown above. For this example, we will be taking a piece of Viserai’s vambraces that are to be stripped and remodeled as our showpieces. Each vambrace was coated in three thin coats of FlexBond to smooth out the rough texture of Worbla and create a surface for the acrylic paint to adhere. After the FlexBond is dried I paint on a black basecoat and then two coats of FolkArt Sterling Silver acrylic paint.
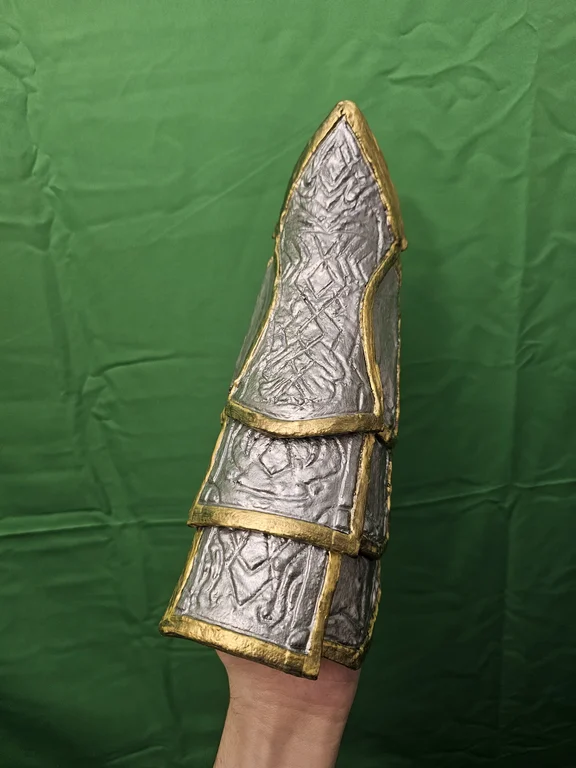
Once our silver paint was dry, I added a second base coat of black to the trim of the armor to ensure the gold paint didn’t have silver undertones later on. After the base coat dried I applied two coats of brilliant gold as my armor trim color of choice, with Round the Table recently releasing I was inspired to try a Brevant-themed color scheme for this vambrace. Although we could call the vambrace complete with our current appearance, we want the details to pop and the armor to shine.
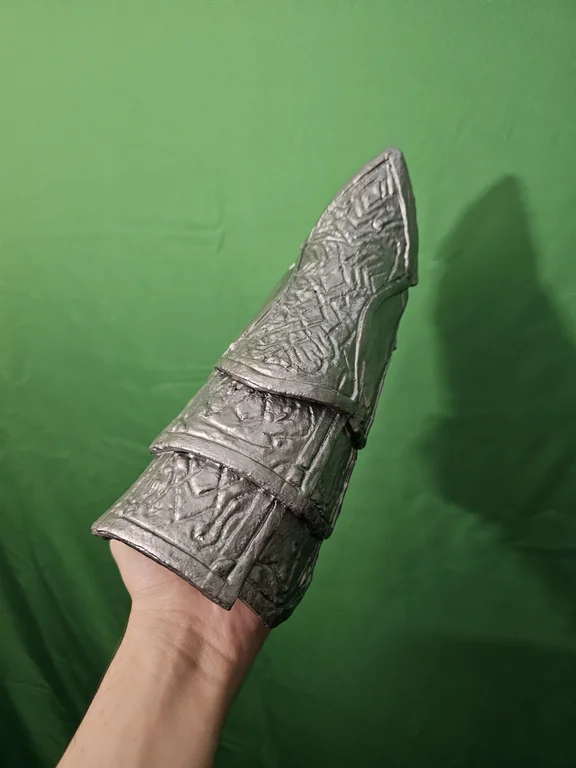
To make the details of the armor pop I will apply a wash to darken the recesses of the vambrace. For this step, we have two options, DecoArt Vintage Effect Wash or Vallejo Dark Vehicle Wash. Each wash will accomplish a different goal, DecoArt is a thicker consistency that creates an almost engraved appearance while the Vallejo wash dries lighter creating a shadowed appearance. For this vambrace, I will be using the DecoArt wash to create darker matte engravings that will contrast well with our shining metallic armor. After coating the vambrace in DecoArt I’ll wipe off any excess wash off the top, our overall armor will look darker due to the excess wash but it’s an easy fix using Gold and Silver paint.
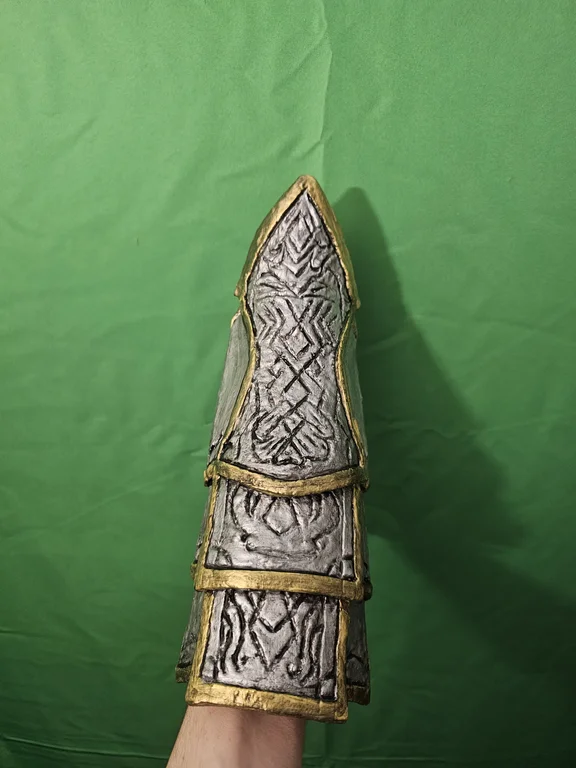
It’s time to add the finishing touches to the vambrace. During the wash process, our armor was dulled due to the nature of the wash. To bring our armor back to its full shine we’ll be applying Silver Leaf Rub ‘n Buff to the body of the vambrace and Gold Leaf Rub ‘n Buff to the trim. Using a gloved finger I’ll apply a tiny amount of Rub ‘n Buff to the vambrace and buff with a soft cloth or our finger to increase the shine. Once buffed we’ll allow 24 hours to cure before touching up any imperfections and the paint job will be complete.
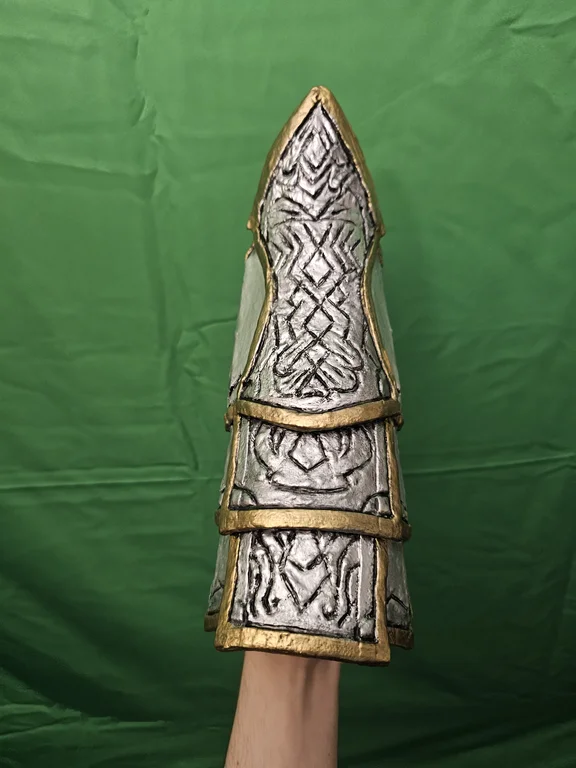
Using the techniques outlined above creating copper or steel armor similar to the art seen in Bright Lights is easy to achieve. Experiment with different colors and washes to achieve the look you want. I played around with Antique Gold and Metallic Chocolate paint to create darker metallic appearances, both are finished with Vallejo Dark Vehicle Wash and Rub ‘n Buff.
Dyeing Fabric
From when I first started cosplaying in 2011 to today the number of fabric options geared towards cosplayers has exploded in popularity. Finding the right shade of fabric or the dye needed to achieve it has never been easier. What’s difficult is adding effects to the clothing portion of your cosplay, although it’s the right color you might want an aged or battleworn effect. A non-toxic method to create an aged effect is to use Black Tea as a fabric dye to add brown tones to the fabric. For creating effects on your fabric such as blood, dirt, mud, or oil we will be using acrylic paint.
Materials needed to dye your cosplay will be a container large enough to fit your fabric, I’ll be using a cooking pot as the dye we’re working with is food-safe. Black Tea will be used as our dye, the brand doesn’t matter but the coloration of the tea will change slightly. A light-colored fabric is preferred when using this method for the best result, today I’ll be using white fabric. Finally, we’ll need a heating element to boil the tea and utensils to add and remove our fabric from the tea.
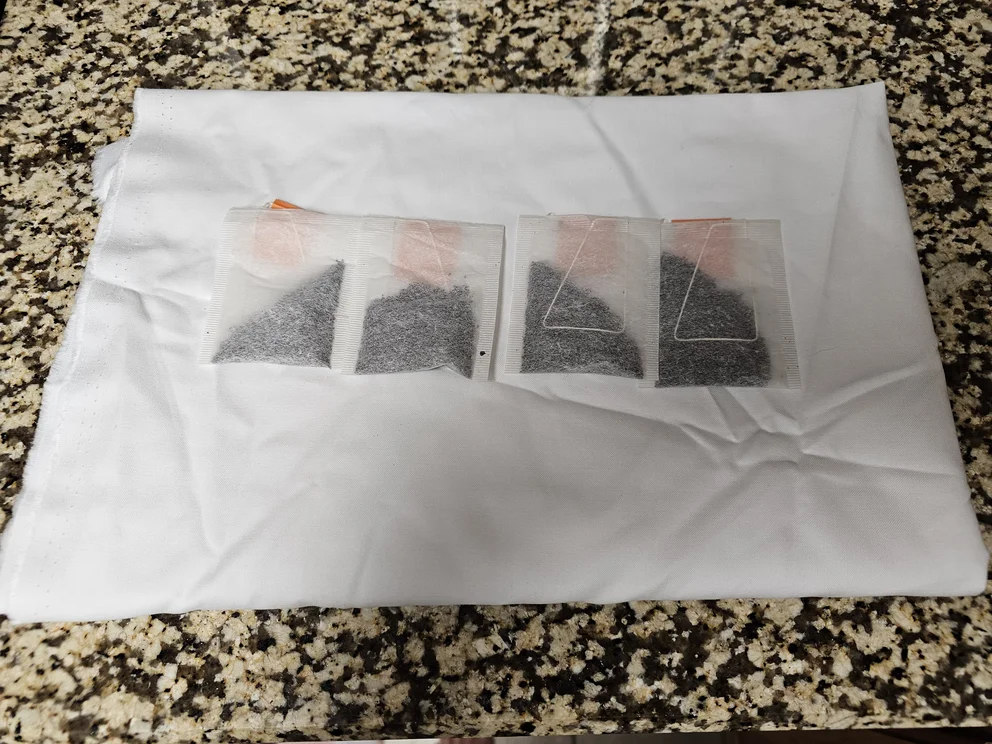
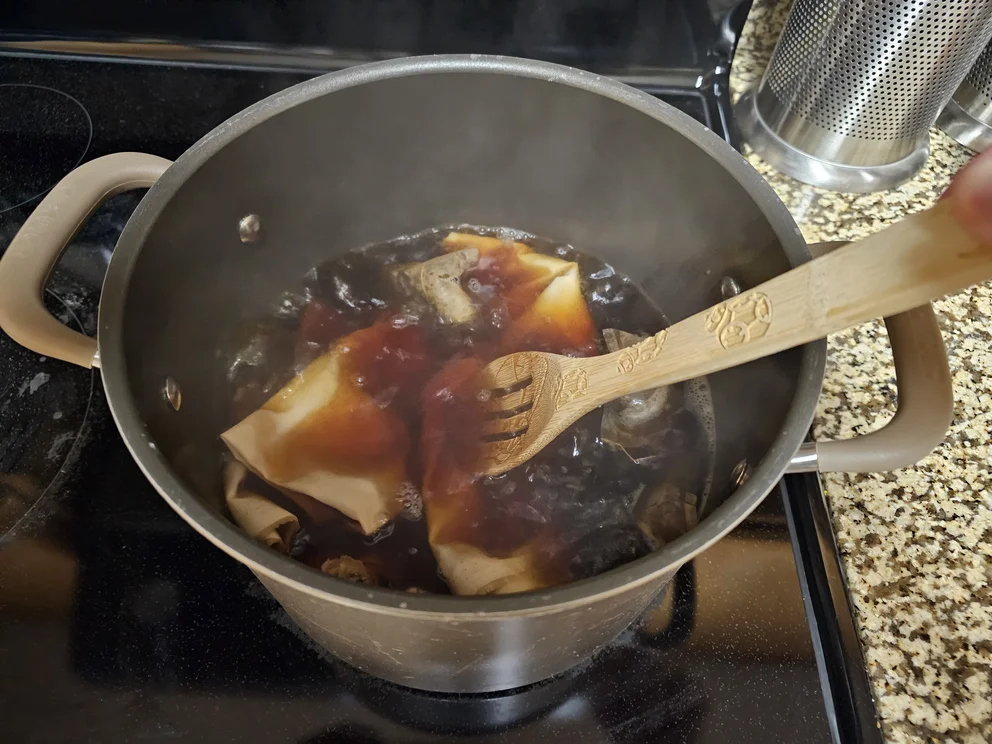
Dyeing your fabric with this method is quick and easy. Fill your cooking pot with enough water to fully submerge your fabric and bring it to a boil. Once the water is boiling add tea bags to the water, the more tea bags the darker the color. On average you will want 3-5% of your fabric's weight in tea bags, per pound this is roughly 6-11 teabags. Brew the tea for a few minutes in the boiling water before adding your fabric directly to the pot. Reduce the heat to low and let the fabric simmer in the tea for an hour, if you want a lighter color remove the fabric after 15-30 minutes. Leaving the fabric alone for an hour in the tea will create an aged stained appearance while stirring the fabric will create an even dyed appearance.
After our fabric has boiled for an hour we’ll remove it from the tea and rinse it under cold water until the water runs clear. Let your dyed fabric completely dry and now you have tea-aged fabric, perfect for the fashion seen in cards like Panel Beater, Arakni, Solitary Confinement, Murkmire Grapnel, or Fleece the Frail. Other fun non-toxic dyes to experiment with would be sugar-free drink mixes like Kool-Aid which can be used to achieve colors such as pink or blue. Below are the results from stirring the fabric, not stirring the fabric, and dyeing using Black Cherry Kool-Aid.
Weathering Fabric
A relatively unexplored area of Flesh and Blood cosplay is creating battleworn versions of existing characters. The world of Rathe is quite expansive and the lore stories give us an idea of how heroes live and the battles they’ve experienced. Adding a little bit of weathering to a hero's clothing such as dirt or soot stains can create a worn appearance to your cosplay. Creating a worn appearance is easy with a bit of practice using a technique known as dry brushing. Dry brushing is a common painting technique using a dry paintbrush with a wide tip to paint a thin rough layer of paint onto your cosplay. While not exclusive to just the fabric portions of your cosplay today I’ll show you how it can be used to create a dust effect.
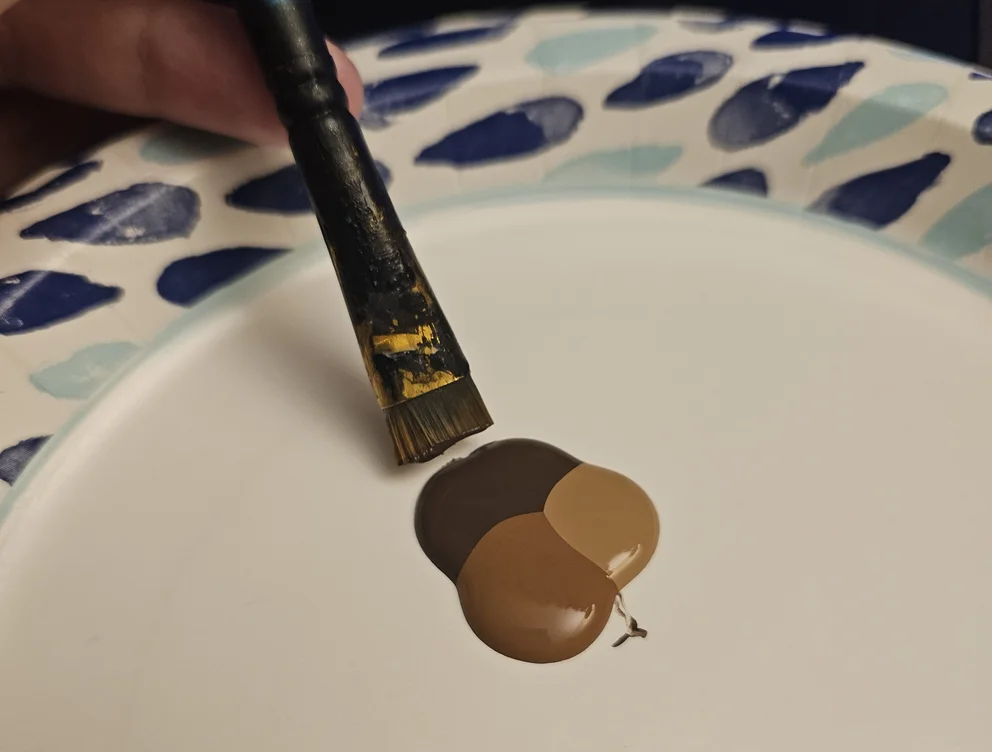
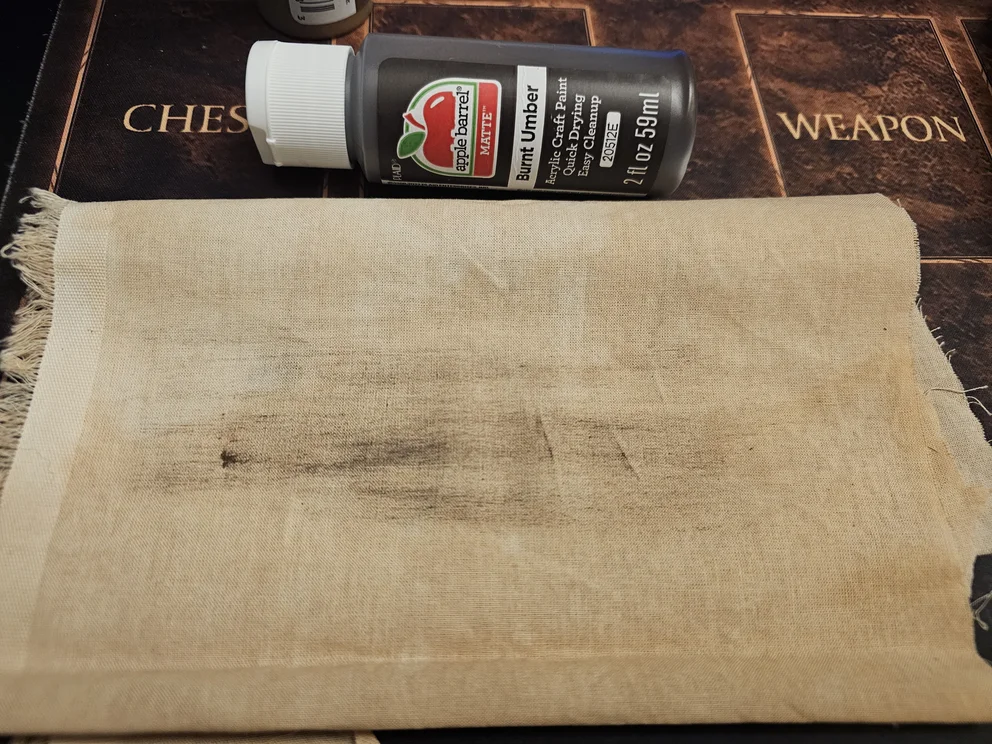
When determining how I should weather a character I will start by reading their lore stories. What type of environment they live in is a great starting point for our weathering. Once I determine the environment I want to emulate I can pick out the paints that will be used. For this example, I will use Burnt Umber, Nutmeg Brown, and Territorial Beige. When arranging your paint on your palette I recommend having all three colors touching in case we want to add mid-tones to our weathering. I start by ensuring my brush is completely dry, using a flat and wide brush is ideal as it allows you to apply a small amount of paint to a wide area. Dip just the very tip of your brush into the darkest color to start and wipe off excess paint on a clear area of your palette or a paper towel, excess paint left on the brush will create a heavier weathering effect. Using directional brush strokes we will apply Burnt Umber to our fabric from left to right, this will make it seem as if our cosplay scraped their outfit against the ground. The effect will start hardly noticeable and will be built upon as we add more coloration.
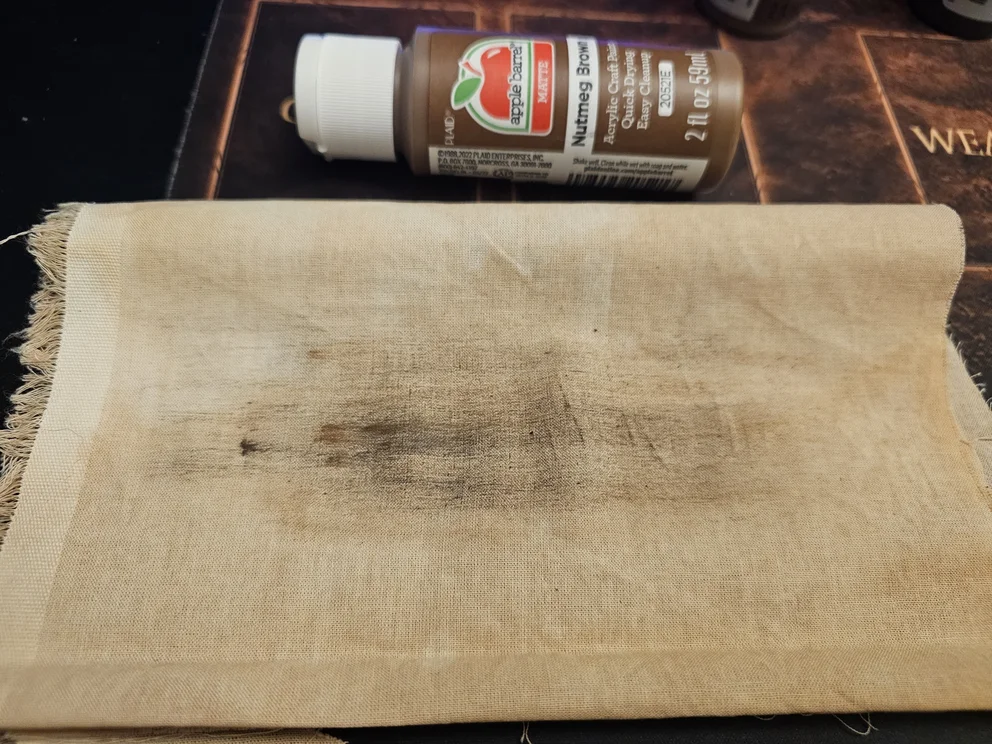
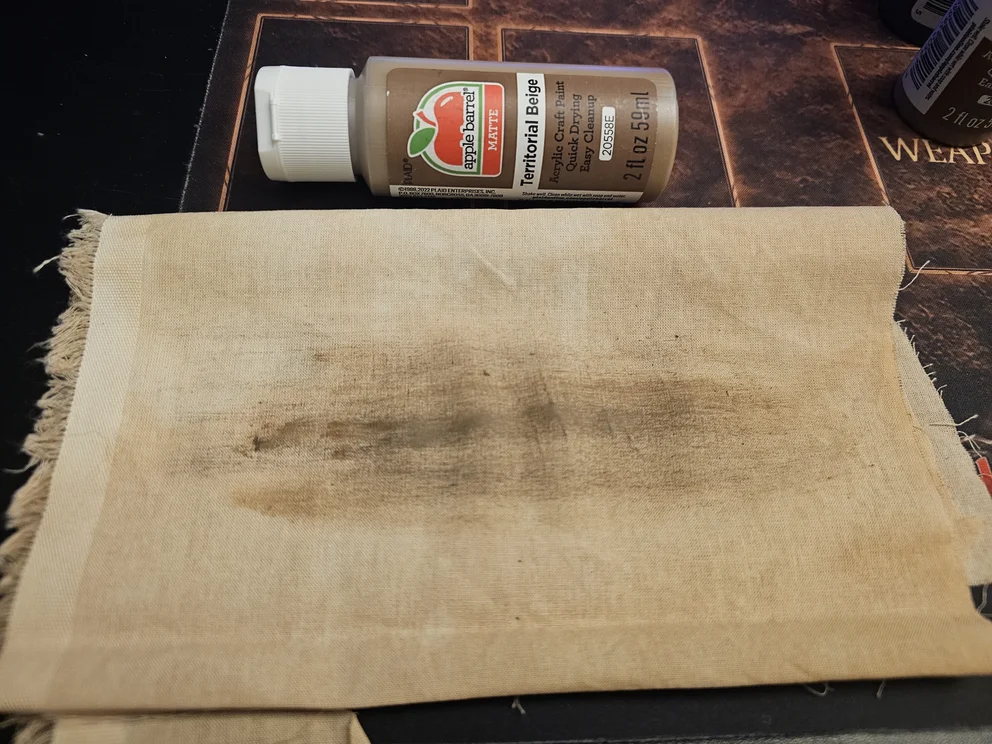
After the base color is applied I will clean my paint brush using clean water and dry it thoroughly. Next, we will repeat the process for our medium-tone Nutmeg Brown and light-tone Territorial Beige. This will complete the effect, but brush stroke direction isn’t the only way to weather using paint...
Another option for weathering using paints is to create a splatter effect. Using the same technique as before we will start from a center point and move outwards with each brush stroke instead of left to right. This creates a dirt-splatter effect which can be used as an accent detail on your battleworn gear. Mixing red colors in with the brown paint can create a dried blood effect whether it is a deep blood stain or smeared, while using black paint can create a coal or soot appearance.
Thank you so much for joining me in Cosplay Corner and I look forward to seeing photos of all the wondrous cosplays at World Championship: Barcelona!