While Classic Constructed and Living Legend are taking center stage this World Tour season, Super Slam is the newest way to play limited at your local game store. Flesh and Blood is a game of skill, and we are committed to giving you the tools needed to play limited at the highest standard each season. We’ve brought pro drafter Simon Nielsen back for another Pro Draft Guide, ensuring you can step into the ring at your local game store with confidence.
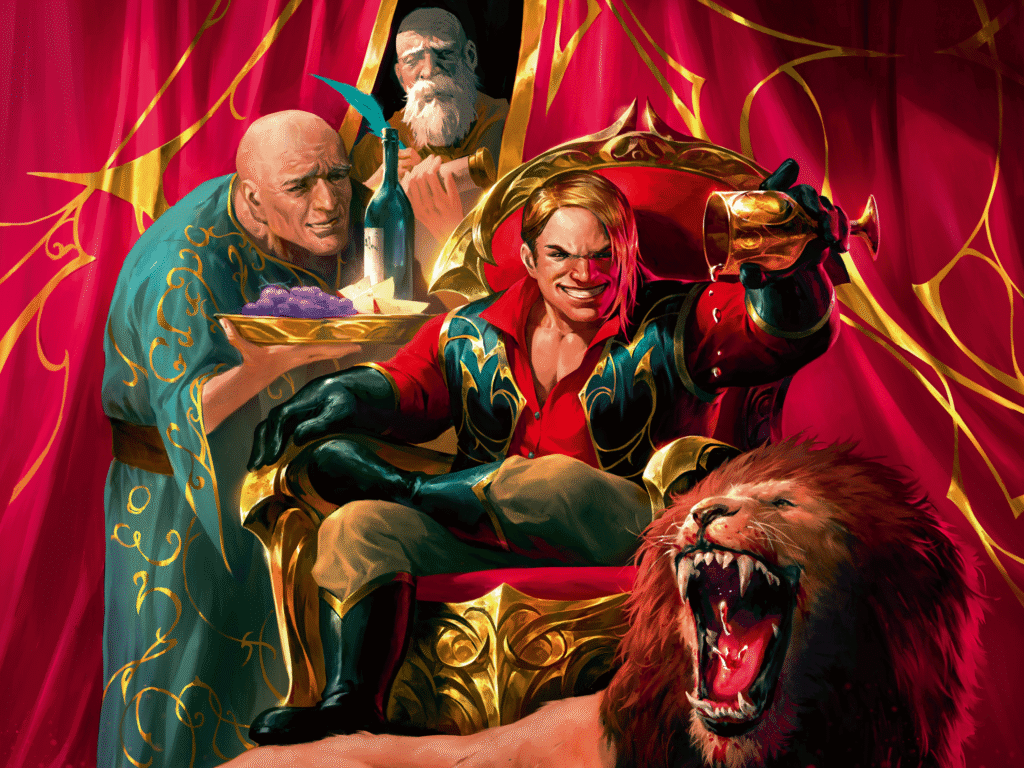
Honorable gentlefolk and vile what-nots, welcome to… THE SUPER SLAM!
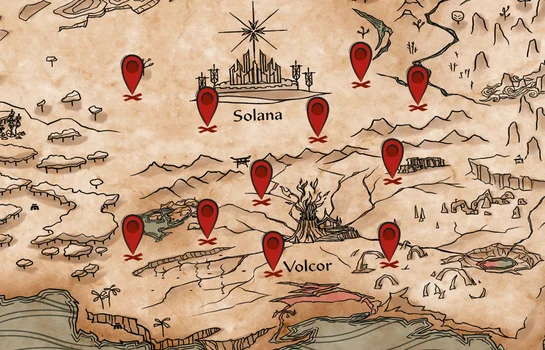
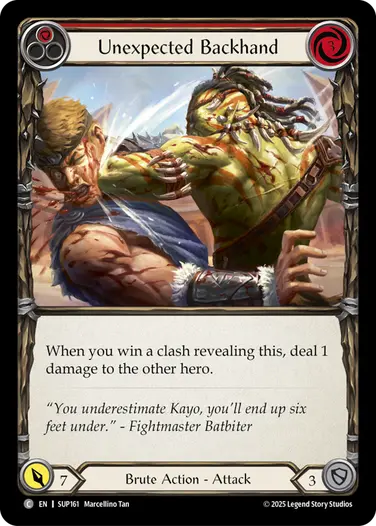
A much contentious draft format, packed full of big punches and cunning plans. Experimental design with different intellect values and no weapons. This format has been so much fun to explore and play. How often do you see a 26 power attack with Confidence or a carefully placed Unexpected Backhand stealing a tight 10-turn long game?
We don’t get to draft this set for Pro Quest season unfortunately, but I highly recommend organizing a couple drafts at your local game store, or getting a box and a group of friends together, or even trying your hand at some Sealed Deck side events at a nearby Premier event. This article will aim to prepare you, not only to draft this set, but also teach you some strategic concepts that you can carry with you into your future draft experiences. As always, the article is neatly sectioned up so you can choose how you want to engage with the tips here. Before we get into the hero specifics, I want to talk about some overall format dynamics: matchups and sideboarding, as well as how to navigate your early picks in this format before you’ve chosen your hero.
Matchups and sideboarding
Quick Hits
- Sideboards play an important role in the format, because of both the amount of hate cards and the need to shift your macro strategy to beat your opponent.
- Tuffnut’s strategy is to make value plays and defend well. He lines up poorly into Lyath stacking damage and as a result needs to change his sideboard to be better at going wide.
- Lyath loves stacking damage and doesn’t attack every turn to deny his opponent from defending well. This strategy is less good into opponents going wide who don’t rely on defending to get their value, and so Lyath needs to switch into making better value plays.
- Kayo is good at going wide with his card pool and hero ability, but struggles to present enough damage to outvalue Tuffnut in the long run. So he needs to look out for ways of stacking damage to overcome the defenses.
- Pleiades gets to use the auras of suspense flexibly to change between all three macro strategies and is better set up to adapt to the opponent.
- Most heroes want to go second except in the Tuffnut mirror and certain builds of Lyath.
Before any good wrestling match, we have the smack talk as these heroes are matched up against one another. Because the set has no access to weapons whatsoever, each hero relies more on their inherent synergy, and these highly synergistic decks match up interestingly into one another. I do think there is less variety in sub-archetypes for this set compared to High Seas, and so I won’t spend as much time covering archetypes in this article compared to my last one. Instead I’ll talk more about how to unlock these synergies during the draft and how the heroes match up against each other. Let’s start by meeting the characters of this colorful ensemble!
introducing…
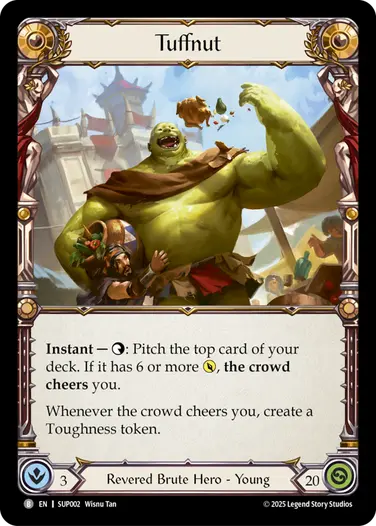
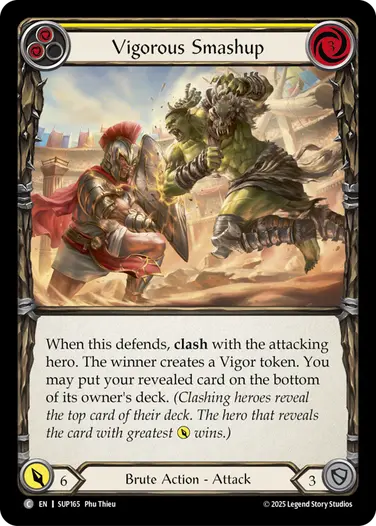
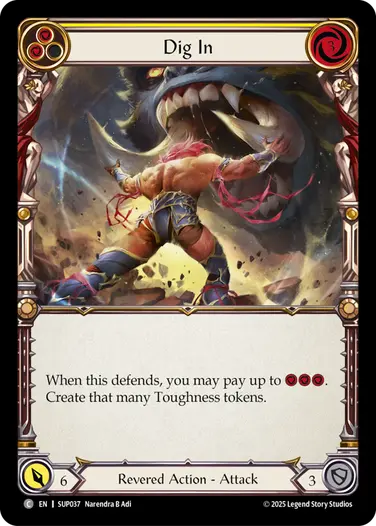
Tuffnut, the Revered Brute, might have initially been much maligned for his 3 intellect, but the hero ability is so powerful that he is now considered one of the best in the format. Ideally you build his deck with at least 20 attack action cards with 6 or more power, and the way you achieve this is by playing a minimal number of blue cards and filling up your resource base with yellow 6-power attacks and some strong red cards. Add in the variance minimizers like Vigorous Smashup, cards that profit from having 6-power in the pitch zone like High Pitched Howl, and strong defensive tools from the Revered card pool like Dig In. You’ll have a deck that generates a Toughness token on most turns and can often do turn cycles of ‘defend for 7, attack for 7’, all while having strong attacks well into the late game. It’s the perfect setup for a fatigue style hero that will simply outlast your opponent!
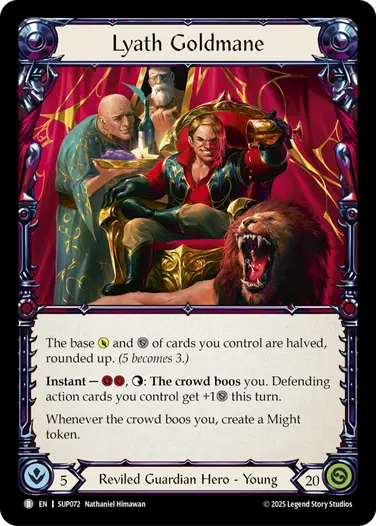
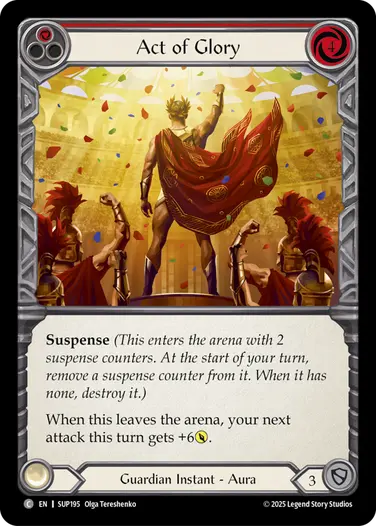
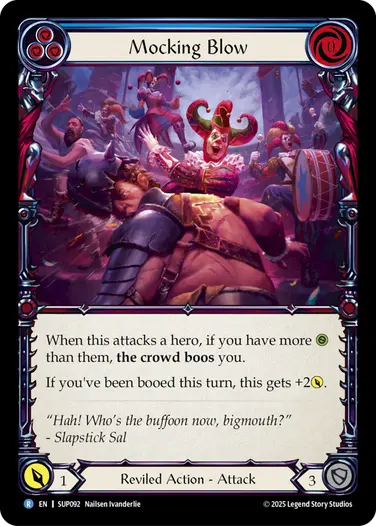
Lyath Goldmane, the Reviled Guardian, plays unfairly unlike any Guardian we have seen before. 5 intellect may be a huge advantage, but his downside cuts off his access to classically strong cards like 3 for 7’s and reduces his defense value significantly. The good Lyath decks take advantage of pump actions not being affected by his hero power, and as such, he wants to stack up damage and time cards like Act of Glory to go off in one big turn with other pump cards like Villainous Pose, and cards that cheat his hero ability like Mocking Blow. Ideally, he plays a few mediocre turns before swinging for more than 20 and slaying the opponent in one or two hits!
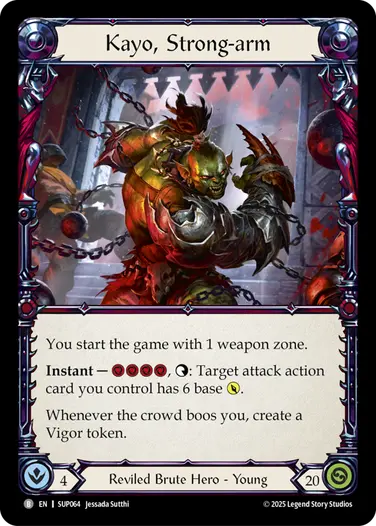
Kayo, Strong-arm, the Reviled Brute, plays more normal Flesh and Blood with 4 intellect, but he can still bully your opponents! Kayo thrives best with ways to boo efficiently, generating Vigor and using that extra resource to great effect. Whether it’s just to attach a Revolting Gesture to a Strongest Survive or send a measly Feisty Locals with another blue card in hand and a resource floating from Vigor, threatening 6-8 damage off just two blue cards. Because he is able to use blue cards so well he wants to play a large amount of them, and otherwise fill up the deck with good attacks and block value.
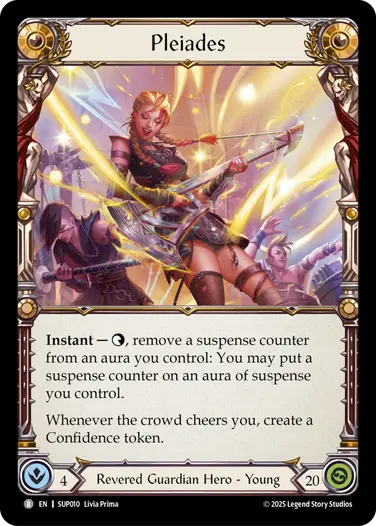
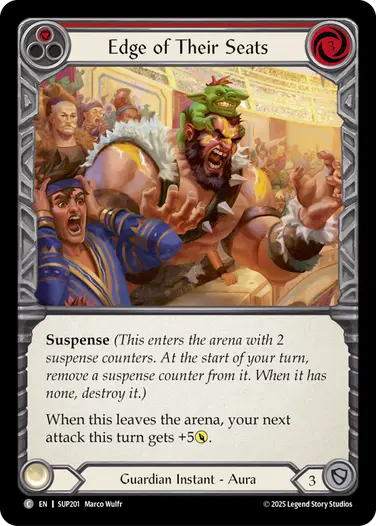
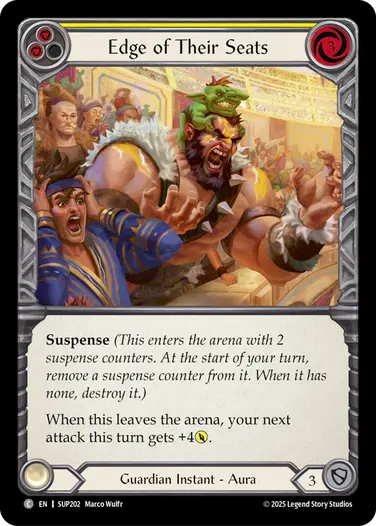
Pleiades, the Revered Guardian, can play the classic midrange games with the strong 3-cost Revered and Guardian attacks like Shoot Your Mouth Off. But Pleiades also gets to leverage the instant auras of suspense quite well, such as Edge of Their Seats, either playing it on the opponent’s turn and using her ability to make it pop right away like a classic pump, using it to fuel continuity auras like To Be Continued… or try to stack multiples of them up on one single turn powered by a Confidence token to make the opponent unable to use their cards well defensively. This flexibility in game plan makes her quite strong, and she has fewer natural blind spots than the other heroes.

grudge matches
Sideboards play an important role in this format, and a key to unlocking success is understanding how to use sideboarding strategies well. In Booster Draft you are fairly limited in sideboarding, and the strategies mostly rely on getting a few key tech options and weighing whether to spend early picks on them or wait for later. For Sealed Deck, the sideboards play a much larger and more dynamic role, as you have access to your entire pool. One obvious way that sideboards matter in the format is through the presence of hate cards like Bark Obscenities and Turn the Crowd Hateful. These cards are too weak to have in your deck against Brute and Reviled opponents respectively, but shine when they line up right. They can be worth considering around pick 4-6 over more broadly applicable alternatives.
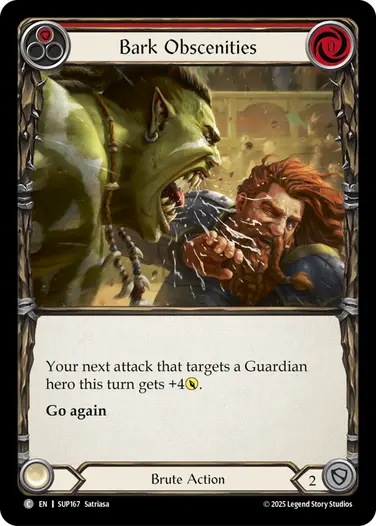

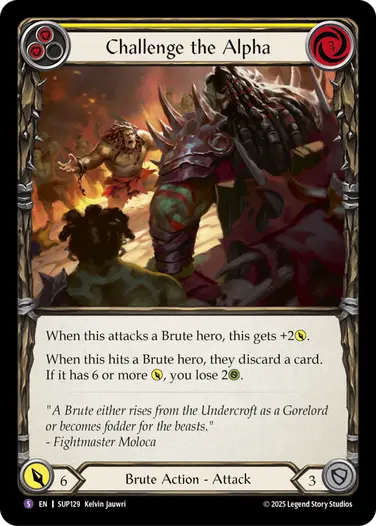
The best hate cards are the ones that are still playable into every hero. One big downside of Bark Obscenities is that it forces you to find a different card for your 30th playable, as you’d want to make sure you can always present 30 good cards in any matchup. But this doesn’t apply to cards like Turn the Crowd Grateful and Challenge the Alpha, which are good enough on rate to include even without their abilities, although nothing special. These cards are more safe to pick as sideboard cards you can take out of your deck if you find enough other playables, but aren’t required to.
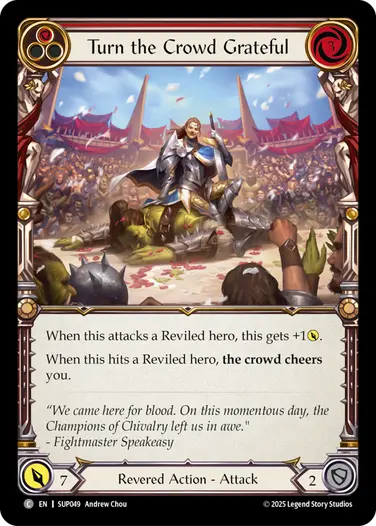
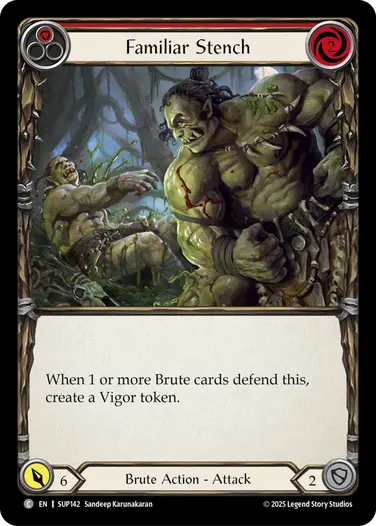
The less useful hate cards are the ones which are not good enough by themselves, but also don’t even have that profound of an effect in the right matchups. Even though this format is so flush with 3 for 7’s that only defending for 2 makes Turn the Crowd Grateful unexciting, the card is saved by how good it is against Reviled heroes. Familiar Stench on the other hand, isn’t even that impressive against Brute heroes, so it’s generally a much lower pick. It does gain a bit of value if you have already drafted a Bark Obscenities, as you’d only need to end up at 29 non-sideboard cards, since you can always safely include either Bark Obscenities or Familiar Stench in your deck, depending on opponent.
It’s also important to distinguish between hate cards that are just activated based on your opponent’s hero, and those that are activated because of their actions. Your Kayo opponent can just choose to not block Familiar Stench with any Brute cards as they might just have a Reviled card they’re just as happy to block with. This is also why Bark Obscenities is much better than Sit!, as the 2-defense block card can be quite awkward if your Tuffnut opponent just happens to send a Revered attack the turn you draw it.

Macro Strategies
Hate cards are not the only way that sideboarding matters in this format, because the heroes have clear macro strategies that line up into each other in a rock-paper-scissors type pattern. Macro strategies are the overall gameplans of the heroes, and for this set I’d divide them into three categories: Value Plays, Stacking Damage, and Going Wide.
Value Plays is the classic midrange Flesh and Blood style. Defend with two cards, use two cards on offense, win on incremental value over the course of a long game. Tuffnut plays this role the best with his constant Toughness generation.
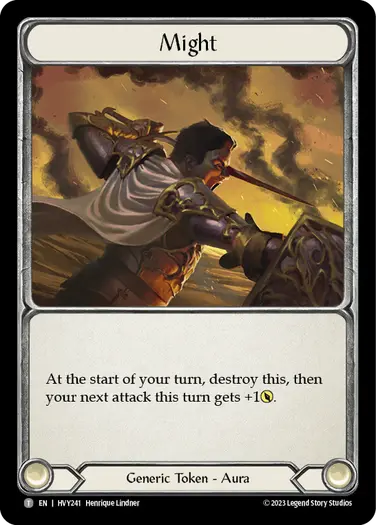
Stacking Damage is about giving up some average value per turn in order to concentrate your damage output in fewer, bigger turns. An off-turn, on-turn type of strategy. Lyath naturally wants to play this gameplan, with auras of suspense paying you off in two turns and Might tokens paying off next turn, you can sometimes pack three turns worth of damage into a single turn. The big payoff here is that your opponent doesn’t get to use their defending cards on your off-turns, either having to play with lower value or maybe even being unable to use all their cards. Then, on the on-turn of 24 damage, they won’t have nearly enough defending cards to cover up all the damage. For that reason, stacking damage lines up pretty well against value plays, and a good Lyath deck tends to be favored against the usual Tuffnut deck.
Going Wide is about building your deck with enough go again effects so that you can reliably spend your entire hand every turn without having to rely on blocking, even if slightly less efficient. Super Slam barely has any attack actions with go again, but you can achieve this with pumps. Kayo is especially good at this gameplan with the pump effects from the Reviled pool, combined with his hero ability that can also let him convert cards into damage. Not all Kayo decks are built like this, but the ones that are tend to line up well into Lyath, as he’ll be taking a full barrage of offense while setting up future turns. On the other hand, when you reliably convert your hand for 12 value on offense, you fall behind against Tuffnut, who gets to defend for 7 and attack for 7. So going wide tends to suffer against value plays, making Tuffnut come out ahead in that matchup more often than not.
Pleiades is mysteriously absent from this three-sided stand-off. I already described how her card-pool makes her more flexible than the other heroes, and this also applies to the macro strategies. This is all due to the auras of suspense. They mostly defend for 3, so she can do value plays totally fine, defending for 6 and attacking for 8. She can use the auras as pump spells to enable going wide, or use her hero ability to sync them up for a single turn of stacking damage.
Certain sideboard cards can let you shift your macro strategy slightly. In Booster Draft it’s not going to be a complete overhaul, but it’s not that uncommon to be able to sideboard 8 cards in Sealed Deck to change your strategy up entirely to be better positioned into your bad matchup.
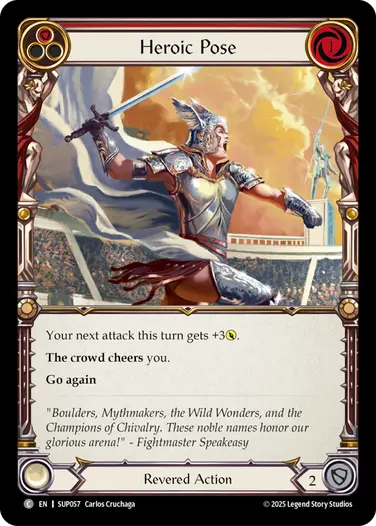
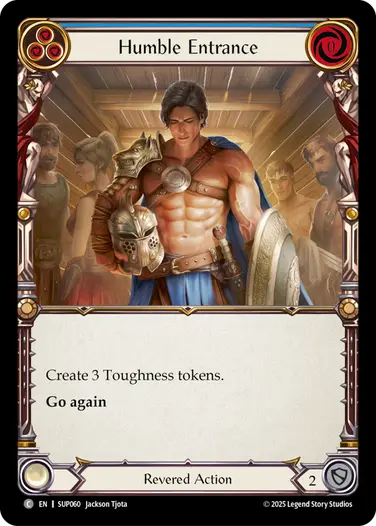
If you’re playing Tuffnut, it’s important to be able to lean more into going wide, since that helps cover up your blind spot into Lyath. Heroic Pose is a good example of a card you’d prefer not to have in your deck when your main game plan is good enough, but becomes great when you’re stuck with extra cards in hand because your opponent didn’t attack you. Bark Obscenities once again shines, not only as a hate card but also because it lines up with the strategic shift. And Humble Entrance can help you convert hands, lining up your Toughness tokens with the turn where your opponent’s auras of suspense will pop.
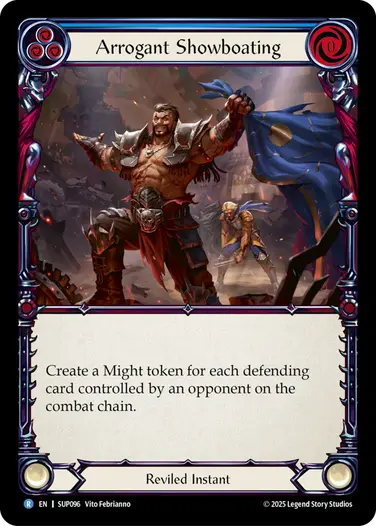
When Kayo needs help into Tuffnut, he needs to be able to stack damage better. The way to do this is through the Might generation from the Reviled card-pool. Bask in Your Own Greatness (yellow) may not have made the cut, but when your opponent has a Toughness token it doesn’t matter whether you attack for 3 or 4, and getting to save 3 Might tokens for next turn can be more important. Arrogant Showboating can be another tool to sit on, and try to line up with the turn where you are already making Might tokens. During your on-turn, you’d ideally want to be able to convert 5 cards on offense, combining with a stack of Might tokens from previous turns.

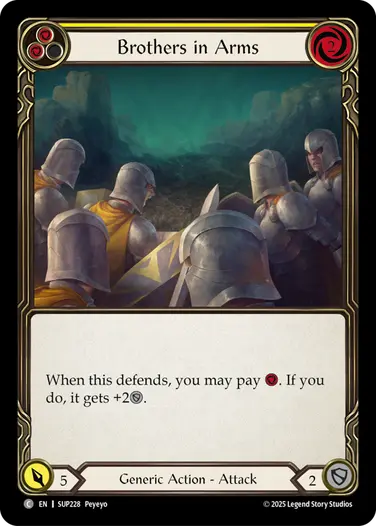
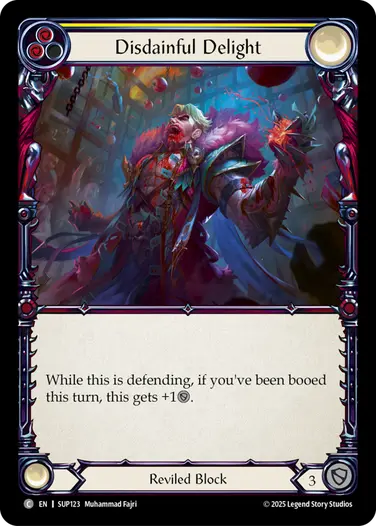
And for Lyath, when he is paired into Kayo, he should focus less on trying to stack damage and instead upping the defensive capabilities a bit to play a few more value turns. You will be using Lyath’s hero ability more often, so your weakest pumps can be trimmed for Brothers in Arms (yellow) and Disdainful Delight. You aren’t trying to fatigue Kayo with this strategy – Lyath will often end up fatiguing first – but you keep your life total higher to set up your power turns and leverage the value of 5 intellect over time.
Even Pleiades can use the same theory framework to slightly change the cards in her inventory, knowing the baseline strategy for each of the heroes. Understanding these concepts will help you out, not only when you sit down for your match but also when you’re at the draft table and need to plan ahead for what your deck needs to be able to do.
First or Second?
An often pondered question of the Flesh and Blood community. It should be noted that the baseline of wanting to go second has a lot of value to it and you’d need more than a good reason to justify going first. Making some Might tokens and getting a free arsenal would not make up for the advantage the player going second has.
The Tuffnut mirror will frequently come down to raw fatigue battles, and getting to go first means you get first dip at exchanging one of your big attacks for two of their defending cards, and so that usually has more value than going second – plus your opponent might not be able to spend their entire hand on their first turn anyways.
Auras of suspense like Edge of Their Seats play an interesting role in this dynamic. They are great to play on turn 0, adding 5 additional guaranteed value to your turn. But they can also be played at instant speed on the opponent’s turn 0, so they arguably are even more backbreaking in the opening hand when going second.
Lyath specifically might prefer the extra free turn of setup, as going first allows him to time multiple auras of suspense to go off at the same time. If you play an aura on your turn 0, then draw another in your next hand and play it on your opponents turn, they will both sit at 2 suspense counters and be ready to go at the same time. If you play an aura during your opponent’s turn 0 and then draw another one to play on your turn, they will be out of sync. So an aura heavy Lyath build would want to go first, except into Kayo (where you want to lean less on stacking damage, as described above).
Drafting Super Slam
Quick Hits
- Super Slam is a 2 class 2 talent set like Rosetta, where most cards go in one of two heroes.
- If you draft a set by getting deep into only one class/talent you may run into trouble, as the two heroes ask for you to prioritize different things.
- When you do start out your draft with the same class/talent, make sure you keep an eye out for synergistic roleplayer cards that you can speculate on, rather than just staying open to both options.
- Even the Generics are not for everyone, as most Generic cards are only really playable by three of the four heroes.
- The Reviled card-pool is an exception to this, as most cards are playable by both heroes.
- Equipment is highly important to prioritize.
- The top picks lists shows cards that are safe to pick early, as they go well with both of the heroes that can play them.
The importance of sideboard cards also throws a bit of a curveball at the draft format. Normally you’re aiming to get exactly 30 playables and it’s not very important to go above that number, since you can only register 30 anyways. But if you want a few sideboard options as well as good equipment, you’ve got a higher bar to clear, and it becomes more important to end up with the right hero for your seat and figure it out early enough to benefit.
You can still force a hero from the start like in any Flesh and Blood Booster Draft, with the upsides and downsides that comes with that strategy. If you do just force, this section might not be too relevant, but Super Slam can be a good set to learn how to pick up new skills, such as speculation picks and being flexible between your options.
I want to break down the set structure before I go into what I believe to be a good drafting strategy for this set and what the premium early picks are.
Token Structure
Four token types are present in this set, and they’re divided in a clean way. Revered makes Toughness, Reviled makes Might, Brute makes Vigor, and Guardian makes Confidence. The first three tokens often convert to a point each, though with Vigor you’ll have to actually use the resource to capitalize on that point of value. Toughness is also not guaranteed value, as you might end up over-defending, or even face an opponent who won’t attack at all into your Toughness tokens.
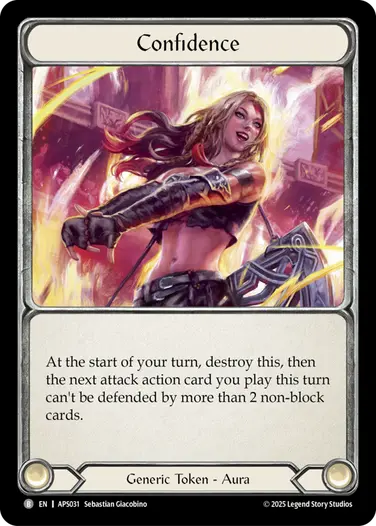
Confidence is a different matter entirely, as these tokens don’t do anything additional in multiples, and also can’t be neatly translated to a point value. They do stop your opponent from defending with equipment if they also want to defend with cards from hand, so Confidence can start virtually guaranteeing on-hit effects of attacks with 7 or more power. Most likely, you’ll only do a couple of Confidence-enhanced attacks per game, but it can be a good way to finish off an opponent who lets themselves get too low. When playing against Pleiades specifically, it can also be good to defend with your equipment earlier than you’re used to, because she might prevent them from defending later on.
Pack Structure
Each pack of Super Slam contains a Rare and a Rare or higher slot. Each pack also contains exactly one equipment, which means each player on average gets three equipment, so they need to be high priority – getting all four is a privilege you have to fight for. There’s also one Generic Common in each pack, and one random foil.
There are nine slots for the class and talent Commons. The vast majority of packs will have two of each, and then the ninth slot is a random extra class or talent Common. An example breakdown could be 2 Revered, 2 Reviled, 3 Brute, 2 Guardian. I have seen packs with only one Reviled card and an extra Revered card, so this breakdown isn’t a full guarantee. The breakdown means that if you get passed a pack with only eight non-foil class and talent Commons, and only one of them is Reviled, you can be reasonably certain that a Reviled card was taken out of the pack. You can use this information to help guide your draft, and also to send signals to the people you’re passing to.
Set Structure
On the surface, Super Slam is built with the same recipe as Rosetta: two classes, two talents. A 2 x 2 matrix. In most sets, the majority of cards will be class cards that can only go in one hero. But here in Super Slam, most of the cards will be either class cards (Guardian or Brute) or talent cards (Revered or Reviled) and each of those cards will have two heroes that can play them. There is also a small amount of Generic cards, and an even smaller selection of cards at Rare and Super Rare that have both a class and talent and go into one specific hero, like Old Leather and Vim. I will refer to these cards as specialization cards, even though they aren’t actually specialization keyworded, they effectively function as specialization cards.
Modern age Flesh and Blood Booster Draft sets are grouped into three categories, based on the patterns of cards that can go into more than one hero: Rectangle, Hotpot, and Hybrid. These distinctions help us understand how we can stay open during the draft. Super Slam is a Rectangle set because the class and talent cards are each split between two heroes.
Hotpot sets have all the heroes share the same class and/or talent so the card-pool has a large number of cards playable by all heroes, like Pirate cards in High Seas, or Mystic cards in Part the Mistveil.
Hybrid sets primarily have class cards that are only playable by one hero, but the set is bound together by hybrid or talent cards that can be played by two of the three heroes rather than all of them, such as Assassin/Ninja cards in The Hunted, or Ice cards in Tales of Aria.
Draft Navigation in a Rectangle Set
Normally when drafting, the decisions often boil down to whether you should pick the stronger class card that can only go in one hero or pick the weaker hybrid or shared talent card that can go in multiple heroes. But with Rectangle sets, there are no (or at least very few) cards that only go in one hero, so each pick is always keeping you somewhat open. If you first pick a Brute card and second pick a Reviled card, you could be looking to be in Kayo, and it will be your most likely hero at that point, but you don’t need to commit to that. You could still give up your first pick and end in Lyath, give up your second pick and end in Tuffnut, or even give up both and play Pleiades.
The further you get into the draft, the more information you’ll have on which directions to go. If you keep picking Brute and Reviled cards, it’s going to be hard to flex out of Kayo and your Pleiades path is certainly closed, but the upside is that you’ll have a strong foundation for a deck where you won’t need to give up any early picks. Compare this with a draft where your first four picks are of four different types. In that case you know you’ll have to give up two of the cards in the end, but you are also guaranteed to have two good cards for whichever hero turns out to be the best for your seat.
The usual strategy for Rectangle sets is to keep picking the same class or talent for the first six or so picks and then later decide which direction to go. I don’t think this is bad advice for the first few picks of Super Slam, but the set is uniquely different from Rosetta in the way that the synergy demands of each hero is so varied.
For example, I’ve found that starting your draft with eight Brute cards poses a problem, because Kayo wants to play with high blue counts while Tuffnut wants a low blue count. Pack 1, pick 6, you might be deciding between Flex Strength (blue) and Give ‘Em a Piece of Your Mind (yellow). One is actively good in Kayo and quite mediocre in Tuffnut, and vice versa. This means that it’s usually unreliable to make picks that are good in two different heroes for very long, even if their shared class is open to your seat.


Instead I’d recommend picking the strong class/talent cards that do go in multiple heroes early, for the first four or so picks, and then during the next four picks keep your eyes open for synergy enablers that you can speculate on.
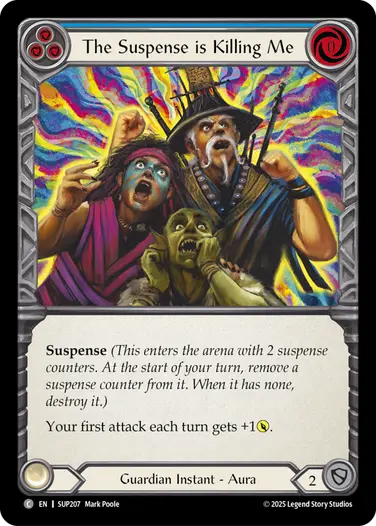
Speculation is a draft theory term that means picking a card that you don’t necessarily intend to play and don’t mind giving up, but would be powerful in a certain strategy, essentially opening up that strategy to you. After speculating on a powerful Pleiades card like The Suspense is Killing Me you can continue to draft as if you’re not locked into Pleiades. But if more pieces come to you that makes Pleiades look like a strong option, then you’d be glad that you picked up that important piece rather than a more flexible but ultimately replaceable option.
In order to execute this draft strategy, it’s important to be aware of which cards fit well into multiple heroes and which ones are important synergy enablers. I’ll go over each class and talent here and lay out their top picks in Common and Rare that should be safe to take early, then go into the hero specific synergies in their own sections. First, I’ll start with the equipment and the Generic cards.
Equipment
The equipment in this set fall into three different categories: The four Generic ones, the six class/talent ones, and the four specializations. Since there isn’t much equipment in this set, most of them end up being high picks, and so I wanted to cover them in this section rather than having to litter up my top picks lists with equipment.
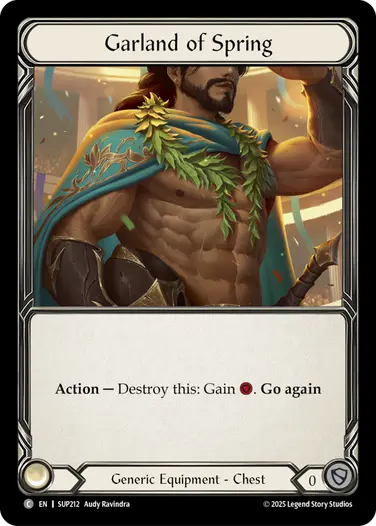
Garland of Spring is the best one of these to pick early, partly because of its flexibility and partly because of how strong a resource on demand can be for saving or elevating a turn. I believe this card is one of best early picks you can make as a strong generic that actually keeps all your options open.
Helm of the Adored and Horns of the Despised are also in the same group of absolute premium equipment. In Tuffnut and Lyath, they convert to 2 points of value each which is already great, but in Kayo it can be game changing to have access to a Vigor on the turn you need it and likewise for Pleiades getting a Confidence on demand for your big turn. Additionally, being cheered or booed on the opponent’s turn enables a few effects, like Darling of the Crowd. I believe both of these are great early picks as well.
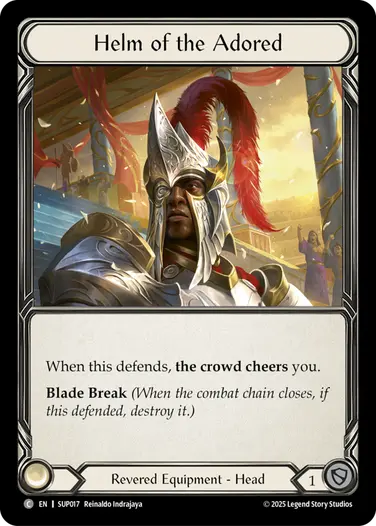

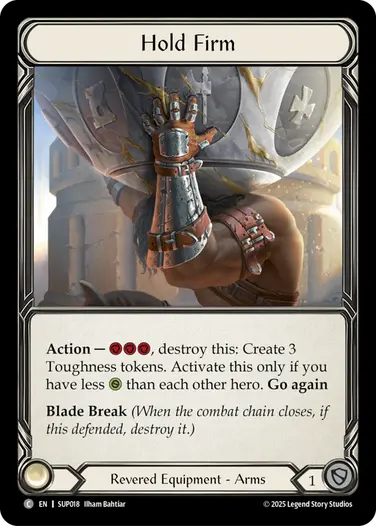
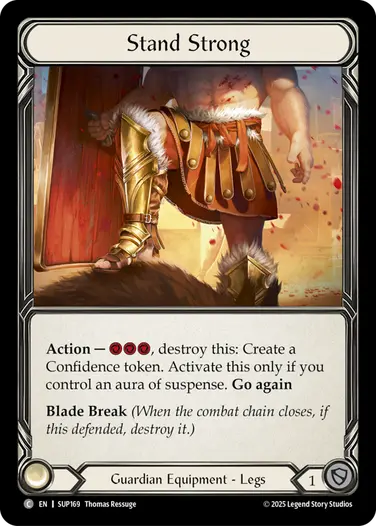
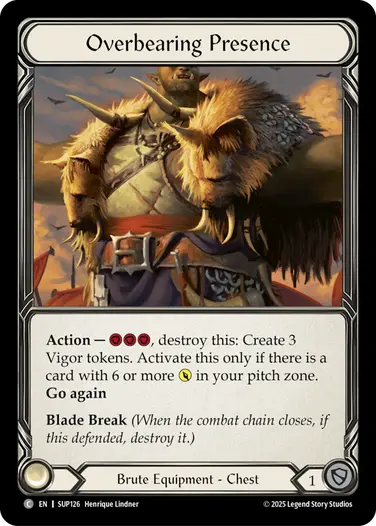
The rest of the class/talent equipment, Hold Firm, Stand Strong, Overbearing Presence, and Mightybone Knuckles are mostly just defensive Blade Break equipment. That’s still quite valuable, and I do believe these to be nice to snatch up in the first few picks even if they’re not as powerful as the hats. They also do have some utility that I’ll cover later.
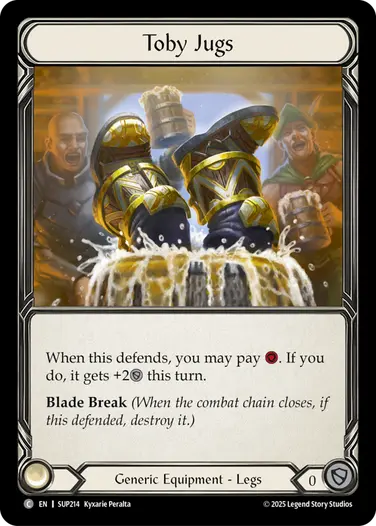
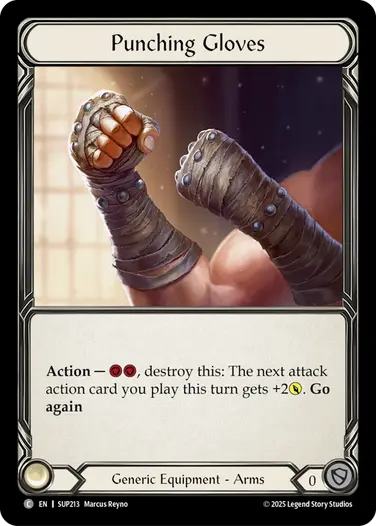
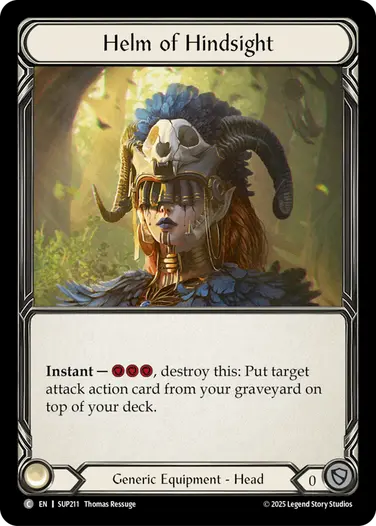
The Generic equipment varies a lot in usefulness. Toby Jugs has quite a few applications that I’ll cover in the next section. Punching Gloves is a card to pick up in the middle of the pack. The ability may not look that strong, but it can help you out on hands where you need to convert for damage or sometimes help enable cards like Flex Strength (red). Helm of Hindsight is one you pick up at the end of the pack. Getting your best card back can be useful in games that go late, but any game that revolves around tempo will punish you too much for spending a card on this effect. Do note if your opponent has Unexpected Backhand in their graveyard, you should try not to go to 1 life against them if they have this equipped!
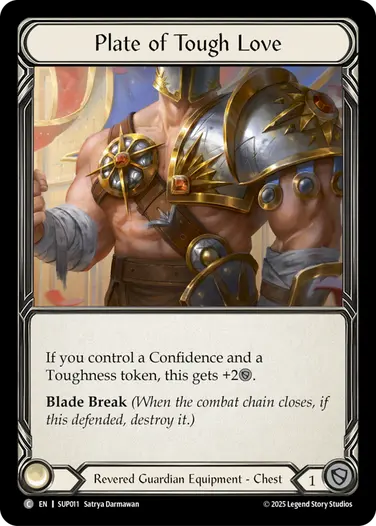
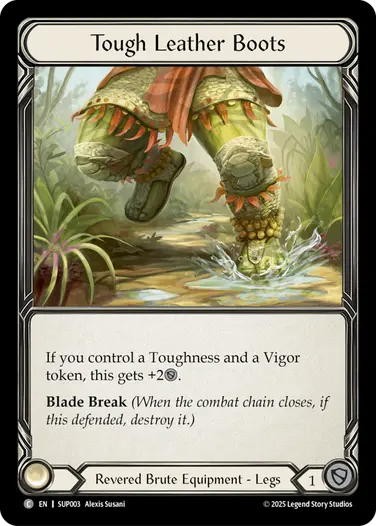
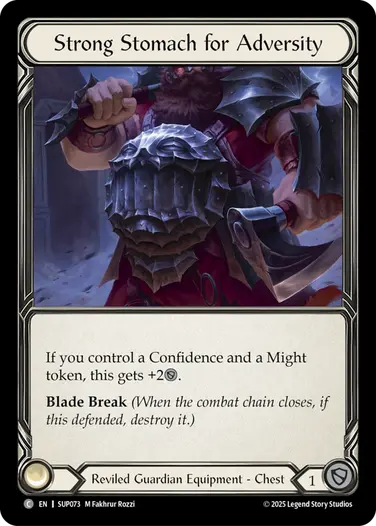
Finally the specialization equipment, Plate of Tough Love, Tough Leather Boots, Strong Stomach for Adversity, and Laughing Knee-Slappers. These have the potential to defend for 3, but can only be played by one hero so they are more risky picks. I believe these are not as high picks as the class/talent ones, but can be nice options for speculation around pick 4-8. The trickiest thing about them is that it isn’t trivial to enable them. Toughness tokens break at the start of the opponents turn, so you need to create one during their turn if you want to enable Tough Leather Boots or Plate of Tough Love. There also aren’t many cards that make Confidence in Lyath to enable Strong Stomach for Adversity. Only Laughing Knee-Slappers is relatively easy to enable, and for that reason it’s a higher pick that you can speculate on a bit earlier.
Top Generic Commons and rares
- Garland of Spring
- Chest Puff
- Punch Above Your Weight (red)
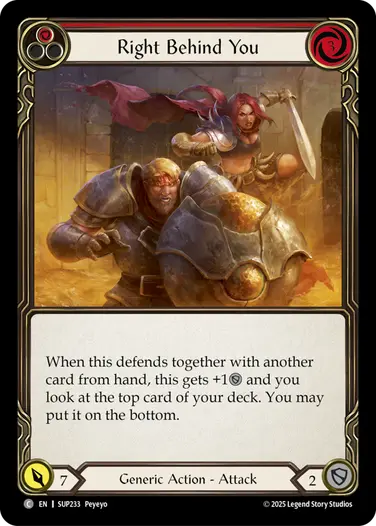
- Right Behind You (red)
- Toby Jugs
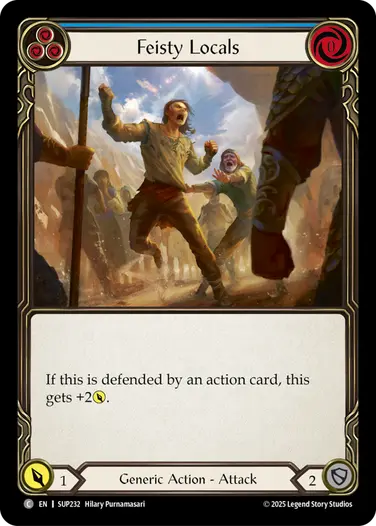
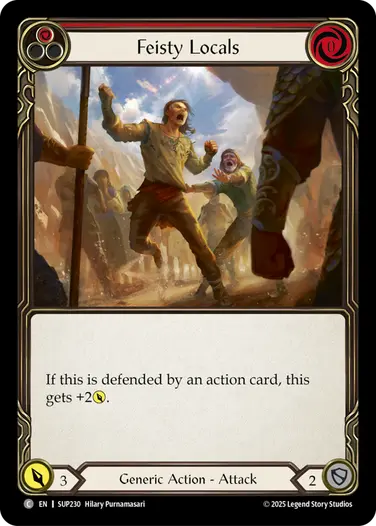
- Feisty Locals (red)
- Prime the Crowd (red)
Normally the Generics are the safest early picks, able to go in any hero. But that’s actually not the case in this set, as the synergy demands also restrict the Generic cards.
The “-uff” friends, Bluster Buff, Chest Puff, and Look Tuff, are amazing early picks too. They defend for 3 and are flexible on curve, so they can often easily fit whatever you need them to do. But Lyath is not interested. His power-halving ability makes them downright awful power-per-resource ratio. They are still great early picks going into three different heroes, but this is just one example of how Generic cards can be restricted.

The rest of the Generics are not as strong but can still be picked out of weak packs. Punch Above Your Weight (red) is a 3 for 7 that is totally reasonable in Lyath (where it’s a 3 for 6), and it even has the flexibility of being played for 0 if you need to, can be pumped by Kayo’s ability, etc. But Tuffnut is not super happy about having this card in his deck. It’s a red card that defends for 2, doesn’t have go again, and doesn’t trigger his hero power.
Toby Jugs is an unassuming equipment, but it’s specifically good with Lyath’s hero power, which leaves a resource floating on the opponents turn. Pleiades can use it alongside Tension in the Air, and Tuffnut can use it with his hero power in spots where you don’t want to risk bricking your turn by hitting a red card from the top. But Kayo, he can’t get much value from this equipment. Blocking with it is not any better than just blocking with the card you pitch to it, except for setting up your late game which is not really worth an early pick.
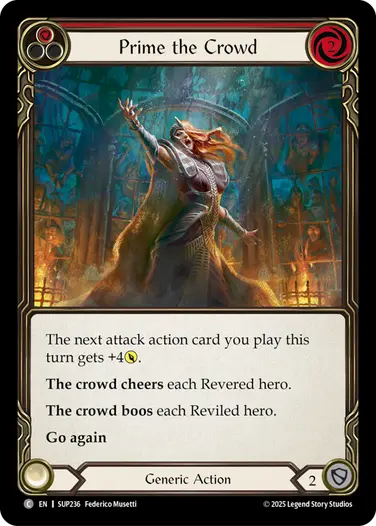
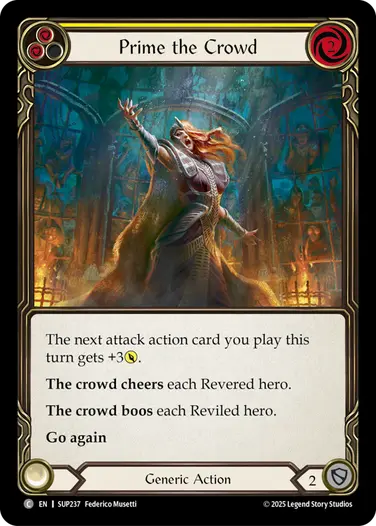
And finally Prime the Crowd (red) does good things for Lyath, works in some Kayo decks that care about pumps, and can even be the sideboard option that Tuffnut craves to better go wide. But in Pleiades, her Confidence token is not of as much value as the token you’ll give the opponent, and she isn’t really interested in this type of pump when she could just play auras.
At this point it should be clear to see how so many of the cards in the set come with stipulations and restrictions. The more you know these hidden rules of the cards you draft, the better you can steer into a direction that gets the most out of them.
Top Revered Commons and Rares
- Helm of the Adored
- Comeback Kid (red)
- Hold Firm
- Turn the Crowd Grateful (red)
- Comeback Kid (yellow)
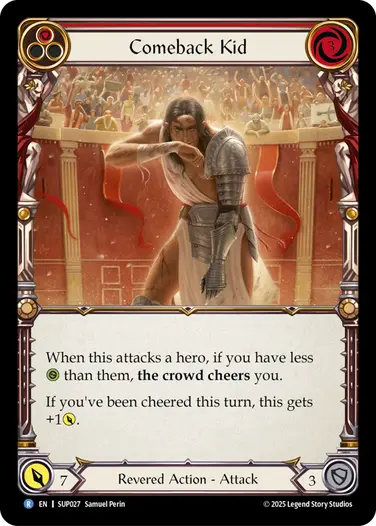
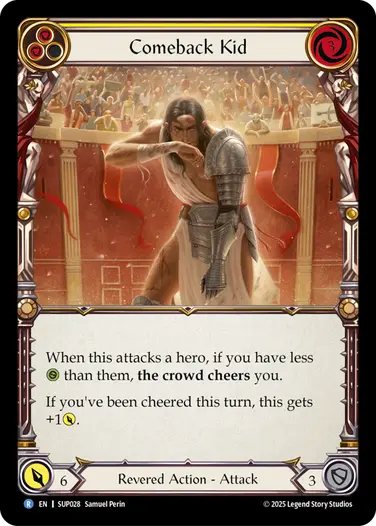
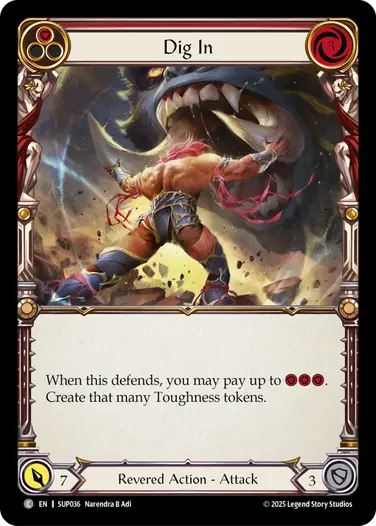
- Dig In (red)
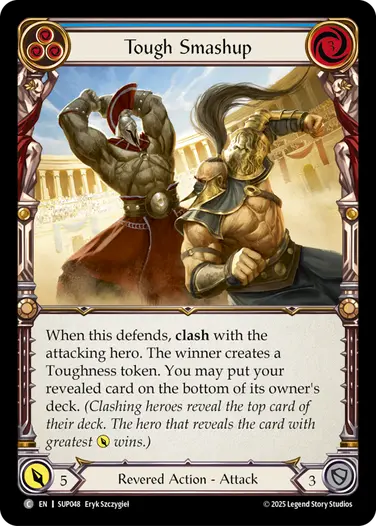
The list of Revered Commons and Rares include a lot of variations of 3 for 7’s, and they are honestly mostly interchangeable. Comeback Kid (red) stands out above the rest. In Tuffnut where it also makes a Toughness token, it’s even a 3 for 9! The ones not listed are Tough Smashup (red), Disembody, and Rapturous Applause (red), and they are all reasonable early picks. Pleiades wants a ton of 3-cost attacks and Tuffnut doesn’t mind 3-block good value attacks.
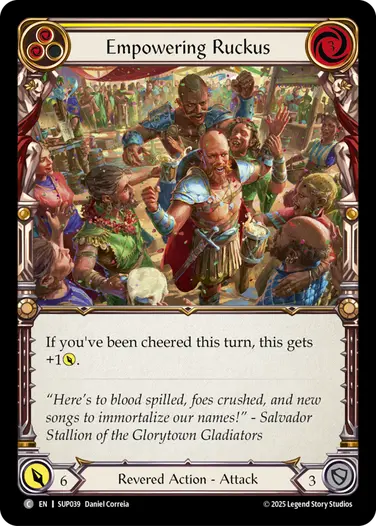
The biggest issue with starting your draft with 3-4 of these types of cards is that Tuffnut does have a limit on red 3 for 7’s before he starts to prefer yellow 6-power attacks instead. The yellow ones aren’t all that bad in Pleiades anyways, just as yellows with 3 defense, so after you’ve picked a few red ones it would be good to look out for yellow 6-power attacks instead if you want to stay in Revered. Comeback Kid (yellow) is a tier above the rest, but otherwise I think Empowering Ruckus is the best one, as it acts like a 3 for 7 when you play it in Tuffnut. It also only comes in yellow.
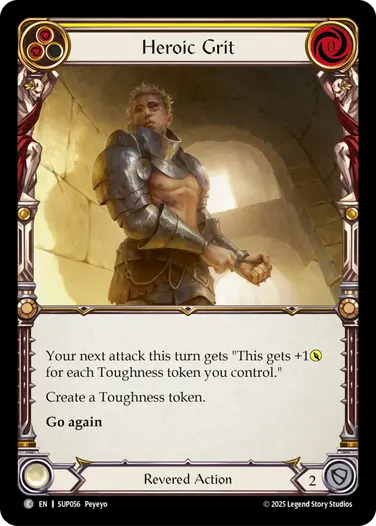
Heroic Grit is another interesting card to pay attention to for picks 5-8 if you have a Revered heavy start, especially if you have a Hold Firm already. In Tuffnut it’s another one of those important sideboard pumps (but one that he can happily play against everyone since it’s yellow), and for Pleiades it enables a whole sub-archetype that I will cover more in detail in her section.
Once you know your direction between Tuffnut and Pleiades you can start to prioritize the cards differently. Yellow 6-powers and 2-cost attacks for Tuffnut, blue 3-blocks for Pleiades.
Top Reviled Commons and Rares
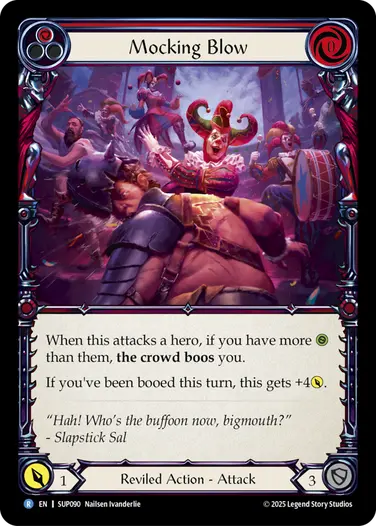
- Mocking Blow (red)
- Horns of the Despised
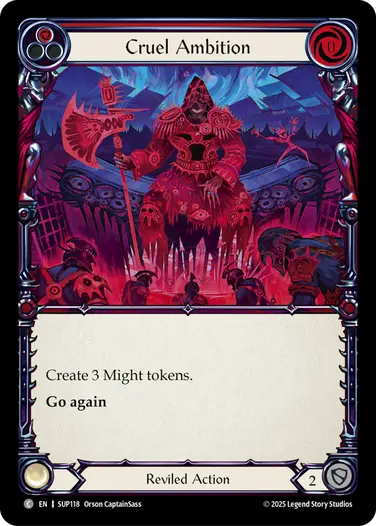
- Cruel Ambition
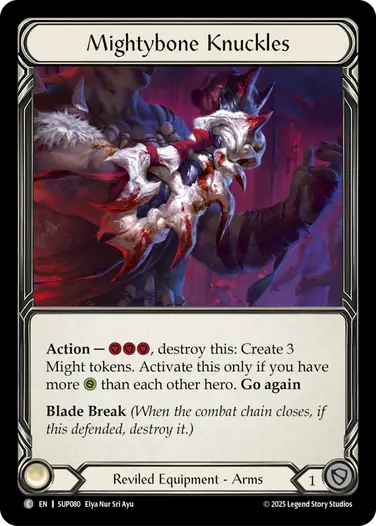
- Mightybone Knuckles
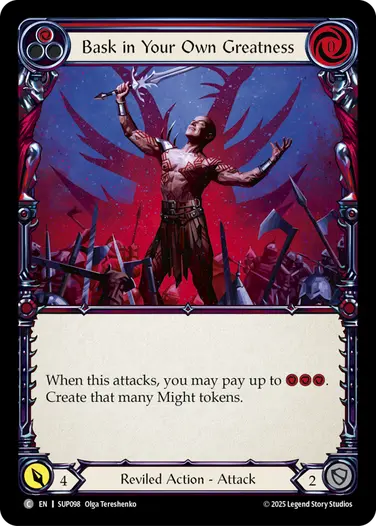
- Bask in Your Own Greatness (red)
- Mocking Blow (blue)
Reviled is the easiest class or talent to go deep into, because both Kayo and Lyath are interested in many of these same cards the talent has to offer, and they both want a high blue count, so their priorities are similar.
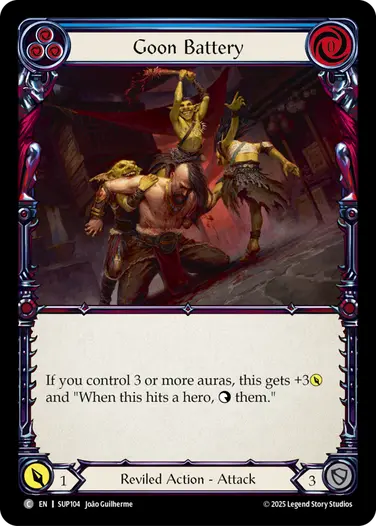
Mocking Blow (red) is an amazing card that is enabled well in both heroes. It dodges the downside of Lyath’s ability, and can be cleanly pumped by Kayo. Both heroes also want cheap 3-defense blue attacks, and for that reason even the blue version is quite a high pick. You wouldn’t have to go much further down the list before we’d reach the best blue Reviled Common which I believe to be Goon Beatdown, as there is just so much demand for this type of attack action in blue for both Reviled heroes.
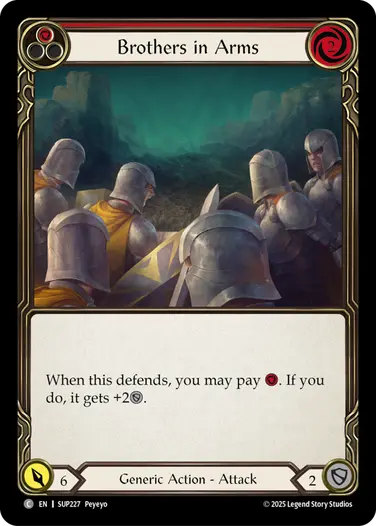
Cruel Ambition may be a bit of a surprise to have this high, and it also took me a while to realize that it’s this good. The main appeal of this card is that it’s an on-rate go again effect enabler as well as a way to stack damage, an excellent card to have on turn 0, and one of the few enablers for Goon Beatdown, Goon Battery, and Goon Tactics, which are all premium blue cards. It’s such a unique effect that I believe it should be taken highly, and you are probably not unhappy to have 3 copies in your deck. Mightybone Knuckles is another way to enable the Goons, although much less reliable as it’s not easy to keep yourself at a higher life than your opponent.

Bask in your Own Greatness (red) does a similar thing, but not having go again means it doesn’t quite fulfill the same role. Instead, you can view this as a 3 for 7 that has a ton of flexibility, as it can also be a 2 for 6, 1 for 5, or 0 for 4, depending on how many resources you have available. It’s not as good in Lyath as it is in Kayo, but it’s still a serviceable card. It’s actually possible that the blue copy is just a higher pick than the red one, as it fits perfectly into what both Reviled heroes want to do with it, and is a fairly flexible card. Don’t overlook Bask In Your Own Greatness (blue)!
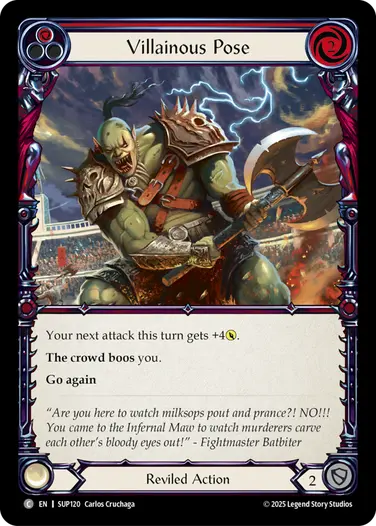
Lastly I should mention Villainous Pose (red), which also fits into both heroes, as well as its best friend Low Blow. These cards get better the more you have of each of them, as they perfectly line up with a blue and enable each other.
The Reviled card-pool is fairly deep, and it’s not a bad position if your draft just starts out with eight good Reviled cards, as they’d presumably go equally fine in either hero. Just make sure to have started picking up some blue cards along the way, as both heroes are blue hungry. The biggest issue with this start is that Lyath would be missing Guardian auras, and Kayo would be missing big Brute attacks, so make sure that you still speculate on those key Guardian and Brute cards if you see them pick 5-8.
Top Brute Commons and Rares
- Vigorous Smashup (red)
- Overbearing Presence
- Vigorous Roar
- Strongest Survive (red)
- Bark Obscenities
The biggest issue separating the two Brutes is their vast difference in demands for blue cards. Kayo would like to have 16 blues while Tuffnut would prefer to not have much more than 4. This discrepancy makes it awkward to go deep into Brute without choosing one hero over the other, as Kayo would need to start picking blue cards in the pick 4-8 range, whereas Tuffnut would like to not waste those picks on blue cards, otherwise he could end up with too many of them.
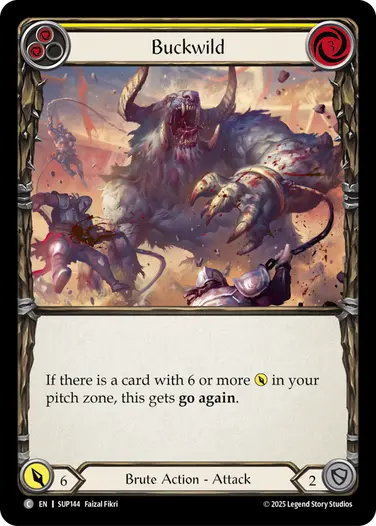
There are some Brute cards you can pick early that go well into both heroes. Vigorous Smashup in all colors is great in Tuffnut as a way to reduce variance, and Kayo does want some 3 for 7’s, which is why I have Vigorous Smashup (red) valued so highly. Strongest Survive (red) is another powerful attack action, though it’s usually only really impressive when combined with a pump. The other two 3 for 7’s, Unexpected Backhand (red) and Buckwild (red), are also fine early picks. Kayo cares a bit less about Buckwild because it’s a 2-defense and hard to enable in his decks, but Tuffnut cares more about having access to it for a potential go wide turn.


The pumps, Vigorous Roar and Bark Obscenities, are also high priorities in my estimation. Vigorous Roar is rarely going to make a Vigor token in Kayo, but it’s just an extra 3-power go again for him. In Tuffnut, the card is excellent! I’ve already sung the praises for Bark Obscenities, though I will note that I have seen enough times where Brute was so contested that this had to be included in the deck to reach 30 playables against everyone. So if Brutes are more popular than Guardians at your local drafts, you’d need to rank this one lower.
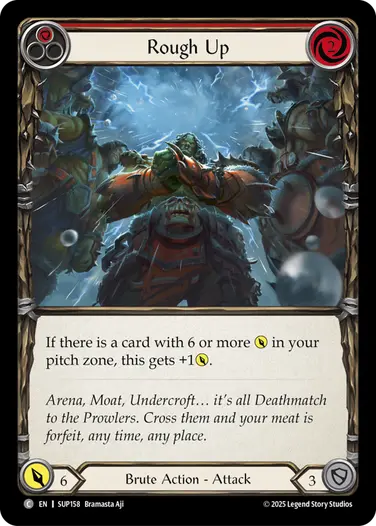
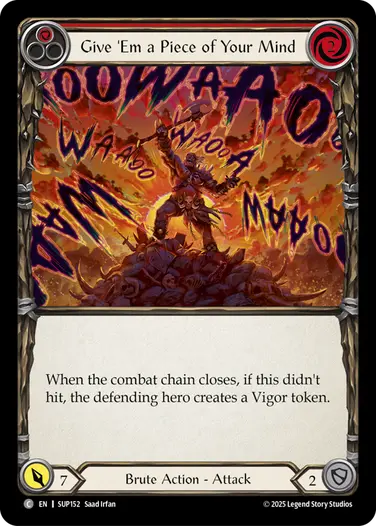
The attacks that care about having 6-power in pitch fit so much better with Tuffnut. High Pitched Howl (red) and Rough Up (red) are both amazing in that hero, but in Kayo they’re just vanilla attacks. Still, they are on rate and defend for 3, so not the worst ones to pick up while you’re still unsure which direction to go. Give ‘Em a Piece of Your Mind (red) is another one that is fine in Kayo, but better in Tuffnut.
Because of these differences, I wouldn’t recommend going deep into Brute, but it’s totally fine to pick up a few of these types of cards early. You will soon have to start speculating, as you have to decide between blue 3-defense cards for Kayo or yellow 6-powers for Tuffnut. Even the red cards diverge quickly, with Flex Strength (red) being great in Kayo and borderline unplayable in Tuffnut.
Top Guardian Commons and Rares
- Edge of Their Seats (red)
- Power Play (red)
- Stand Strong
- Power Play (blue)
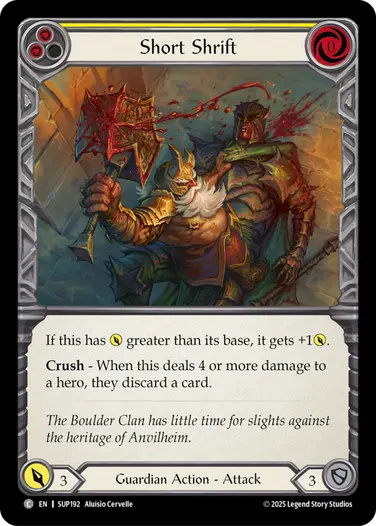
- Short Shrift
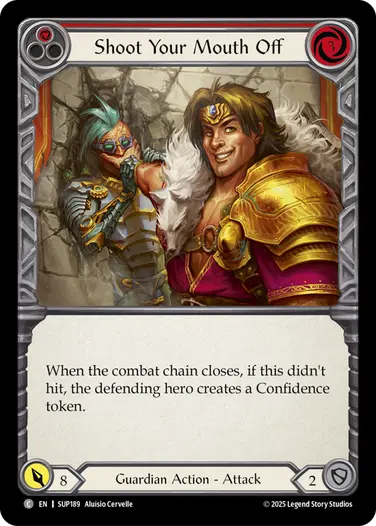
Guardian is the pool with the least overlap between its two heroes. Many of the Guardian Commons and Rares are 2-defense 3 for 7’s which Lyath has absolutely no interest in. This means you can’t pick any of those cards highly, because even though Shoot Your Mouth Off (red) is a strong card, it’s essentially a Pleiades specialization too.
There are two cards that go perfectly well into either hero, and so I believe those are the best reasons to get into Guardian: Edge of Their Seats (red) and Power Play (red).
I want to talk a bit about the auras of suspense. I believe they are crucial to either hero, though unintuitively more important to Lyath than Pleiades. They offer a lot of flexibility, being 3-defense cards that don’t take up an action point, and give you some optionality with when to time them, as well as allowing you to stack damage. That said, they are also under rate (normally you’d expect a 6-power pump for 3 resources). Additionally, when you play them on the opponent’s turn it’s hard to use the floating resources.
Edge of Their Seats excels because it costs exactly 3, so it doesn’t leave any value on the table and doesn’t ask for anything extra. Tension in the Air (red) is a fine card as well, but unless you pair it with Toby Jugs in your Pleiades deck, it’s just going to be a full point lower than Edge of Their Seats (red). Act of Glory (red) is actually not great in Pleiades because she has such a hard time spending 2 resources that it often just costs a full card more than Edge of Their Seats. Lyath can be a lot more forgiving with these costs, as his 5 intellect and differences in costs on the cards in his deck makes it easier to weave in the auras. He can even spend the 2 resources left over from playing Act of Glory easily with his hero ability! This means that Tension in the Air tends to be better for Pleiades and Act of Glory tends to be better for Lyath, but neither are as high a pick as Edge of Their Seats. This is a card you can safely first pick.

It’s also worth noting with these instant auras that they are not action cards. This matters mostly on defense, but they will not gain defense value from Lyath’s hero power, Toughness tokens, or Dramatic Pause. They will also not buff Feisty Locals when blocking, so there is some upside too.
Power Play is a 3 for 8 in Pleiades that even defends for 3, and it plays beautifully around Lyath’s restriction, allowing him to access a 3 for 7. Even the blue copy is a premium card for Lyath and just a regular good blue for Pleiades, so I have them both ranked quite highly. The fact that so many of the Guardian cards are not wanted by both heroes makes me value the ones that are playable in both much higher.


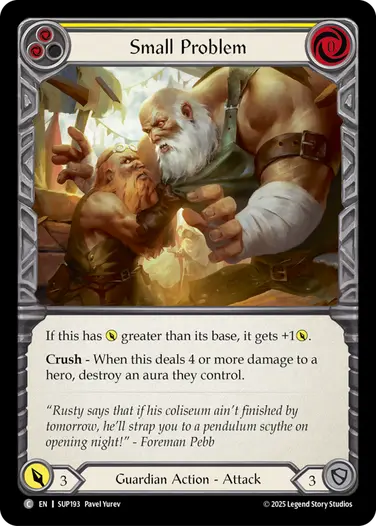
I also want to talk about the short kings, this new style of Guardian attack actions: Short Shrift, Small Problem, and Wee Wrecking Ball. I love that Guardian design space is being expanded to include cards like these, and I think they’re nice roleplayers in the format but nothing amazing. They are totally justifiable attacks in Lyath, and I’ve also found that my aura heavy Pleiades decks like to run a couple of these so you can send an efficient 1-card attack to go with your auras. It’s often not that hard for an opponent to block out the crush effect, but when combined with enough pumps and Confidence, they can be devastating. Short Shrift is the best one of these with the most reliably impactful crush effect, but they are all somewhat similar in value and good to keep an eye out for picks 4-6.
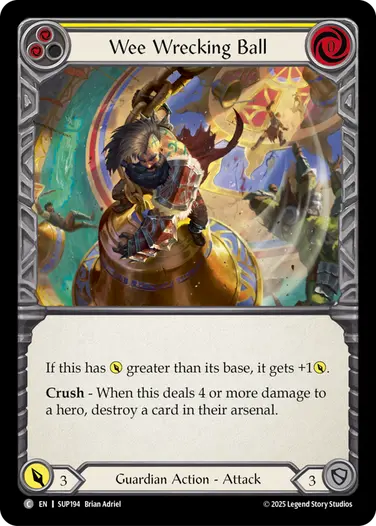
Another reason why Power Play and short kings are so high on my Guardian pick order list is that they’re the only action 3-defense cards in Guardian, to enable Dramatic Pause (red). I think this card is nice in some Pleiades builds that aim to move counters around, and serviceable in Lyath too. Just don’t touch the yellow and blue versions of it. The main issue is that it needs help from your Revered or Reviled cards, because most of the Guardian cards are either 2-defense or instants.
Once you get a handful of picks into the draft, if you started Guardian, it’s time to look for some direction. Act of Glory in both red and yellow are good in Lyath while Pleiades likes the continuity auras To Be Continued… and The Suspense is Killing Me, as well as the big attacks like Shoot Your Mouth Off (red) and Story Beats (red). I would also recommend picking up blue 3-blocks here, which are just Power Play and the pump auras, as they can do well in both heroes.

Tuffnut
Quick Hits
- Tuffnut wants to run around 10 yellow 6-power attacks, and support them with plenty of red 2-cost attacks.
- You reduce variance through clash cards, Vigor tokens, and playing to keep two good attacks in your hand so you can always pitch one to play the other in case Tuffnut hits a red card off the top.
- Access go again through Buckwild, pump actions, and Punching Gloves.
- Make sure that you start speculating on yellow 6’s around pick 5-6 if you haven’t already, as it’s tough to move into this hero if you don’t have at least a couple of them after pack 1.
He may seem like a bit of a simpleton on the surface, but building and piloting a Tuffnut deck can be rather tricky. It’s so rewarding when it comes together, a smoothly running fatigue deck, out-valuing opponents turn after turn.
The main reason he plays well as a fatigue hero is that his Toughness generation pushes for the game to go longer, and when the game does go longer his card quality will outmatch the opponent. Normally the way you’d want to have a good late game is by finding ways to pitch red cards efficiently so you can draw them in your second cycle. Tuffnut does this automatically with his hero ability, making sure you have powerful attacks available into the second and third cycle.
The trickiest thing about him is the inherent variance. His hero ability essentially replaces the missing point of intellect, and it’s worth a full pitch card, but the issue is that you won’t know which color of card you’re pitching from the top. An initial assumption might be that you want to play a ton of resource cards and very few reds, but that way you’ll only end up with a deck that has to send underpowered attacks and often doesn’t even trigger his hero ability.
Instead, you want to play a bunch of red and yellow cards which will let you generate Toughness on most turns, and look for other ways to minimize variance.
Minimizing Variance
There are a number of ways embedded in the set to reduce variance. The worst scenario that can happen is when you have two red 3-cost cards in hand, activate Tuffnut and hit another red, then sheepishly have to pass the turn because you can’t play anything. That’s why Tuffnut naturally wants to limit the amount of red 3-cost attacks he plays, and why it can be dangerous to start your draft with too many red 3 for 7’s if you want to have a shot at ending up in Tuffnut.
The most natural way you can reduce variance is by including cards of different costs and try to leave yourself with a 2-cost card and a 3-cost card available for your turn. That way, if you hit a red you can still pitch your 3-cost to play the 2-cost for an inefficient but not disastrous turn. If you hit a yellow you can play the 2-cost, and if you hit a blue you can play the 3-cost and save the 2-cost attack in your arsenal for a future turn to do the same trick again.
There are also ways of actively looking at the top card of your deck and changing it, with Right Behind You, Tough Smashup, and Vigorous Smashup. These cards tend to perform well, and are the most acceptable blue cards to run as you will just want to block with your blue cards when you draw them anyways. Clashing is especially fruitful in Tuffnut where your deck is full of high-powered attacks, so they conveniently work in a way where they both let you manipulate your top card and also give you extra value on top of that. Your deck will even include some number of Unexpected Backhand (yellow) and Rapturous Applause (yellow) for some additional value on these clashes.


The most reliable way to reduce variance is through Vigor tokens and 2-cost attacks. When you have a Vigor, you can safely leave yourself with just a 2-cost attack in hand and even if you hit a red card off the top, you can still play your attack. In theory, a deck would function off 30 copies of High Pitched Howl (red)! You wouldn’t normally think of Tuffnut as a redline hero, but the more Vigor you have access to, the more red cards you get to include.
It’s not too easy to access Vigor tokens, though. This is why Vigorous Smashup is so good in all colors, as it both helps you manipulate the top card and helps guarantee that you can make an attack. Vigorous Roar is equally amazing. Although it’s not a 6-power by itself, it does help with going wide. Garland of Spring is another key piece, as it acts like a Vigor token on demand for whenever something goes wrong. If you have Garland of Spring, you can play a lot more freely and not need to always hold two cards. The Vigor tokens don’t really count for 1 value in this deck, and there’ll be plenty of times where you’ll leave yourself with a resource floating because of them, but what they do is reduce variance and free you up to not have to hold extra cards and there’s a lot of hidden value in that!
If your Tuffnut pool is contested and you don’t end up with very many yellow 6-power attacks, I still don’t think you should put a bunch of blue cards in your deck to compensate, though you can include a few more. Instead you can look for ways to reduce variance by activating Tuffnut on the opponent’s turn. Brothers in Arms (red), Toby Jugs, and all colors of Dig In have this ability. Say you have a red 3-cost attack, a blue card, and a Brothers in Arms (red) in hand. Rather than blocking with your blue card like the classic Tuffnut play pattern, you can block with Brothers in Arms and use Tuffnut to guarantee paying for the trigger, even if you just have a red card on top, guaranteeing that you can just pitch the blue and send your good attack in peace.

And lastly, you can naturally reduce the variance once you get to second cycle if you try to remember your pitch stack. You don’t need to go full mind palace and remember every single card, but if you can try to remember the color of every fourth card it can help a lot. When you put your pitch on bottom at the end of the turn, count cards from the top to see if the one you pitched will be a number divisible by four. Do note that cards like Right Behind You putting a card on bottom will shift the stack and ruin the count. This can be a good exercise to help learn the skill of pitch stacking.
Going Wide
A big issue with Tuffnut is how one-dimensional he can be. Sure, it’s strong to defend for 7 and attack for 7 every turn, but if an opponent doesn’t let you defend how you want to, you might bleed a lot of value. If someone just plays an aura and makes some Might tokens, you will be burning value on your turn if you have no access to go again. It’s not something you need to fill up your deck with, but it goes a long way to have a few go again effects in your main deck alongside a couple more in your sideboard.
The major one is Buckwild in red and yellow. They are 6-power attacks by themselves but also an outlet for go again. The trickiest thing about these cards is that you can easily trap yourself with them. If you activate Tuffnut and hit a blue card off the top, your Buckwild won’t be able to gain go again since you can’t overpitch into it. Therefore, you’re instead looking for a hand where you have a blue card, a 2-cost, and a Buckwild, and have a yellow 6-power on top (for example, in second cycle or by looking at your top card with a clash card). Vigor tokens can also help a ton with unlocking your Buckwild, enabling you to pitch a yellow 6-power from hand to attack with Buckwild before you activate Tuffnut for the turn.
The pump actions also go a long way. I already highlighted Vigorous Roar, but Heroic Pose (red) works nicely too as another on rate effect. There is a real cap to how many non 6-power red cards you can include in your deck, but I’ve found it acceptable to have 1-2 pump effects, and then going up to 3-4 against Guardians.
Heroic Grit is another card that’s easy to enable for some value in Tuffnut. It has the big downside that your opponent is incentivized to block a lot on your big attack and just arsenal a card and leave your pile of Toughness to rot, forcing you to convert yet another hand. But it is just a yellow, so the downside is less severe, and it can be an awesome sideboard option against Lyath where you can sit on it in the arsenal until the turn before their stack of auras is about to go off, forcing the opponent to play into your Toughness. Humble Entrance can do something similar into their pop-off turn, while also combining with Heroic Grit for a one-two punch!
And speaking of punches, Punching Gloves is a nice equipment to pick up for your deck as another reliable way to spend an extra card for some additional value. It can also come up when you have a Vigor token and hit a blue card, so you can spend the 2 extra resources alongside your 2-cost attack.
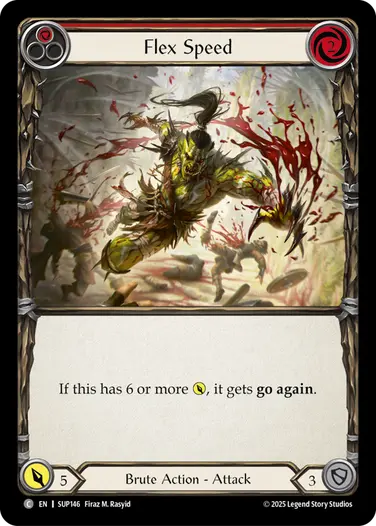
If you do have Punching Gloves, it also becomes fine to pick up a Flex Speed (red) for your sideboard. It’s not the most reliable way to get go again since it needs to combine with a pump effect (and it essentially takes up the same slot as your other pump actions, being a non 6-power red card), but it at least defends for 3 and when you have the gloves it lets you spend a big hand with lots of resources.
Putting it all together
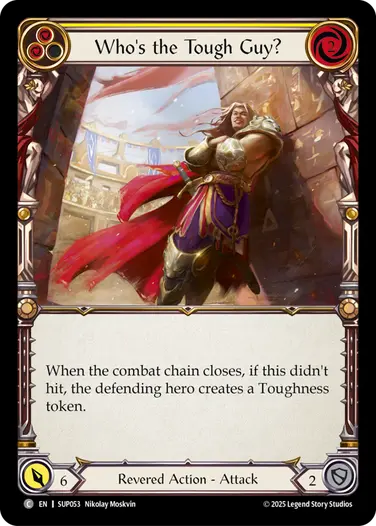
The trickiest part about Tuffnut is getting enough yellow 6-power attacks, and enough good 2-cost attacks. There are 13 different yellow 6’s available and they are mostly interchangeable. The best one is Vigorous Smashup (yellow). You want most of them to be 3-defense, but it’s nice to have a few Give ‘Em a Piece of Your Mind (yellow) and Who’s the Tough Guy? (yellow) in your deck to help with cost flexibility. Ideally you have 10 yellow 6’s and 10 2-cost attacks, so these help glue the deck together by fulfilling both roles.
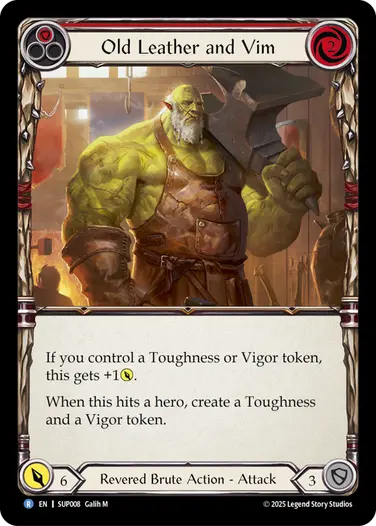
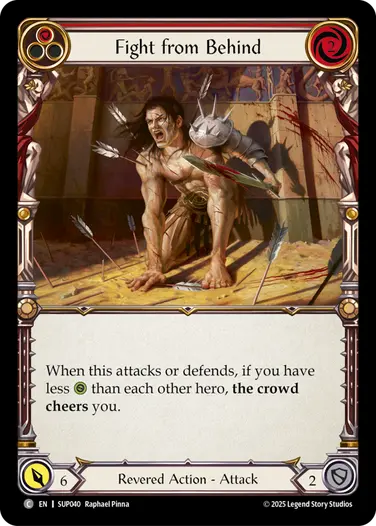
There aren’t that many good 2-cost attacks. You ideally want most of them to provide more than 6 value so you can keep up your good rate. The good ones are Old Leather and Vim, High Pitched Howl (red), Rough Up (red), Give ‘Em a Piece of Your Mind (red), Who’s the Tough Guy? (red), and Fight From Behind (red). Since there aren’t as many of these available as yellow 6’s, it’s important not to forget to prioritize these as well, making sure you have a bit of each. All the Tuffnuts at the table will be fighting for yellow 6’s, so I wouldn’t feel comfortable going into Tuffnut if I don’t have a single yellow 6-power attack in my pool by pick 6 or so. This is why it’s important to consider speculating on some yellow 6’s when you’re in Brute or Revered and want to be open to drafting Tuffnut.
From there you can fill up the deck with some good red 3 for 7 attacks and a few blues. Ideally you play four or even fewer blue cards, but once you go above six blue cards your deck starts to suffer on power level. And it’s very important that your blue cards defend for 3. Whenever you draw a blue you often can’t pitch it, since you’ll use Tuffnut instead, so the best thing it can do is just defend with it. The more blue cards you have, the more 3 for 7’s you can afford to include in your deck, capping at around six red 3 for 7’s for six blue cards. The better you are at making Vigor, the less you need blue cards. Round out the 30 with a few pumps if needed, or some non 6-power 3-defense cards like Rough Up (yellow).
This is my full recipe for Tuffnut:
- 8-12 red 2-cost attacks
- 4-6 red 3-cost attacks
- 10-12 yellow 6-powers
- 4-6 blue 3-defense cards
- 20+ total 6+ power attacks
- A few pumps and yellow 3-defense cards to round out the deck
Lyath Goldmane
Quick Hits
- Lyath only has a few turns to play the game, so you want to make sure they count.
- Prioritize pumps, both the Guardian auras and Reviled actions. Try to time them to happen on the same turn.
- You need about 10 0-cost attack actions, and it’s best if a lot of them are in your blue base. The good blue 0-cost attacks are premium.
- Look for attack actions that have an odd base power number, so they get less affected by his power-halving ability.
The biggest restriction for Lyath is time. Because of 5 intellect, he quickly rips through his deck, reaching second cycle in just six turns. And at that point you’ll only have one or two more turns before you’re out of damage.
His hero ability does seem to incentivize defending a lot, but I think this is a misinterpretation of his strategy. His ability merely lets you spend your extra card to get your defending cards back to “normal”, while netting a Might token. But since you don’t have access to big attacks like 3 for 7’s, you can’t actually play this midrange style, and what will often end up happening is that you run out of cards.
Instead you should be looking to activate his hero ability occasionally when you have extra cards anyways and want to save some damage to stay alive while you’re setting up your big attacks. You shouldn’t even be worried about sometimes defending without using his ability if you need to – sometimes it’s better to defend for 4, than to defend for 3 and make a Might.
Lyath is at his best when he ruthlessly chains together big pumped up turns or sets up for a couple huge swings that are impossible to defend against. A good Lyath game may look like this: Your Turn 1, play Act of Glory (red), arsenal Power Play (blue). Opponent’s Turn 1, defend with one card and play Edge of Their Seats (red) so it’s at the same number of suspense counters as Act of Glory. Your Turn 2, play Cruel Ambition to set up three Might tokens for your next turn and make a Confidence token with Stand Strong. Your Turn 3, all your auras pop, play a few pump actions and send Power Play for 27 damage with Confidence, one-shotting the opponent!
Playing Lyath requires constant evaluation of whether you’re better served defending to help buy time to set up, or just taking damage to increase your odds of sending lethal. In order to achieve a deck that can make plays like this, we need to draft carefully to arrive at the right mix of pumps and attack actions.
Pump it Up
The most important ones are the auras of suspense. As discussed, Lyath likes all of them, as he doesn’t mind giving up a bit of value as long as he can stack up his damage for the big turns. Act of Glory and Edge of Their Seats in yellow are also totally fine playables, but I think Tension in the Air (yellow) is too little bang for your buck. I wouldn’t mind running six of these red and yellow aura pumps. The blue ones do go into your blue base, but be careful not to have too many, because they don’t get buffed by Lyath’s ability so they don’t fully count as 3-defense cards, and they take up spots for blue attacks which you’d rather have.
Cruel Ambition also counts as a set-up aura in the same way as these, though ideally you’d want to time it to play it the turn after you have played your auras so they go off at the same time, or save it to buff up a Goon. Bask in Your Own Greatness has a similar effect as a set-up aura though it is quite a bit worse, costing you an extra card and letting your opponent block with Dig In. The blue copy is nice though, also filling up the blue base and can be a 0-cost attack if you need it.

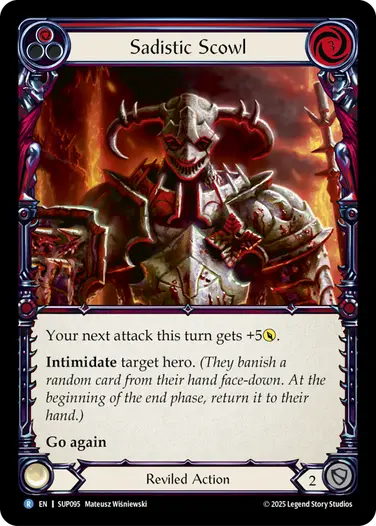
Additionally, we have Villainous Pose in red and yellow, Prime the Crowd (red), Sadistic Scowl, Revolting Gesture, and Punching Gloves. Prime the Crowd (yellow) can be boarded in against Pleiades specifically, otherwise I think it’s too weak when it gives your opponent a point of value too. These are the same turn pump effects, and you also want a good amount of them. Sadistic Scowl is the best one, with intimidate helping to strip away your opponent’s ability to block.
If your deck is very aura heavy, they do get a bit worse because they might be less useful when you draw them while setting up when you don’t yet have a good attack available. And if you’re aura light, they get better because they’ll be more important to amp up your damage output. In such a deck you aren’t trying to play for setup as much as just constant damage each turn. Garland of Spring becomes especially nice with a lot of 2-cost pumps, allowing you to efficiently play two of them in a turn using just one blue card.
Suitable Attack Actions
Lyath’s hero ability is quite limiting in terms of which attack actions it makes sense to play. Yet it still is very important to have enough attack actions in your deck, because the worst case scenario is drawing a hand of no attack actions on the turn where all your auras pop, and having to watch all that pump go away. It can be important to try and arsenal an attack action card for safety, to play around this scenario.
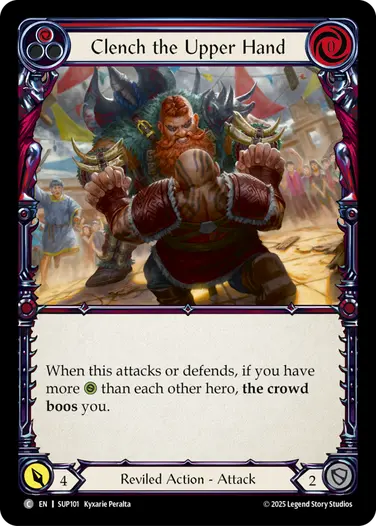
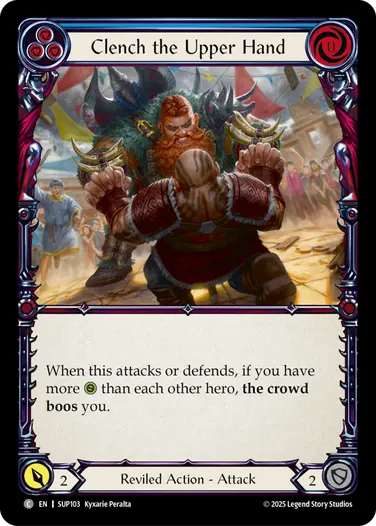
Because of the rounding down, you are primarily interested in attack actions that have an odd base power number. Clench the Upper Hand (yellow) will attack for 2, just like the red one, so the yellow version is, weirdly, just a better card in Lyath. By this pattern, you are generally more interested in blue attack actions, since their ratio that would normally make them 2 points worse on offense compared to red cards only applies halfway here, while their pitch value is unaffected. You also would prefer not to spend resources on your attacks, as each resource would normally go towards an extra point of power, which you don’t get to utilize fully. Plus, it also induces more risk on your combo turn if your attack costs resources that you might not have because you needed to defend with them.

The best attack actions for Lyath are then blue 0-cost, 3-defense, 1-power attacks, preferably with some way to buff themselves. And luckily the format has plenty of these.
Goon Beatdown, Goon Battery, and Goon Tactics are the best ones if you can enable them, as they will just be blue 0 for 4’s, even through Lyath’s restriction. The easiest way is with Cruel Ambition, but you can also have some auras lying around, like What Happens Next?, then play Villainous Pose and activate Lyath’s ability on your own turn to make 2 Might tokens.

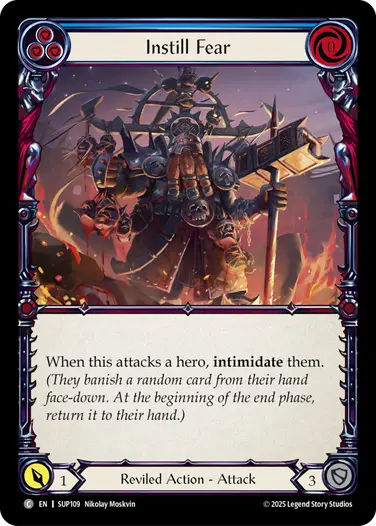
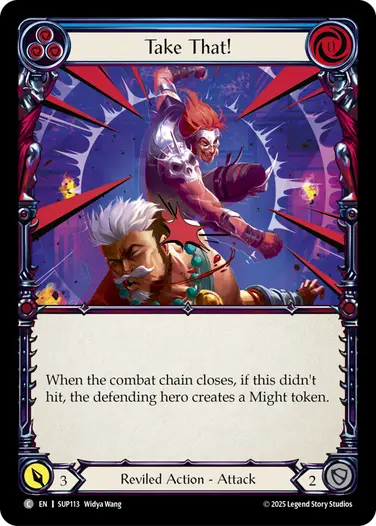
Instill Fear (blue), Mocking Blow (blue), and Feisty Locals (blue) are some other examples of premium ones, while Bask in Your Own Greatness (blue), Punch Above Your Weight (blue), and even Take That! (blue) do the job just fine. Clench the Upper Hand (blue) has the nice upside that it will often make a Might when it defends (since you tend to be ahead on life on the opponent’s turn, and behind on life on your own), making up for its lower defense value.
Many of Lyath’s turns require two blue cards, and some even require three. This makes him want a high blue count, in the 12-14 range. Fitting this amount of blue cards while also running a bunch of pumps makes it hard to make space for enough attack actions if you don’t play a good amount of the blue ones. This is another reason why these blue attacks are so nice to have in Lyath, and why the good ones are so premium.


You do also want some number of big attacks to make sure your deck has enough power to close out games. Power Play in any color is excellent, though you can’t solely rely on them because they do require setup. Feisty Locals (red) is a great attack when combined with pumps that will make it threatening enough to force the opponent to block, making it a 0 for 4 through Lyath’s halving. Low Blow can be nice if your deck has a lot of Villainous Pose (red) and Prime the Crowd (red), though I have found the 1-cost to be awkward in a more aura centric build. The short kings, like Small Problem, are totally reasonable attacks as well, but they are nothing special unless you can pump them up well enough to make their crush effects scary.
Plotting it all Together
Your ideal Lyath deck wants almost as many red and yellow pumps as it can get, around 10-12. This means that these are the highest priority during the draft, because you might not get that many if you don’t fight for them. Power Play (red) and Mocking Blow (red) are the other cards that compete with the pumps for early picks. You do also require a good amount of blue cards, so it’s important to keep an eye out for the good ones early.
You want a minimum of 10 0-cost attacks of any color to help you guarantee that you can find one in your next 5-card hand if you really need it. On top of that you can add some costed attacks, like Power Play and Low Blow. You do need to make sure you don’t have too many attacks as well, because even in long games you might not need to attack more than 8 times.
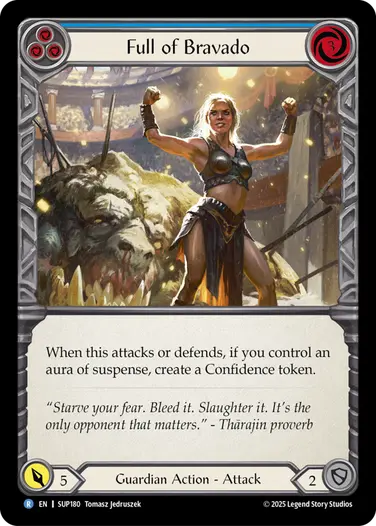
If you are aura heavy and try to stack damage, it would also help you to have a few ways to make a Confidence token. Stand Strong is the most accessible way to do it, but Full of Bravado (blue) can also do the job in a pinch, defending for only 1 but leaving you with that juicy Confidence if you happen to draw it on the right turn.
This is my full recipe for Lyath:
- 10-12 red/yellow pumps
- 12-14 blues
- 12-16 attacks total, ideally 10 of them 0-cost.
- Filling up the deck with a few defensive tools if needed, like Dramatic Pause (red) or Brothers in Arms (yellow).
Kayo, Strong-arm
Quick Hits
- Aim for half your deck or more being blue cards.
- You want to generate Vigor to represent a hero power activation on your small attacks, putting your opponents in a tough decision.
- “Get ahead, stay ahead” mentality, building upon a core of 3 for 7’s and good defense values to keep your life total higher than theirs.
- Multiple pump effects that make Vigor can enable you to build the deck in a way where you chain together playing two 2-cost cards off a single blue for heavy pressure.
Kayo likes to take an early lead and keep it that way, combining good defense and efficient turns with some power spikes that take advantage of Vigor tokens. His hero power enables all of his blue attacks to be threatening, which means he can get away with fairly high blue counts, even as high as 18. You can slightly pull your Kayo deck in different directions depending on how many pumps you run, how good you are at making Vigor, which blues you have, etc. I’ll cover a few of the directions here.
Buff Blues
One of Kayo’s big strengths is how he can threaten a lot of damage off his blue cards. This damage also has a level of being evasive in some sense. For example, you can attack with Bask in Your Own Greatness (blue), make 2 Might tokens, and leave 1 resource floating with another card in hand. Your opponent can defend it for 6, respecting your Kayo ability, but then you can simply not activate him and instead arsenal the remaining card. From their perspective, you might even have a red card in hand and just be bluffing!
To play around this, they’re incentivized to just defend with one card, at which point your ability is getting evasive damage through to them. It can be especially painful to navigate these situations as the opponent if they’re at 3 life, where they always have to over-defend the attack and give you a free arsenal.
This dynamic is also why you want to have not only a density of blues, but also have a large amount of blue attacks that work well with his hero ability, so that you can often draw multiples in the same hand and send one of them, ready to stuff the other one in arsenal for next turn if they try to cover up all the damage.
Flex Strength (blue) is another card that works perfectly with Kayo’s ability, leveraging three blue cards to threaten 9 damage with the same fork being presented. It’s even a 3-defense on top of it, and absolutely one of the premium blues. Depending on the number of front pumps you have, it can even be prioritized over the red copy.
Similar to Lyath, Kayo is looking for 0-cost attacks with the lowest inherent power. Feisty Locals (blue), Mocking Blow (blue), the Goon squad, Punch Above Your Weight (blue), Instill Fear (blue). In order to really enable these, you’d need to generate a Vigor token so that you can threaten his ability off a single card.
Getting Vigorous
Ironically, the Brute card-pool is a lot worse at enabling Vigor tokens for Kayo than Tuffnut. Getting 6-powers into pitch is quite hard to do, so High Pitched Howl and Vigorous Roar usually don’t have additional effects. Kayo includes more pumps and tiny attacks, so it’s much harder to win clashes from Vigorous Smashup. That card is still good, but much less reliable.
Instead, he has to go to the Reviled cards that boo for access to Vigor. Mocking Blow (red), Villainous Pose (red), and Booze. You should also try to pick up a Garland of Spring or Horns of the Despised to give you a resource on demand for the turns you want the Vigor.
Booze is an interesting card, but you essentially get to trade your 3 value now for an extra resource for each of the next two turns, as well as being booed twice. Being booed can activate cards like Mocking Blow (red) regardless of life total, and that card is a good follow-up to Booze for that reason. Low Blow is the perfect card to play off the Vigor on the next turn, being enabled by Booze to be a 1-card 6-power attack.
The last way to generate Vigor is with Clench the Upper Hand (red), just as a blocking card. It’s not hard to be on a higher life total than your opponent on their turn, and while you essentially have to pay a life to get the Vigor, it may be well worth it if you can use the extra resource for great effect.
Once you have the Vigor token, you can take advantage of it in a few different ways. The obvious one is through the hero ability combined with a 0-cost attack, as explained before. Another line is to pair up a 2-cost go again with another 2-cost attack. Villainous Pose (red) is the main way you can do this, combining especially well with Flex Strength (red) or Give ‘Em a Piece of Your Mind (red), and even sets you up to get another Vigor next turn to do it again. If you can also make Might tokens, Flex Speed (red) can even come in handy as another way to spend two with go again, and Punching Gloves can play the same role in a pinch.
Once you’re in this space of having lots of ways to generate Vigor, 2-cost cards become more important than 3-cost cards, and you can even start to seek out Prime the Crowd (red) and Villainous Pose (yellow) to keep the chains going. Even vanilla 2 for 6’s like Rough Up (red) can be worthwhile for such a deck. It also has the advantage that if you do end up making two Vigor on a turn, you get to block with an extra card and just send a 2-cost attack without paying anything for it!

The less Vigor enablers you have, the more you just want to lean into 3 for 7’s and good defense values. It’s still good to play some Vigor makers to enable your hero ability, which also means that even in this version of the deck, blue 0-cost attacks are important to include.
Mashing it all Together
I can’t reiterate enough how important the high blue counts are for this hero. You should be looking for a minimum of 14, and preferably with most of them being 3-defense. This means you’d like to have at least four good blue cards when you leave pack 1, but preferably even more.
From there you can draft the strong red cards. Your baseline preference is to grab a handful of 3 for 7’s, but the more Vigor you can make, the more you should start looking at 2-cost cards. Also put a premium on getting either Horns of the Despised or Garland of Spring.
You also want to make sure you have a few ways to stack damage and have go again effects against Tuffnut, so you can set up to use a full 5-card hand buffed up by Might tokens from the previous turn to break through his defenses. Once he gets low enough, you might be able to juice enough value through the threat of hero ability, but you need effects like Bask in Your Own Greatness to set you up to get there.
This is my full recipe for Kayo:
- 14-18 blues, mostly 3-defense, with 6 or more being 0-cost attacks
- 4-6 3 for 7’s
- A few pumps and ways to enable hero power
- More good 2-cost red attacks and 2-cost go again effects if you have many effects that boo you
Pleiades
Quick Hits
- Pleiades has access to a ton of good 3-cost attacks, and will build her baseline mostly around those.
- Auras of suspense can just be a small subtheme, helping her convert hands on some turns.
- You can lean into her ability to move counters around to keep a continuity aura alive through many turns.
- Heroic Grit offers an off-ramp strategy for the Pleiades drafter that doesn’t get many auras.
This rockstar will build her decks upon a solid base of strong 3-cost attacks, blues, and 3-defense cards like a classic midrange draft deck. But there is some optionality in how you want to build upon that base, with the more Revered heavy Toughness synergies, or more Guardian heavy auras of suspense that gets to take full advantage of her hero ability.
All About That Base
Once you’re looking to get into Guardian, you can start to look out for the strong big attacks coming your way, which the Lyaths of the table won’t be interested in. Shoot Your Mouth Off (red) is an excellent attack action, and it is supported by the plethora of 3 for 7 attacks with 3-defense in the Revered card-pool. It’s not that hard for Pleiades to end up with more 3-cost attacks than she can realistically handle, and once you get above eight you should be thinking about pulling your punches.
The main issue with the midrange gameplan in Guardian in this set, is that the Guardian cards, weirdly, don’t defend well You have to actually fight for your 3-defense cards, and will often have to pick yellow 3-defense cards over blue 2-defense cards to support your defensive values. This of course makes blue 3-defense cards even more important, but the majority of them you will have to find from the Revered card-pool since the Guardian blues still contain plenty of 2-defense. You’d want at least 10, but preferably 12-14 blues in a deck with this many 3-cost cards.
Edge of Their Seats in red and yellow, and Tension in the Air (red) can be nice in small numbers for this midrange style, just letting you convert a hand if your opponent doesn’t present you with a good opportunity to block. Act of Glory (red) is not as good as the other ones, but if you happen to have a Garland of Spring it becomes reasonable to play one copy, since it’s not that easy for Pleiades to use the extra resource when almost all of her attacks cost 3 anyways. From this core, you can build more synergy.
Continuity Auras
Pleiades’ ability is quite flexible. Not only can you speed up the wait time for the auras of suspense without adding a counter somewhere else, turning the pump auras into front pump actions, but you can also use it to move counters from a useless-once-played aura like Dramatic Pause (red) onto your pump aura to delay the take-off if your opponent has built a wall of Toughness.
My favorite thing to do with Pleiades though, is to use her ability to keep a To Be Continued… or The Suspense is Killing Me alive turn after turn. Both of those get to generate real value the longer they stay in play. The Suspense is Killing Me does so more reliably, since you can always choose to attack each turn, whereas there could be turns where your opponent won’t attack to deny you value from To Be Continued… However, preventing 1 damage rather than dealing 1 damage will cause the game to go longer, enabling you to milk even more value out of your auras.
The Suspense is Killing Me and To Be Continued… end up being cards to keep an eye out for in the middle of the pack when you’re looking for some direction. Their deck inclusion is quite delicate too. You want to draw one as early as possible so you can develop it with minimal fuzz and obtain value for as many turns as possible. Running two is fine, three makes them more reliable but also asks if you can actually support them. Four gets to the point where you really start to feel their diminishing returns.
What Happens Next? is not really in the same tier as the other two. Again, Pleiades’ attacks will mostly 3-cost or 0-cost, so reducing their cost won’t get you anything tangible. Also remember that to play out these auras you’d often have to give up a 3-defense card for the turn, so you need to make sure the cost supersedes that. What Happens Next? at least combines nicely with Act of Glory (red), but at that point you’re building with scraps.

Dramatic Pause is another neat tool to move counters from, as it’s already an on rate effect by itself. It does not work when you defend with the instant auras though, since they aren’t actions, so when you play with a couple of these cards, you need to be especially mindful of not playing too many blue auras instead of blue actions that defend for 3. The blue 3-defense auras are still better than 2-defense actions, but not much better.
The main way you feed your continuity auras will be through the pump auras. Normally these are priced to be one point below rate, but you turn the counter into a point of value through keeping your continuity aura alive for another turn.
Story Beats (red) is an excellent rare for this archetype when you have a continuity aura in play. You essentially get to turn your 3 for 7 attack into a 3 for 8, and stack suspense counters outside of the tapped hero ability, making it easier to keep them alive.

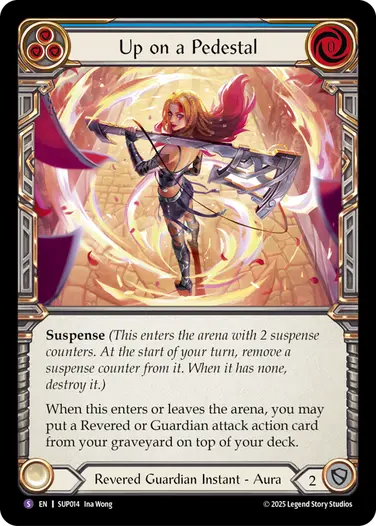
My favorite cards to use with this gameplan are the Super Rare auras that are way less timing restrictive, such as Up on a Pedestal and Hungry For More. You can play these on your own turn, then tap Pleiades to move a counter. Then during the opponent’s turn, you can use Pleiades again, netting 2 suspense counters out of a single aura.

Going off the Grit
This is a bit of a wacky sub-archetype built around Heroic Grit. You might think that Tuffnut is a better home for this card because he naturally produces Toughness, but if you look over the Revered card-pool, you see a few ways to produce a lot of Toughness – Hold Firm, Dig In, Humble Entrance. The main pull to doing this in Pleiades is that Heroic Grit is usually weak to an opponent just blocking out and passing, which wastes the value of the Toughness. But with a Confidence token, you can restrict your opponent from blocking too much, forcing them to send an attack into your pile of Toughness.
So essentially, this deck is a bit of a combo deck, trying to set up Heroic Grit + Confidence + a way to make Toughness + an attack. The most important piece that makes this function is Hold Firm, which acts as Toughness generation on demand, and I don’t think you should go into this archetype if you don’t have that card yet.
Keep an eye out for copies of Heroic Grit at the table. Tuffnut is also interested, so you might not always be able to wheel the card, and you want to pick up 2-3 copies since your deck is built around it. The best turns are the ones with 2 Heroic Grit, but that requires even more setup.
You run these cards on top of the regular Pleiades base, but in exchange you can tone back the auras of suspense. This archetype is especially nice when you sit near other Guardians and don’t get passed the auras. Additionally, you want to have some 0-cost attacks to lessen the card requirement on the combo turn. Short kings and Feisty Locals (red) are good candidates for this, otherwise you just have to smack the Heroic Grits onto a big attack like Shoot Your Mouth Off.
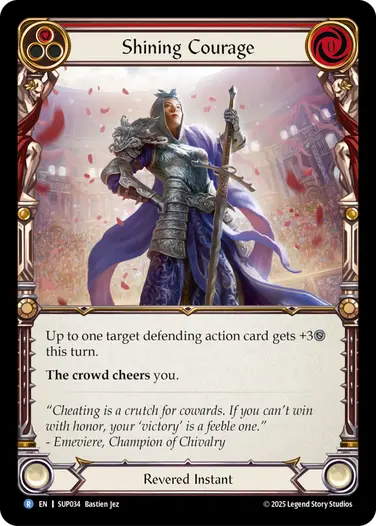
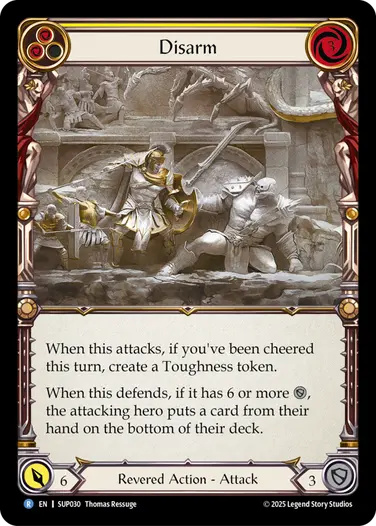
In terms of Confidence generation, Helm of the Adored is the best choice. You might not run that many auras of suspense, so Full of Bravado might not be online, but if you can manage to set it up, it’s a good attack. Shining Courage is another good way to enable Confidence, and it conveniently combines well with a cycle of Rares that pay you off for creating a stack of Toughness: Disembody, Disarm, and Disperse. Shining Courage and Dramatic Pause will be able to trigger these effects as well, just by responding to the defend trigger and pumping the defense value.
This isn’t a deck you will draft all the time, but it’s one way to combine the Revered cards into a coherent strategy that does more than just attacking for 7 and defending for 6.
Jamming it all together
Pleiades decks are all built with the same core that can then be enhanced by different flavors. Typically you’ll get some auras of suspense and use them to either fuel a continuity aura, or try to stack them up and send a Short Shrift powered by a Confidence token to force through the powerful on-hit. Or even adding in the Toughness generating cards, and using Heroic Grit as your pump of choice.
This is my recipe for the Pleiades core:
- 6-10 red/yellow 3-cost attacks
- A few red auras of suspense, with more if your deck is built around them
- 12-14 blues
- A few fillers like Dramatic Pause, good defending cards, and 0-cost attacks
Get in the Ring!
With this comprehensive guide, you should be ready to face your foes in the Deathmatch Arena at your next Super Slam Booster Draft event. There is a lot of good gameplay to be had in this format, and following these tips can help you unlock some of that potential while also teaching you about the values of staying open and flexible during a draft through speculation picks that can steer you in the right direction.
Awareness of synergy is everything in this format. Happy gaming!